
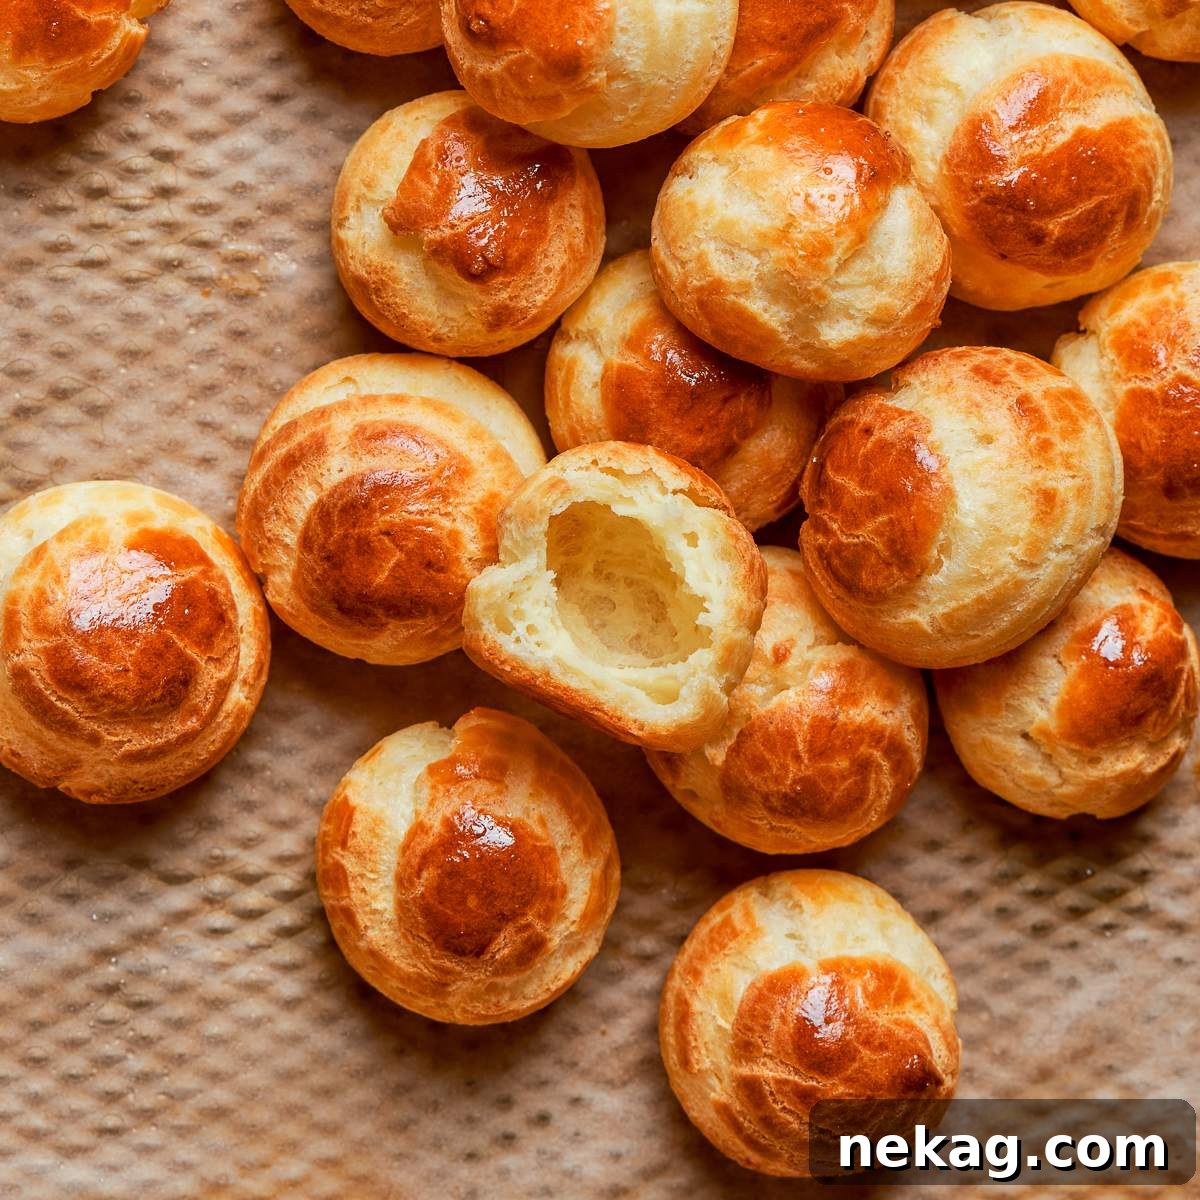
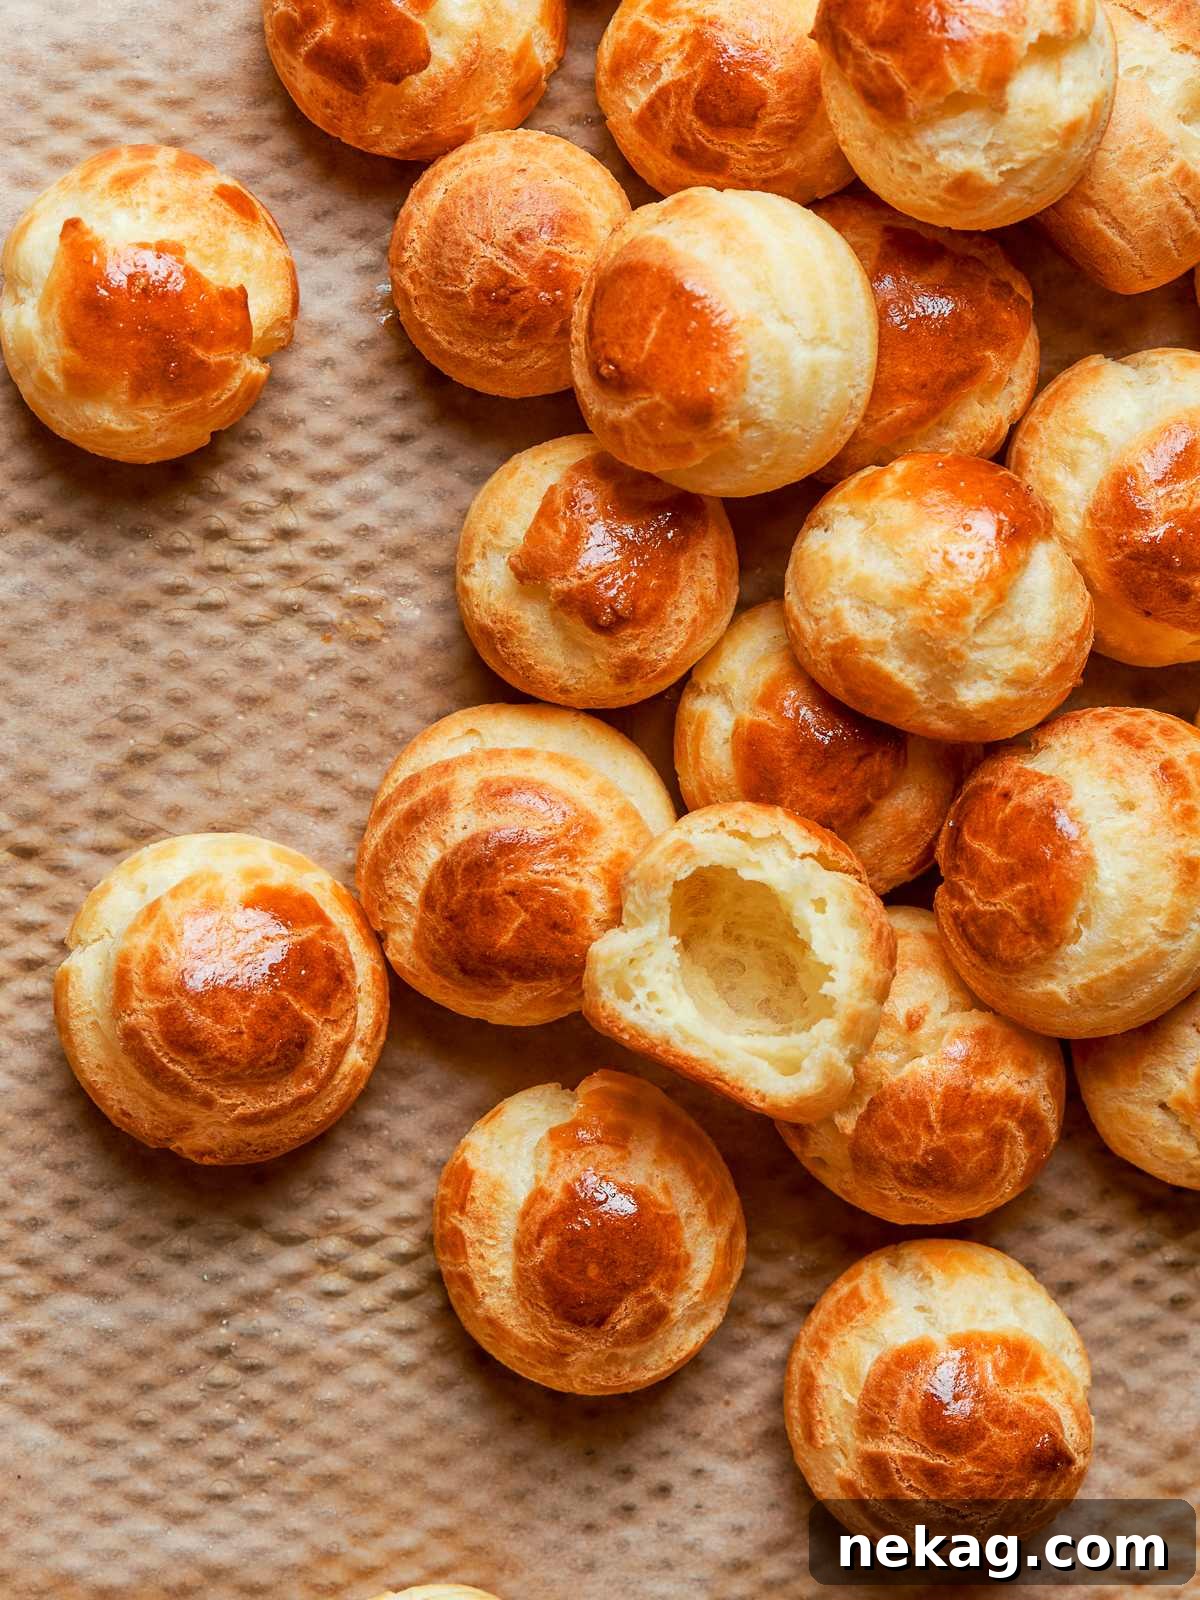
Choux pastry, also known as Pâte à Choux, is a fundamental and incredibly versatile French pastry dough that forms the basis for a myriad of classic desserts and savory delights. While its elegant appearance might suggest complexity, mastering choux pastry is a deeply rewarding culinary journey that empowers any home baker. This comprehensive guide demystifies the process, equipping you with professional consistency tests and step-by-step instructions to ensure flawless results every time. Forget the guesswork; learn to ‘read’ your dough like a pro and unlock the secrets to perfectly puffed, crisp, and hollow choux shells.
A Quick Look At The Recipe
This is a brief summary of the recipe. Jump to the recipe to get the full details.
Jump to Recipe
Prep Time
20 minutes
Cook Time
35 minutes
Total Time
55 minutes
Servings
150 4 cm rounds
Difficulty
Intermediate — stovetop panade with gradual egg incorporation and professional consistency tests to guide the process.
Calories *
21 kcal per serving
Technique
Stovetop panade method with gradual egg incorporation; dough tested for consistency before piping and baked until deeply golden and hollow.
Flavor Profile
Buttery, lightly savory, neutral, subtly eggy.
* Based on nutrition panel
Summarize & Save this content on
I was always nervous about making choux pastry at home, but the trench consistency test in this recipe was exactly what I needed. I could finally see when the dough was ready instead of guessing, and my cream puffs came out perfectly hollow with a crisp shell. I have already made a double batch for a party. ⭐⭐⭐⭐⭐
Lauren
Why This Recipe Works: The Science of Perfect Pâte à Choux
Creating exquisite choux pastry hinges on understanding a few key principles. This recipe meticulously incorporates professional techniques to guarantee success, transforming a seemingly daunting task into a consistently achievable one.
- Professional Consistency Tests Included for Unwavering Precision. The most critical juncture in choux pastry production is knowing when the dough has achieved the perfect hydration. Too little egg results in stiff, dense pastries, while too much leads to flat, soggy failures. This recipe removes all guesswork by integrating industry-standard “trench test,” “hook test,” and “ribbon test” methods. These aren’t just arbitrary checks; they are sensory evaluations used by professional pastry chefs to gauge the dough’s elasticity, viscosity, and readiness for piping and baking. We’ve translated these essential checks into easily observable cues for the home baker, ensuring you add just the right amount of egg for optimal puff and texture.
- Gradual Egg Incorporation for a Stable and Resilient Paste. Rushing the addition of eggs can drastically alter the final structure of your choux. This recipe advocates for adding eggs one at a time, allowing for full absorption and careful monitoring of the dough’s temperature and texture. This controlled approach is vital because it manages the final hydration level and prevents the premature coagulation of egg proteins. Adding eggs too rapidly can lead to a broken, unstable emulsion, impacting both the delicate structure and the rich flavor of the finished pastry. It’s a subtle but significant step that ensures your choux pastry develops the robust framework needed to trap steam and rise dramatically in the oven.
- High Butter Ratio for a Non-Stick Panade and Richer Flavor. Many standard choux pastry formulas use a lower fat content, which can result in the panade (the cooked flour, liquid, and fat mixture) aggressively sticking to the pot during cooking. This recipe boasts a higher butter ratio relative to milk and flour. This increased fat content serves multiple purposes: it acts as a lubricant, significantly reducing sticking and making the panade easier to handle. More importantly, butter enriches the dough, contributing to a more tender, delicate crumb and a deeper, more satisfying flavor profile in the baked shells. The butter also helps control gluten development, ensuring the pastry puffs up beautifully rather than becoming dense and bready.
- Designed to Scale Seamlessly for Any Occasion. Whether you’re making a small batch for an intimate dessert or a large quantity for a party or special event, consistency is key. This recipe has been rigorously tested and proven to scale reliably, from a convenient half-batch up to four times the base formula. We’ve included specific notes on how batch size impacts factors like stirring effort and necessary equipment capacity, allowing you to confidently adjust quantities without compromising the integrity of the choux. This scalability makes it an invaluable addition to any baker’s repertoire, ready for any culinary endeavor.
Table of Contents
- Why This Recipe Works: The Science of Perfect Pâte à Choux
- The Rich History and Versatility of Choux Pastry
- Ingredients & Substitutions: The Building Blocks of Choux
- Creative Variations on This Choux Pastry (Pâte à Choux)
- Professional Tips for Choux Pastry Mastery
- How to Make Choux Pastry (Pâte à Choux) Step-by-Step
- 3 Essential Consistency Tests for Pâte à Choux
- Chef Lindsey’s Recipe Tip: The Art of Reading Your Dough
- Choux Pastry Recipe FAQs: Troubleshooting and Storage
- More Classic French Recipes to Explore
- Pâte à Choux Recipe Card
- Before You Go: Your Choux Pastry Journey Continues
The Rich History and Versatility of Choux Pastry
Pâte à choux, meaning “cabbage paste” due to its resemblance to small cabbages when baked, has a storied past in French patisserie. Its invention is often attributed to the chef Panterelli in 1540, who created the paste for Catherine de’ Medici. Later, in the 18th century, Avice and then Antonin Carême refined the recipe, leading to the beloved version we know today. Despite its reputation for being temperamental, a thorough understanding of each stage transforms choux pastry into one of the most reliable and rewarding techniques in any kitchen.
This remarkable dough is the cornerstone for a vast array of exquisite creations, from the light and airy cream puffs and elegant éclairs, to savory gougères and crispy churros. It’s a foundational recipe that, once mastered, opens up a world of culinary possibilities. If you are new to the art of choux, this guide provides the perfect starting point to build your skills and confidence, ensuring a strong foundation for all your future choux-based endeavors.
Ingredients & Substitutions: The Building Blocks of Choux
Each ingredient in choux pastry plays a crucial role, working in harmony to create the perfect light, airy, and crisp shell. Understanding their individual functions is key to both successful baking and effective troubleshooting.
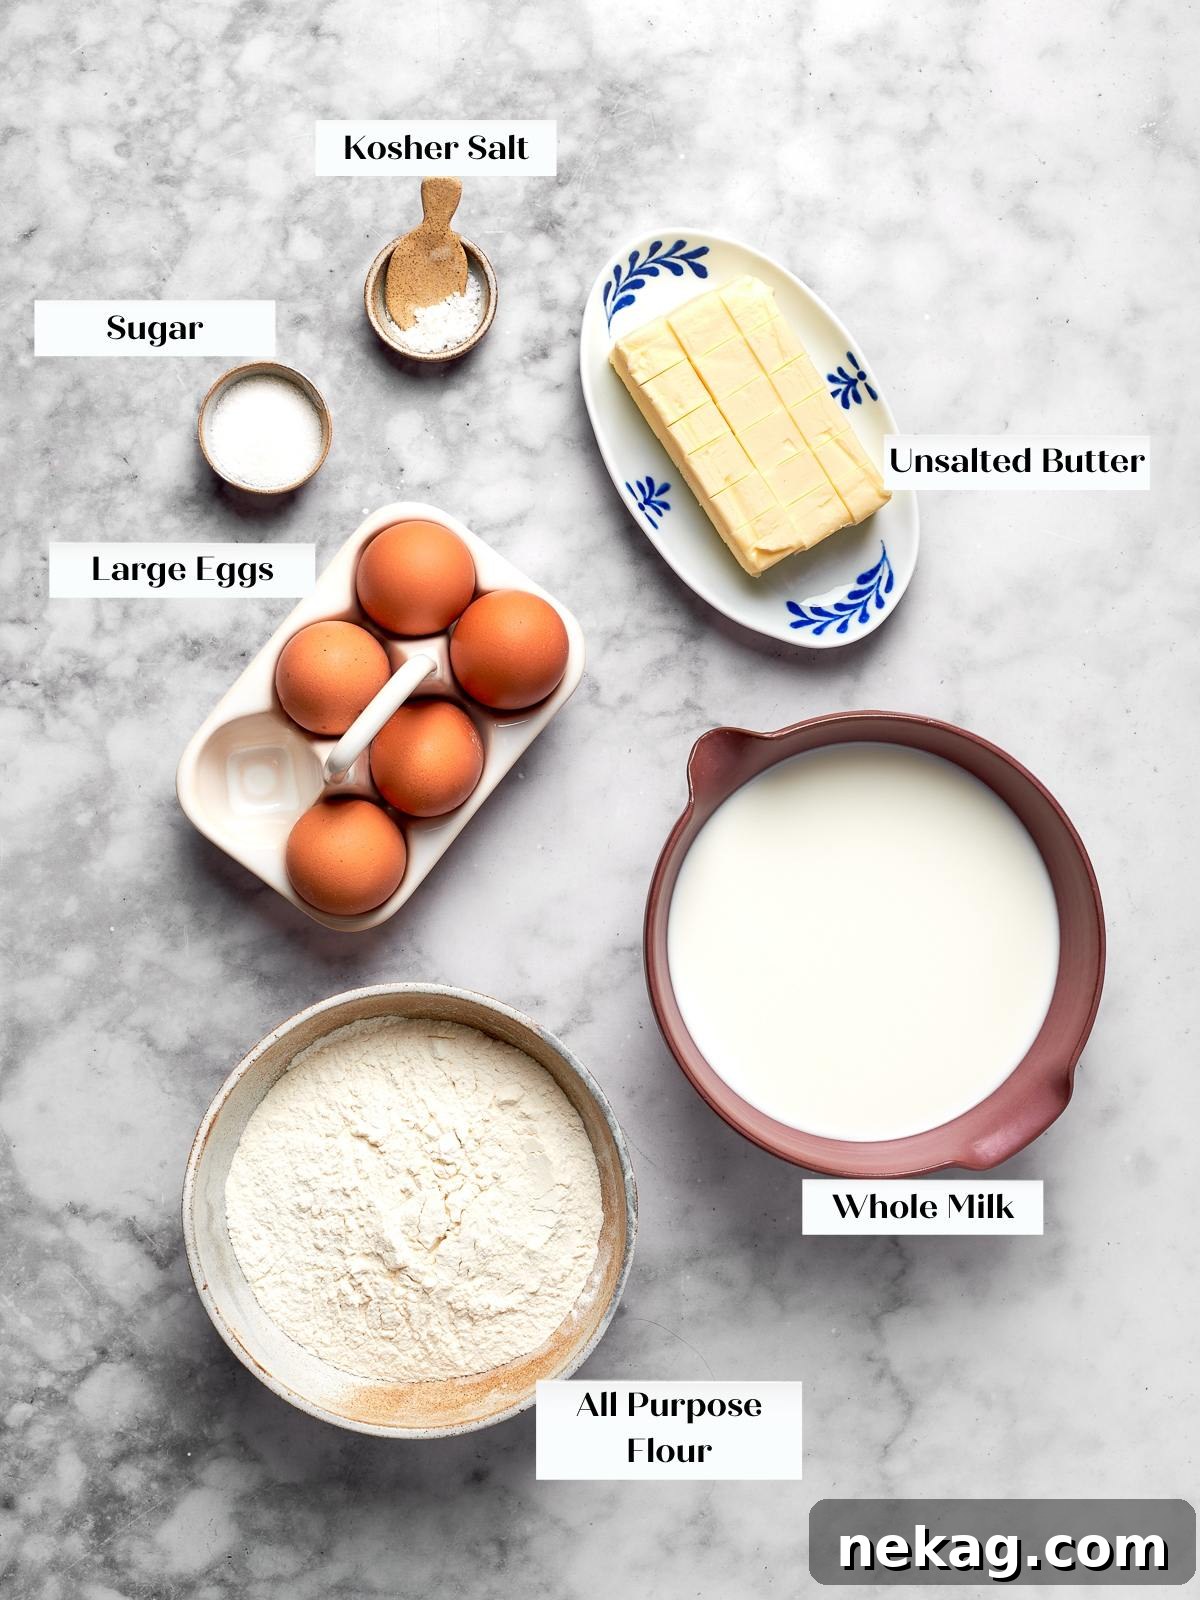
- Unsalted Butter: Butter is not just for flavor; it’s a critical structural component. During the panade stage, butter coats the flour proteins, which helps to control gluten development. This ensures that your choux pastry puffs up with a delicate, tender interior rather than developing a chewy, bread-like texture. Using unsalted butter allows you to control the overall salt content of the recipe. Cube your butter before starting to ensure it melts evenly and at the same rate as the milk comes to a boil, preventing the milk from reducing too much before the fat is incorporated.
- Whole Milk: The liquid base for choux pastry is typically milk, which provides the necessary moisture that converts into steam in the hot oven. It is this trapped steam that inflates the pastry, creating its characteristic hollow interior. Whole milk is preferred for its higher fat content, which contributes to a richer, more custardy interior crumb and promotes superior browning, giving the shells a beautiful golden hue. Lower-fat milk can result in paler, drier, and less flavorful shells. For a classic, slightly less rich choux, water can be used, but milk offers distinct advantages in texture and color.
- All-Purpose Flour: Flour is the structural backbone of choux pastry. Its starches gelatinize when stirred into the hot milk and butter mixture (the panade), forming a stable paste that can effectively trap steam during baking. The specific protein content in all-purpose flour is ideal for achieving the right balance of structure and tenderness. Precision is paramount here; weighing the flour with a kitchen scale is the only reliable way to guarantee consistent results, as volume measurements can vary widely. Too much flour will result in a dense, stiff paste that struggles to puff, while too little can make the paste too slack.
- Kosher Salt: Salt is more than just a seasoning; it’s a flavor enhancer. It sharpens the overall taste of the choux, preventing the richness of the butter and eggs from becoming flat or cloying. The small amount of salt balances the other flavors and makes them more pronounced. If you typically use a different brand or type of salt (e.g., table salt), consider measuring by weight to maintain consistent salinity, as crystal size affects how much fits into a teaspoon.
- Granulated Sugar: A modest amount of granulated sugar is included primarily for its contribution to color and texture, not sweetness. It aids in promoting even, beautiful browning, giving the choux shells an appealing golden crust. Additionally, sugar imparts a delicate crispness to the exterior and slightly tenderizes the finished shell, ensuring it snaps cleanly rather than feeling hard or tough. This small addition is crucial for achieving the characteristic crisp-yet-tender bite of well-made choux pastry.
- Large Eggs (variable quantity): Eggs are arguably the most critical and variable component in choux pastry. They are the primary leavening agent and the main contributor to the dough’s structure and richness. The water content in eggs converts to steam, which expands the pastry, while their proteins set the delicate shell. The fat in the egg yolks contributes to a tender, hollow interior. The quantity of eggs is variable because it depends directly on how much moisture evaporated during the cooking of the panade. You must add them gradually, one at a time, and stop when the paste achieves a specific consistency: smooth, shiny, and falling from the spatula in a thick, cohesive V shape (the ribbon test). Over-adding even a small amount of egg can loosen the paste beyond recovery, leading to flat, heavy, and soggy puffs that fail to rise. Always prioritize the dough’s texture cues over an exact egg count.
See the recipe card for full information on ingredients and quantities.
Creative Variations on This Choux Pastry (Pâte à Choux)
The beauty of choux pastry lies in its adaptability. Once you master the basic technique, a world of creative possibilities opens up.
- Half Batch or Scaled Up for Any Occasion. This versatile recipe is designed for flexibility. It scales reliably and accurately from a convenient half batch for smaller gatherings up to four times the base formula for larger events or meal prepping. For quantities exceeding four times the base recipe, be mindful of your equipment. The sheer volume can become difficult to stir effectively by hand, and you’ll need to ensure your pot and stand mixer bowl have adequate capacity. Beyond 4x, a commercial-grade mixer might be necessary to ensure proper emulsification and consistency.
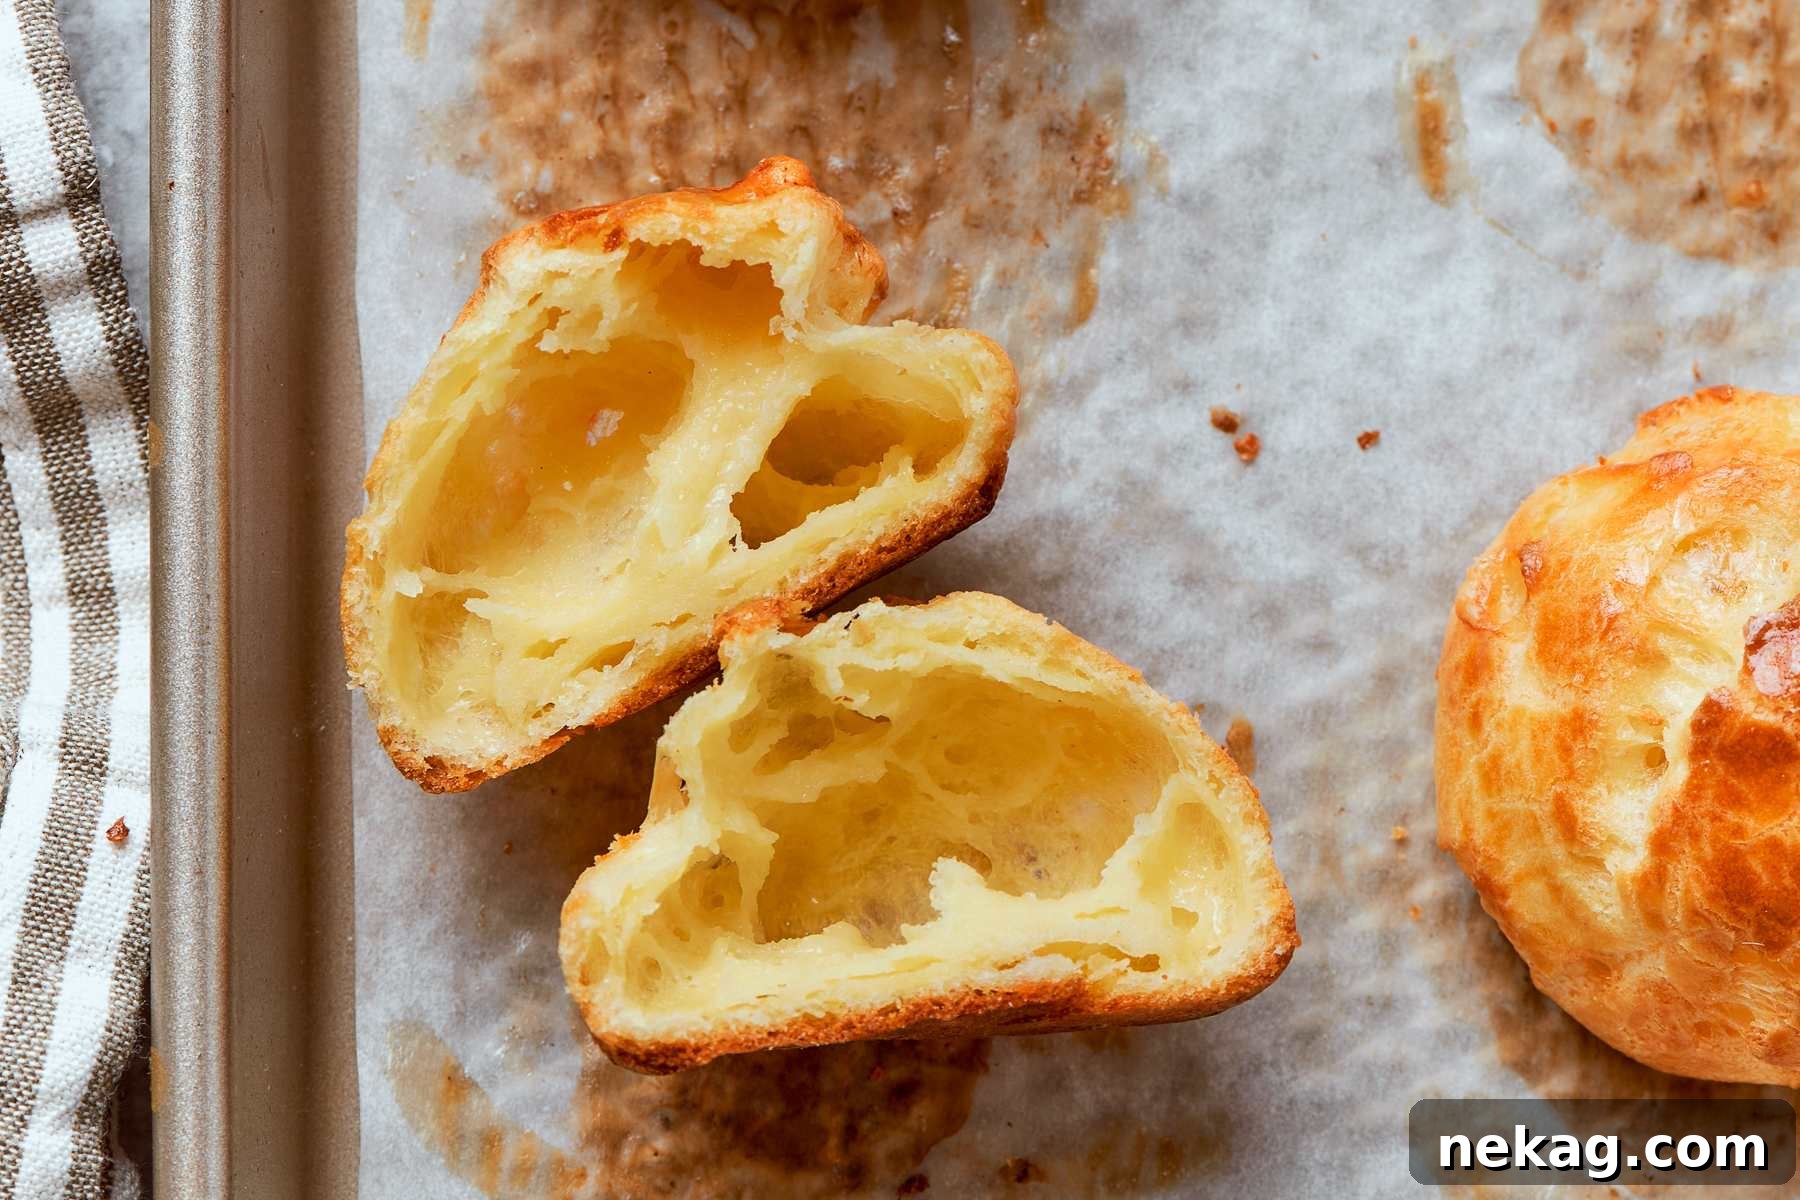
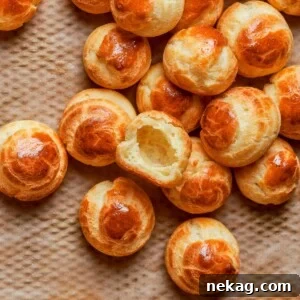
- Savory Choux (Gougères pictured below). Transform your choux pastry into delightful savory bites by incorporating cheese. For classic French gougères, fold finely grated hard cheeses like Gruyère or Comté into the finished paste just before piping. The cheese not only adds a robust, savory flavor but also contributes fat and salt. Depending on the intensity and saltiness of your chosen cheese, you might want to slightly reduce the measured salt in the initial panade. Experiment with other cheeses such as Parmesan, cheddar, or even a blend of herbs and spices for different flavor profiles. Serve them as an elegant appetizer or alongside soups and salads.
- By Hand Instead of a Stand Mixer. While a stand mixer with a paddle attachment offers unparalleled efficiency and consistency, especially when incorporating eggs, making choux pastry entirely by hand is absolutely achievable. It requires a strong arm and dedication, but the results can be just as magnificent. Use a sturdy wooden spoon or a robust spatula. The key is vigorous stirring during the panade stage and persistent beating to incorporate the eggs, ensuring each addition is fully emulsified before the next. While it’s more labor-intensive, the tactile feedback of working the dough by hand can be a valuable learning experience, helping you truly understand the desired consistency.
- Other Applications: Churros and Beignets. The versatility of choux pastry extends beyond classic French pastries. This same base can be deep-fried to create crispy, golden churros, often dusted with cinnamon sugar and served with chocolate dipping sauce. For a different texture, consider shaping the dough into light and fluffy beignets, popular in New Orleans, typically dusted with powdered sugar. The technique for the dough remains largely the same; only the shaping and cooking method differ.
Professional Tips for Choux Pastry Mastery
Achieving consistent, professional-quality choux pastry relies on precision, understanding the dough’s behavior, and knowing how to adapt. These insights from professional kitchens will elevate your baking:
- Do Not Add All the Eggs at Once – Trust the Process. This is arguably the most critical piece of advice for choux pastry. The exact number of eggs required can vary significantly based on factors like the humidity in your kitchen, the heat of your panade, and even the size of your eggs. Adding eggs gradually, one at a time, while continuously monitoring the paste’s texture, gives you complete control over its final consistency. If all eggs are added simultaneously, you lose the ability to stop at the optimal point, and a paste that is too loose—over-hydrated—cannot be corrected. You’ll end up with flat, unpuffed pastries. Observe how the dough accepts each egg; it should look broken or curdled initially, then come back together to a smooth, shiny consistency.
- Work Quickly and Efficiently After the Panade is Cooked. The temperature of the dough when you begin incorporating the eggs is paramount. If the panade cools too much before the eggs are added, its capacity to absorb moisture changes. A cooler dough will require significantly more egg to reach the correct consistency than the recipe specifies. This excessive egg content not only alters the delicate structure of the finished pastry but also impacts its flavor, making it overly eggy. Aim to transfer the cooked panade to your mixer and begin cooling/adding eggs within minutes to maintain the ideal temperature for absorption.
- Watch for Butter Separating from the Dough – A Crucial Visual Cue. This recipe intentionally uses a higher butter ratio to prevent excessive sticking and enhance richness. While this is beneficial, it also means you need to monitor the panade closely during cooking. If the dough is cooked for too long, or at too high a heat after the initial panade forms, the butter can begin to melt out and separate from the flour mixture. This separation indicates that the emulsion is breaking. Should you observe butter pooling around the edges of the dough in the pot, transfer the paste to your mixer bowl immediately and proceed to the egg addition step without delay. In such cases, the dough will likely be drier and you will need to add an additional one to one and a half eggs to achieve the correct consistency. This adjustment is vital to salvage the dough and ensure proper puffing.
- Invest in a Quality Heavy-Bottomed Pot. A heavy-gauge saucepot ensures even heat distribution, preventing the panade from scorching on the bottom while allowing enough moisture to evaporate. This consistent heat is vital for forming the starchy gelatinous structure of the choux paste.
- Preheat Your Oven Thoroughly. Choux pastry relies on a strong burst of steam to rise. A properly preheated oven, maintained at a consistent high temperature, is crucial for this initial puff. If the oven isn’t hot enough, the pastry will struggle to rise, resulting in flat or dense choux.
- Embrace a Pastry Bag and Tip. While not strictly necessary for simple cream puffs, using a pastry bag with a round tip (like an Ateco 805) provides consistent sizing and shape, leading to even baking and a more professional appearance. Uniformity is a hallmark of excellent choux.
How to Make Choux Pastry (Pâte à Choux) Step-by-Step
Successful choux pastry begins with meticulous preparation and understanding each stage. Setting up your workstation before you even turn on the heat is the critical difference between a smooth, controlled execution and a frantic scramble at the stove. Follow these steps for perfect pâte à choux.
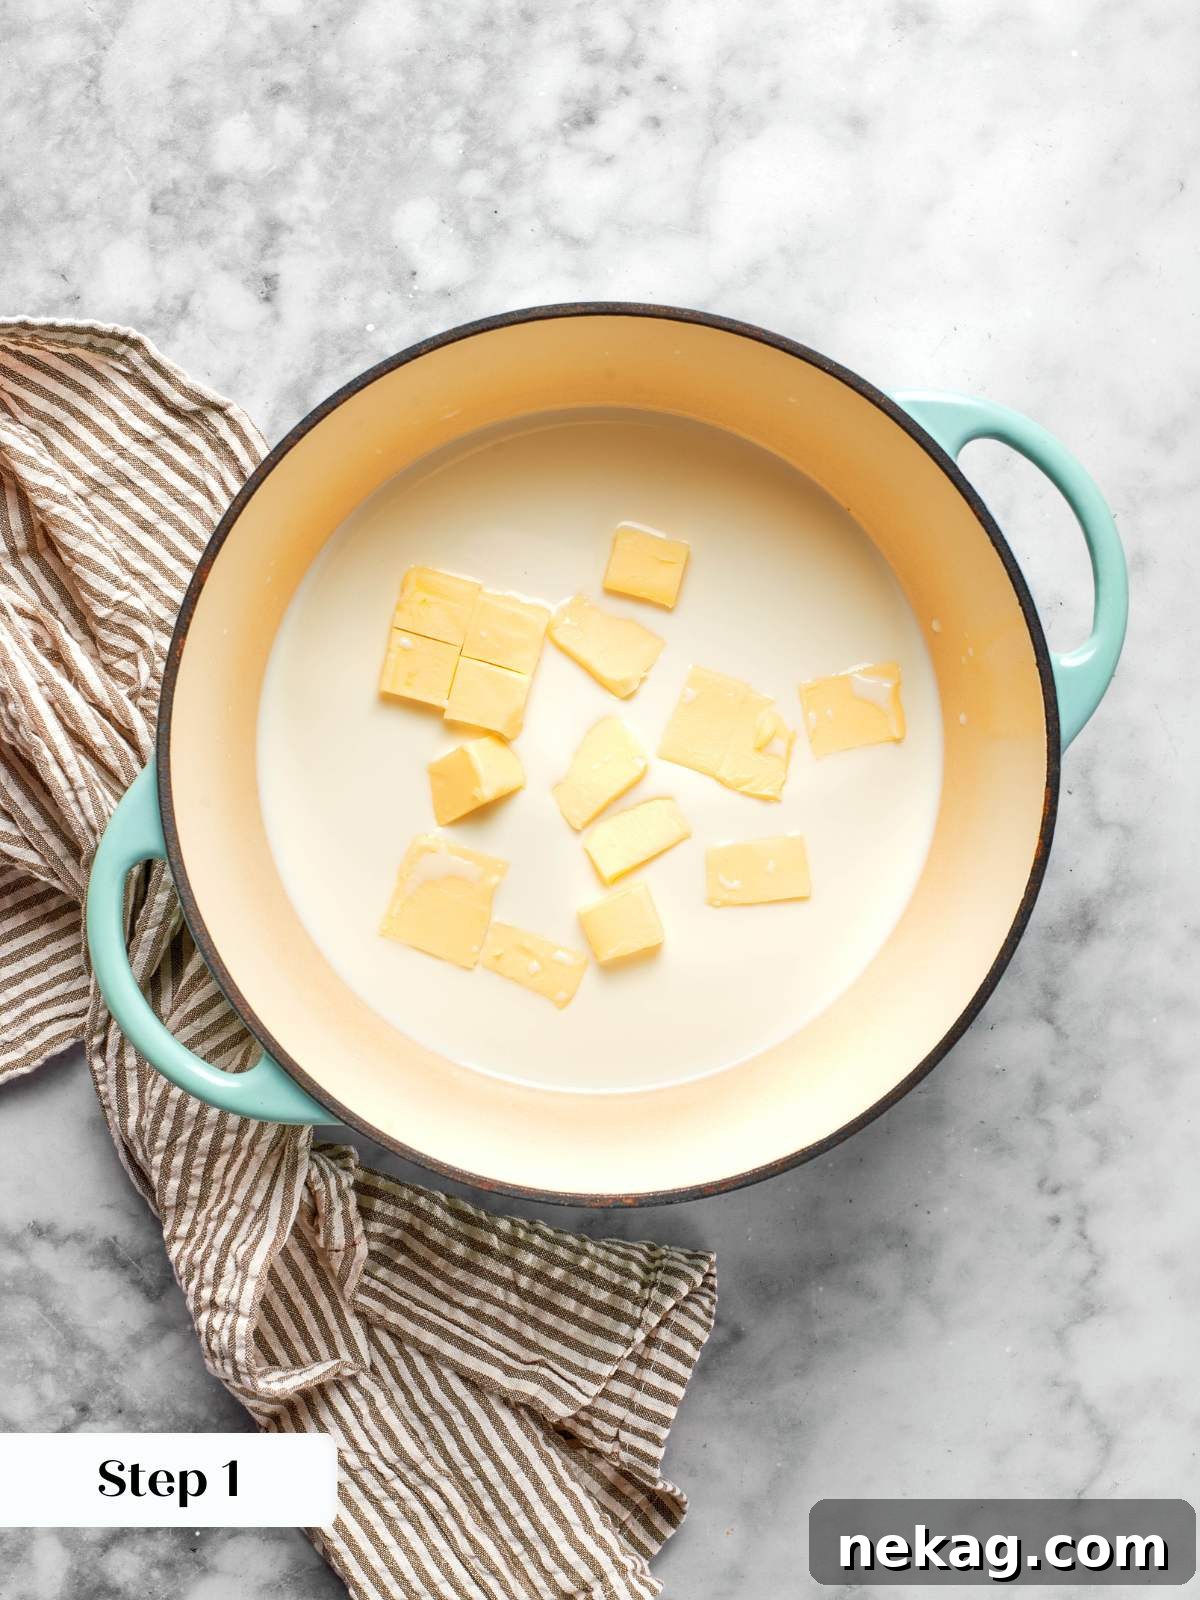
Step 1: Measure and Organize All Ingredients (Mise en Place). This preparatory step is non-negotiable for success. Combine your measured flour, salt, and granulated sugar in a medium bowl and set it aside. Crack the eggs into a separate container or bowl so they are ready to be added one at a time. If your butter is not already cubed, cut it into small, uniform pieces now. Cubing the butter is important because it ensures it melts evenly and simultaneously as the milk comes to a boil (photo 1). This synchronization prevents the milk from boiling off and reducing significantly while you wait for a large, cold block of butter to slowly melt, which can throw off your liquid balance.
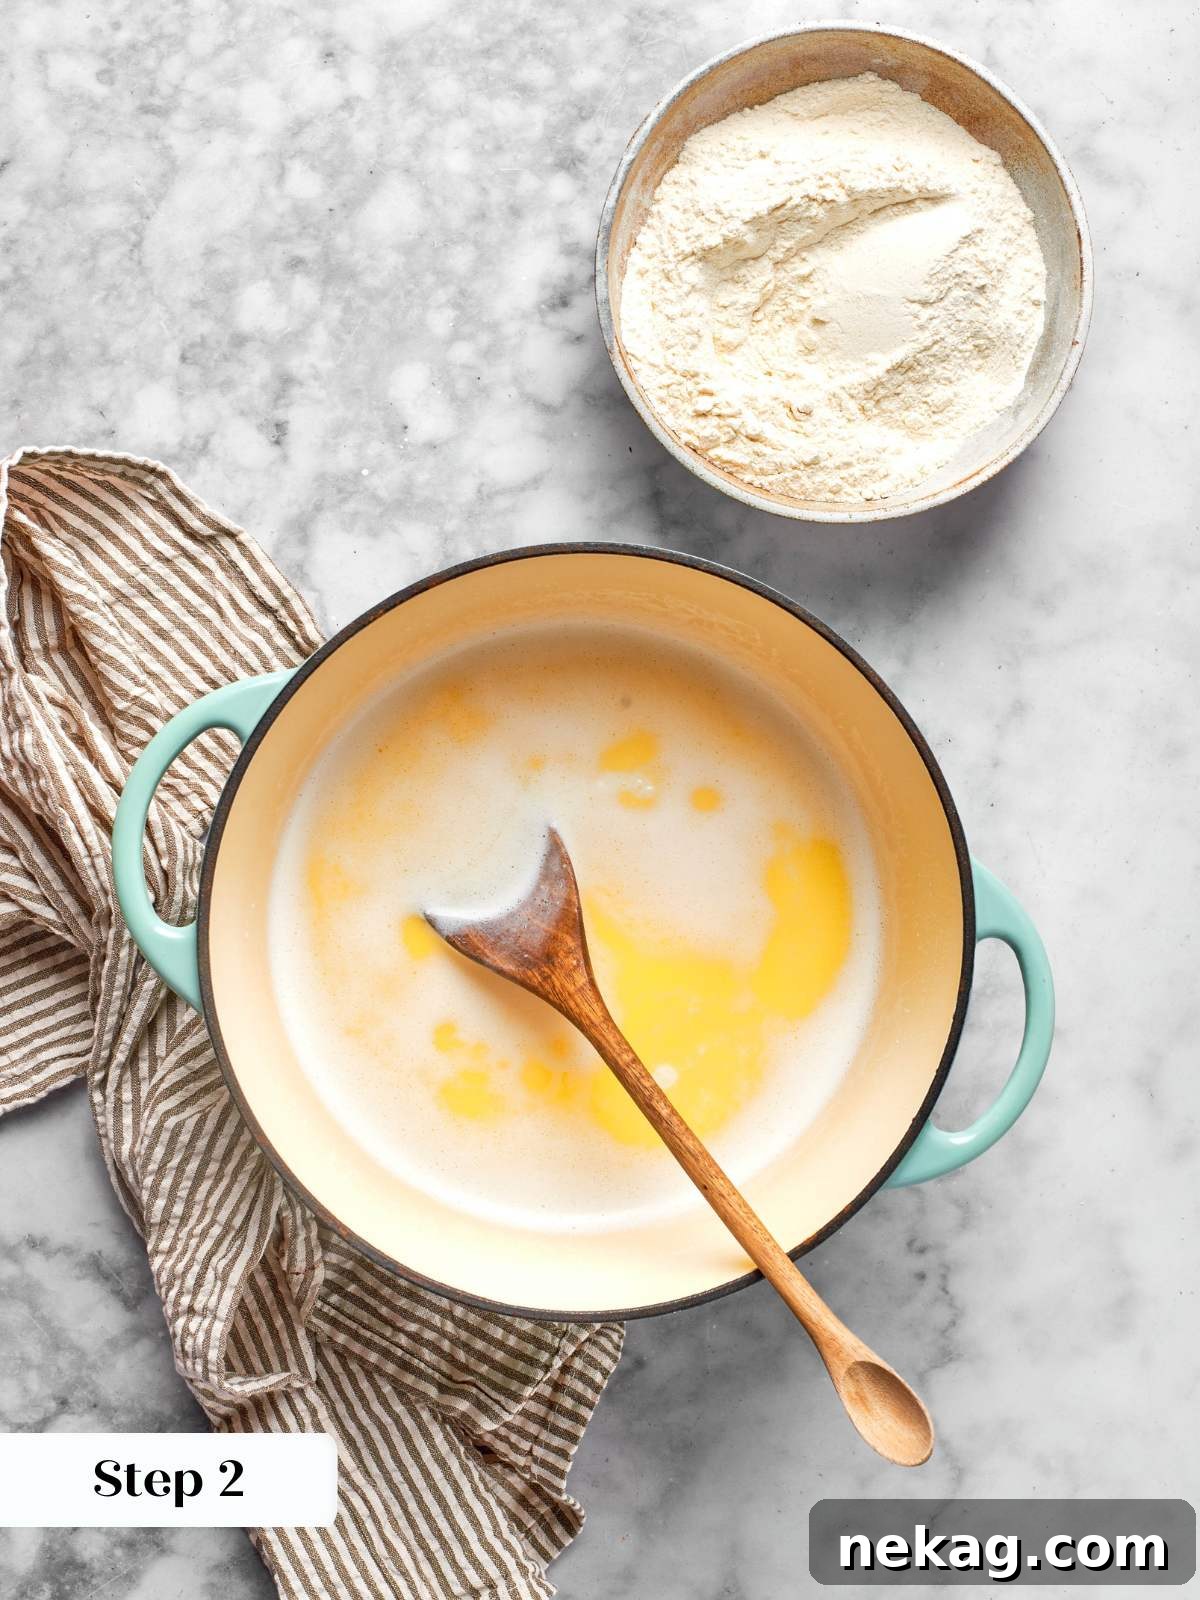
Step 2: Bring the Butter and Milk to a Rolling Boil. In a high-sided, heavy-gauge saucepot—ideally one that distributes heat evenly—combine the cubed butter and whole milk. Place the pot over high heat. Watch the mixture closely, as timing is crucial here. The goal is for the butter to be completely melted exactly at the moment the milk reaches a full, rolling boil. The instant you see the milk boiling actively, move immediately to the next step. Do not allow the milk to continue boiling, as this will cause excessive evaporation and alter the liquid content required for the paste (photo 2).
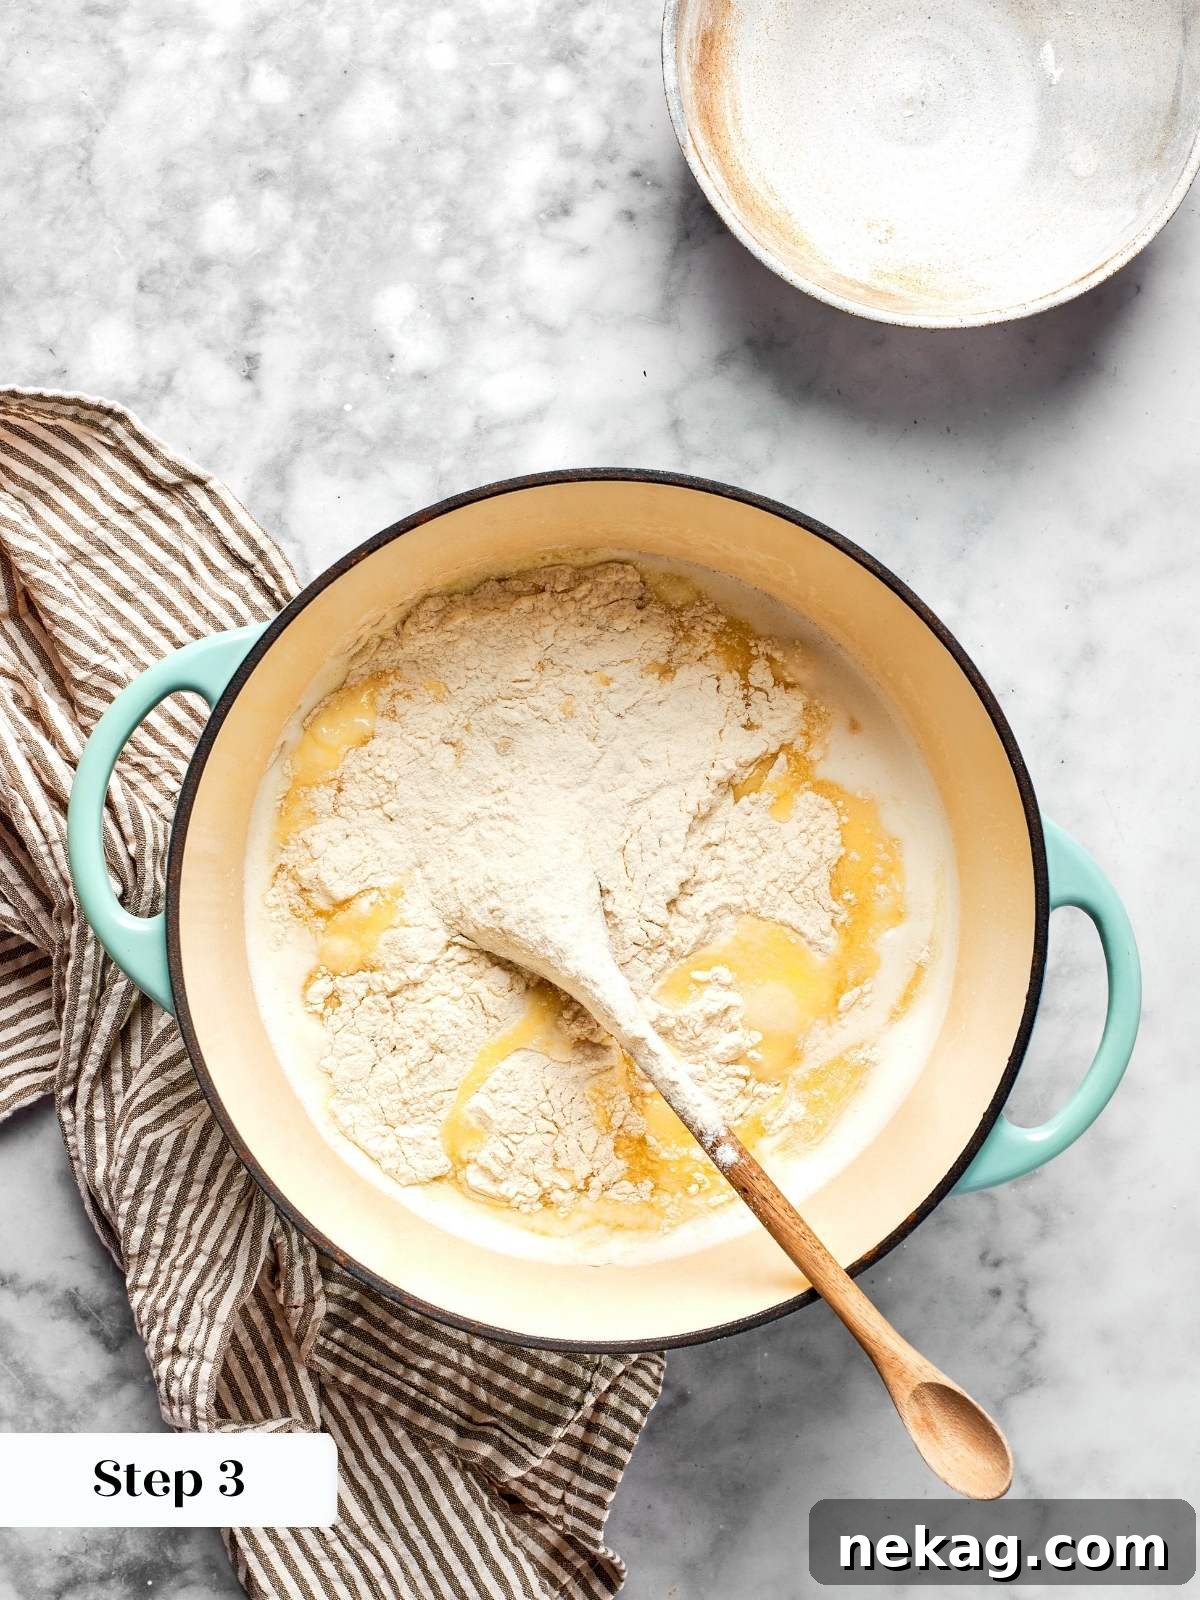
Step 3: Add the Flour Mixture and Begin the Panade. As soon as the milk boils and the butter is melted, remove the pot from the heat. Add the entire flour, salt, and sugar mixture into the hot liquid all at once. Begin stirring carefully at first, using a sturdy wooden spoon, to gradually bring the mixture together without splashing. Once the flour has absorbed the liquid and the mixture starts to thicken into a cohesive mass, switch to vigorous, continuous stirring. This vigorous stirring is essential to smooth out any lumps and fully hydrate the flour. A wooden spoon is the ideal tool for this stage; its rigid nature provides excellent leverage against the thickening dough, and it’s much easier to grip firmly than a silicone spatula as the paste develops resistance (photo 3).
Step 4: Cook the Panade Until it Clears the Pot. Return the pot to high heat, continuing to stir constantly and vigorously. This cooking stage, known as “drying out the panade,” is crucial for evaporating excess moisture from the dough. As you stir, the dough will gradually pull away from the sides and bottom of the pot, forming a cohesive ball. A thin, dry film or coating will form on the bottom of the pot. This coating is the definitive visual signal that enough water has evaporated, and the starch has properly gelatinized, indicating that the dough has reached the correct consistency for a pipeable choux paste. This stage typically takes about 2 minutes from the moment the flour is added. Do not rush this process or remove the dough from the heat too early, as insufficient drying will result in flat, soggy choux pastry (photo 4).
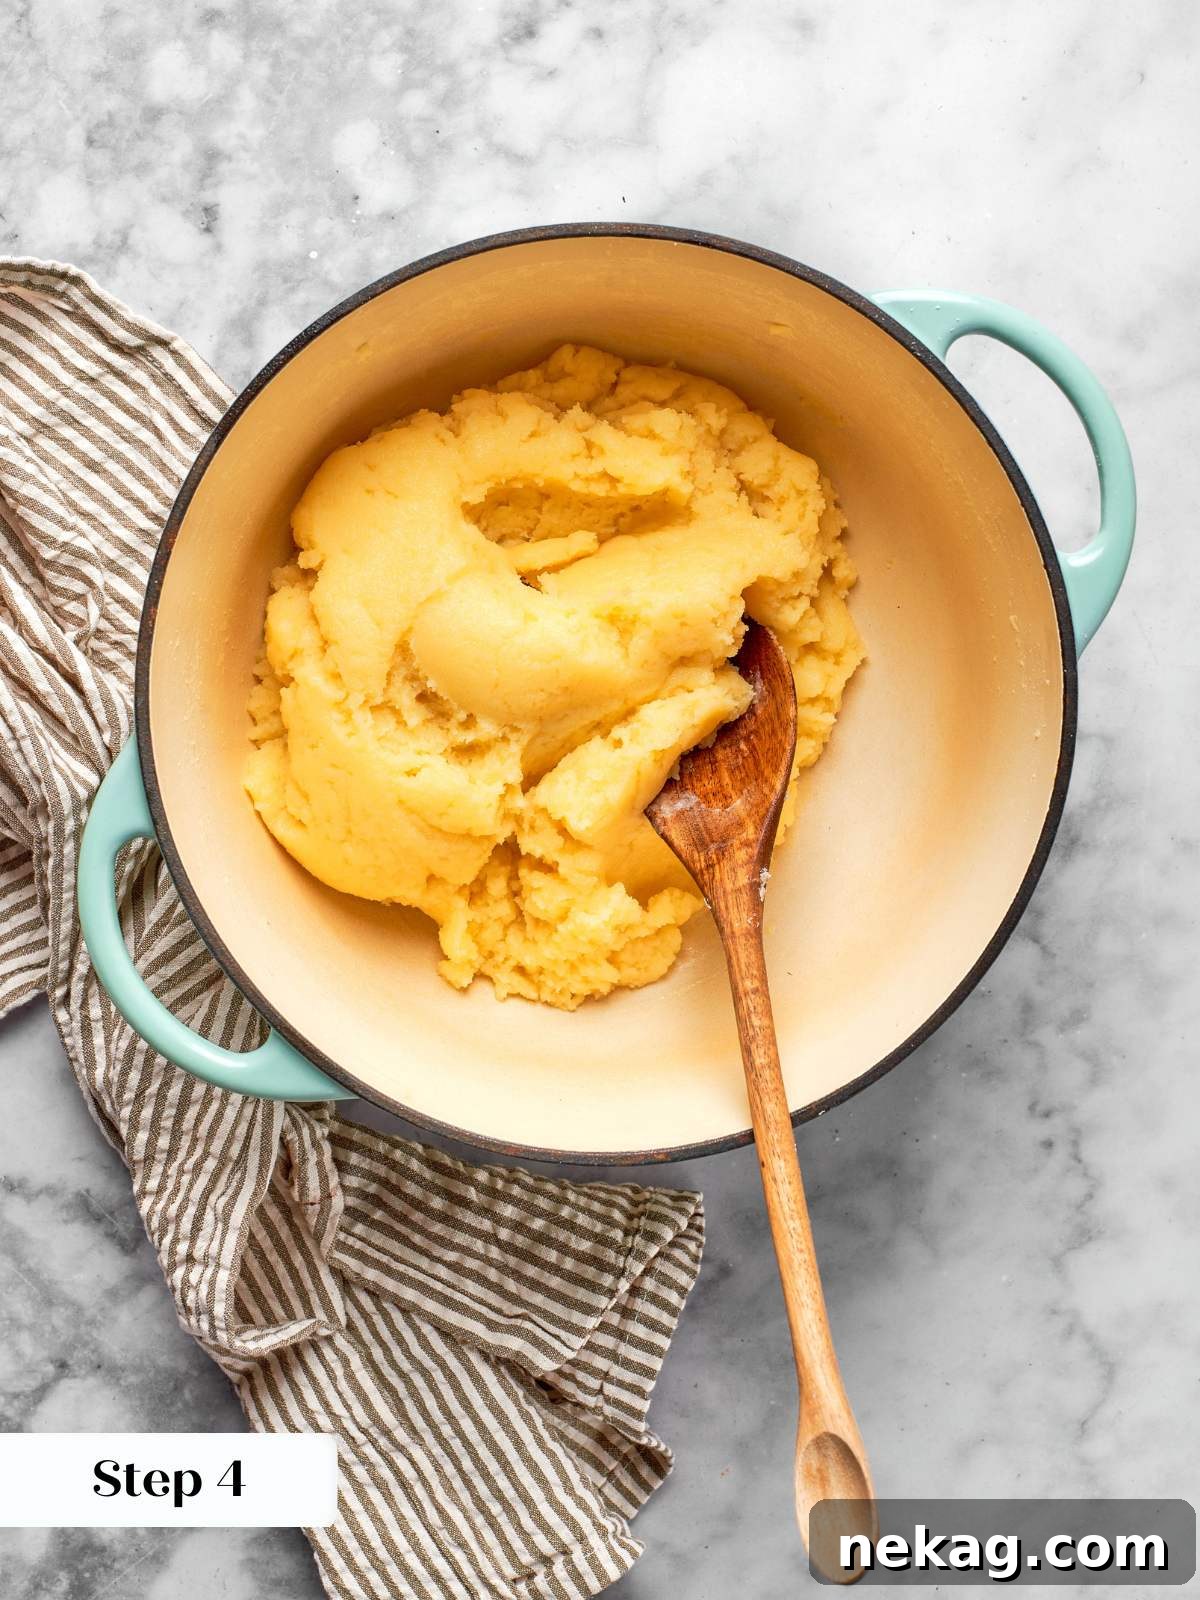
A Note on Butter Separation: This recipe has a generous ratio of butter to milk and flour, which helps limit how much the paste will stick to the pot. However, if you notice the butter beginning to melt out of the dough and separate while cooking the panade, it means you’ve overcooked it slightly. If this occurs, transfer the paste to the mixer bowl immediately and continue from Step 5. You will likely need 1 to 1.5 additional eggs to achieve the correct consistency, as the dough will be drier than intended.
Step 5: Transfer to the Stand Mixer and Release the Steam. Immediately after cooking, transfer the hot panade to the bowl of a stand mixer fitted with the paddle attachment. Begin beating the dough on medium-high speed. At this stage, the dough will appear rough, lumpy, and will release a significant amount of steam. This is completely normal and serves a vital purpose: you are not incorporating ingredients yet, but rather cooling the mixture and allowing residual steam to escape. This cooling process prevents the eggs from scrambling when added. Continue beating until the visible steam stops rising and the dough has cooled sufficiently, typically to around 140°F (60°C). This usually takes 3-5 minutes, depending on your mixer’s power and batch size (photo 5).
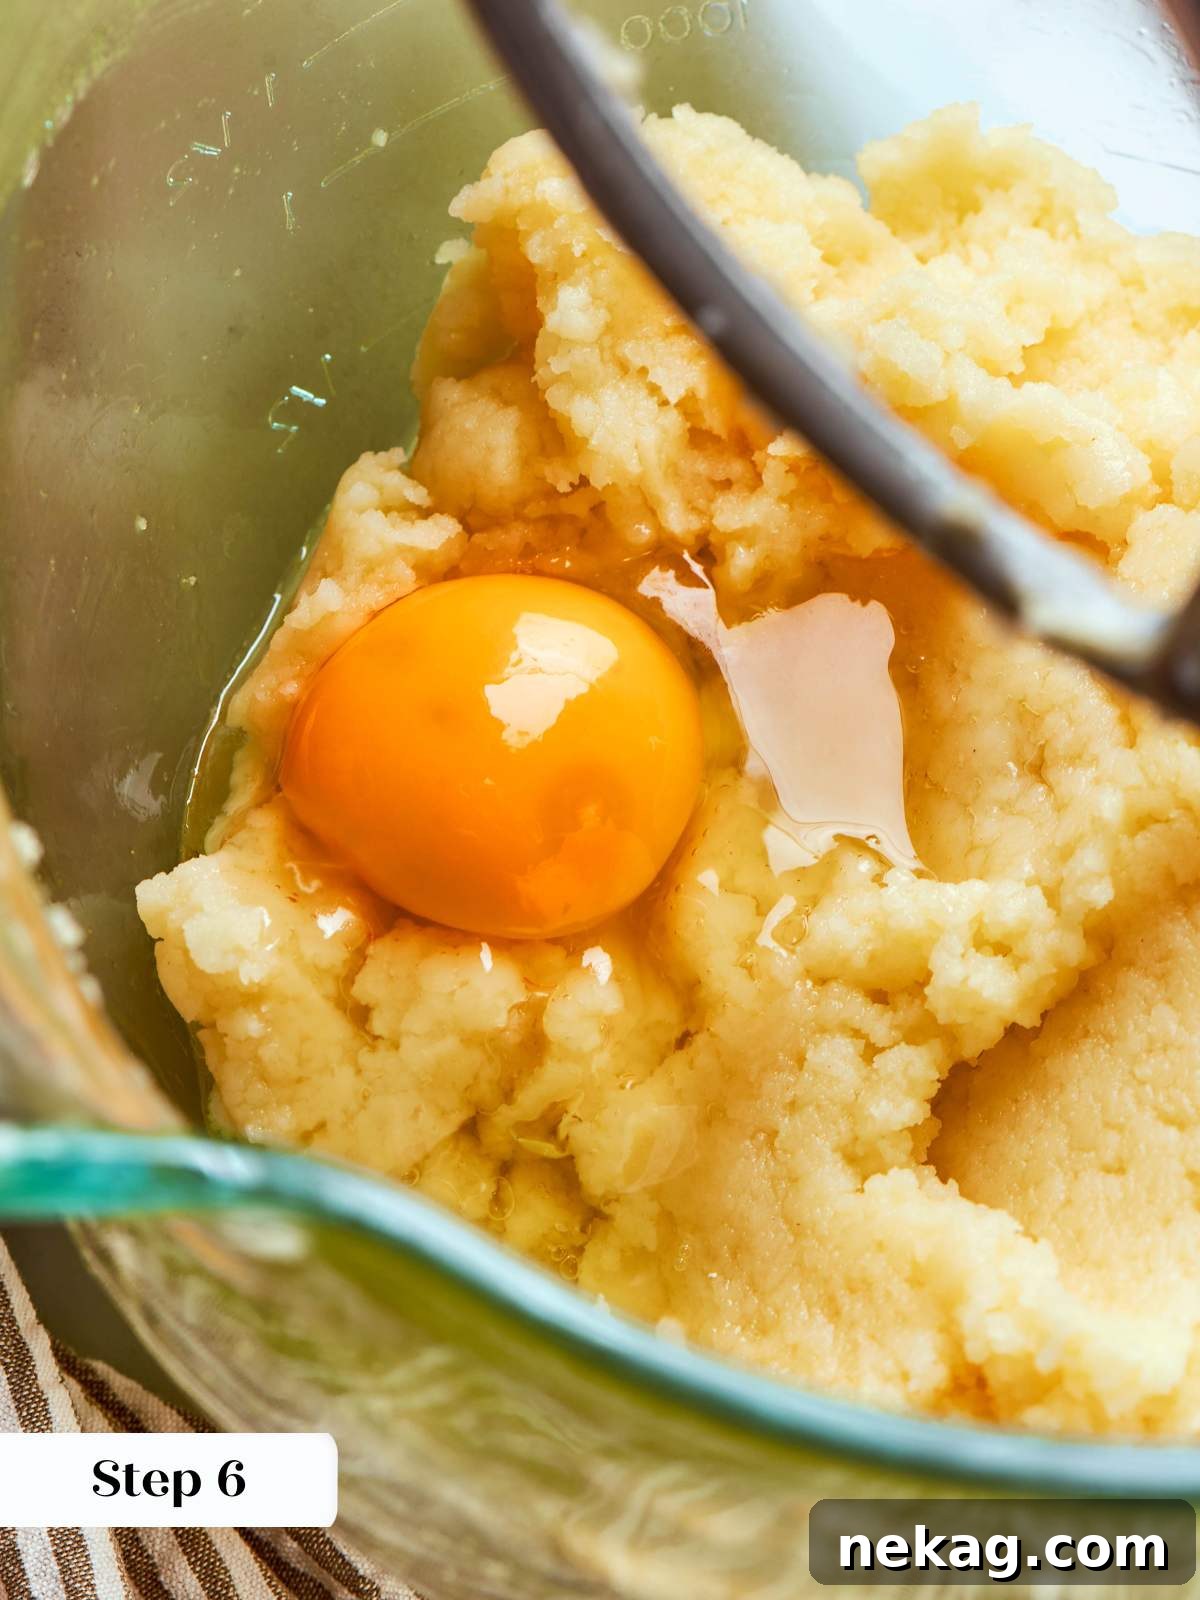
Step 6: Gradually Add the Eggs One at a Time. Once the mixture has stopped steaming and is adequately cooled (below 140°F/60°C), reduce the mixer speed to medium-low. Begin adding the eggs one at a time, allowing each egg to be fully incorporated into the dough before adding the next. After the first egg or two, the dough will often look broken, curdled, or separated—do not panic, this is expected! Continue beating, and it will come back together to form a smooth, cohesive paste. This gradual addition is crucial because the dough’s ability to absorb moisture (from the eggs) is directly influenced by its temperature and the amount of water evaporated during the panade. If the panade cooled too much, or if too much moisture was lost, you may need slightly more eggs than specified. Conversely, if too little moisture evaporated, you might need fewer. Always prioritize the visual and tactile cues of the paste’s consistency over the exact egg count. Over-adding egg will result in a paste that is too loose, leading to flat, dense pastries (photo 6).
Step 7: Test the Choux for Doneness – The Consistency is Key. Once you’ve incorporated most of the eggs and the dough appears smooth and shiny, it’s time for the ultimate test of readiness. For this particular recipe, I find the trench test to be the most reliable indicator of perfect consistency. While some pastry cooks prefer the hook test or a combination, relying solely on the ribbon test can sometimes lead to adding too many eggs, resulting in a paste that’s too slack. [See detailed explanations and photos for all three tests below].
3 Essential Consistency Tests for Pâte à Choux
Mastering choux pastry hinges on recognizing the perfect consistency before piping and baking. These three professional tests will guide you:
- Hook Test: This tactile test requires a bit of practice but offers excellent insight into the dough’s elasticity. Dip your forefinger deep into the choux paste, then bring your thumb and forefinger together, gently squishing a small amount of choux between them. Slowly pull your fingers apart and observe the peaks that form on either side. A perfectly hydrated choux paste will create peaks that flop gently to the side, particularly the one attached to your thumb, forming a soft, curved ‘hook.’ If the peaks stand stiffly upright, the choux is too thick and needs more egg. If it drips off immediately, it’s too loose. Be mindful not to take too much or too little choux on your fingers, as this can be misleading.
- Trench Test (Most Recommended): This is often considered the most reliable and easiest test for home bakers. To perform the trench test, simply draw your finger firmly through the center of the choux dough in the mixing bowl, creating a “trench.” Observe how the sides of the trench behave. The ideal choux paste will cause the sides of the trench to close slowly and steadily, gradually merging back together but not running immediately into each other. If the sides of the trench do not move at all, remaining perfectly separated, the choux is too stiff and requires more egg. Add another half an egg (beaten separately) and retest after incorporating. It’s important to note that a cooler choux paste will cause the trench to close more slowly, so consider the dough’s temperature. In my professional experience, making choux daily for eight years, it was a rare occasion that more than two additional eggs were needed for a quadruple batch. For a standard single batch like this recipe, you should need no more than about half an additional egg at the absolute maximum.
- Ribbon Test: The ribbon test is performed by inserting the paddle attachment into the finished choux paste and then lifting it out. The choux paste passes this test when it falls off the paddle in a thick, continuous “ribbon” or “V-shape.” While this is a common test, I find it to be the least effective for novice bakers, especially as the paste cools. Pastry cooks who rely solely on this test often end up with a choux paste that is too thin or slack, as the ribbon can appear adequate even when the dough is over-hydrated. It’s better used in conjunction with the trench or hook test for confirmation.
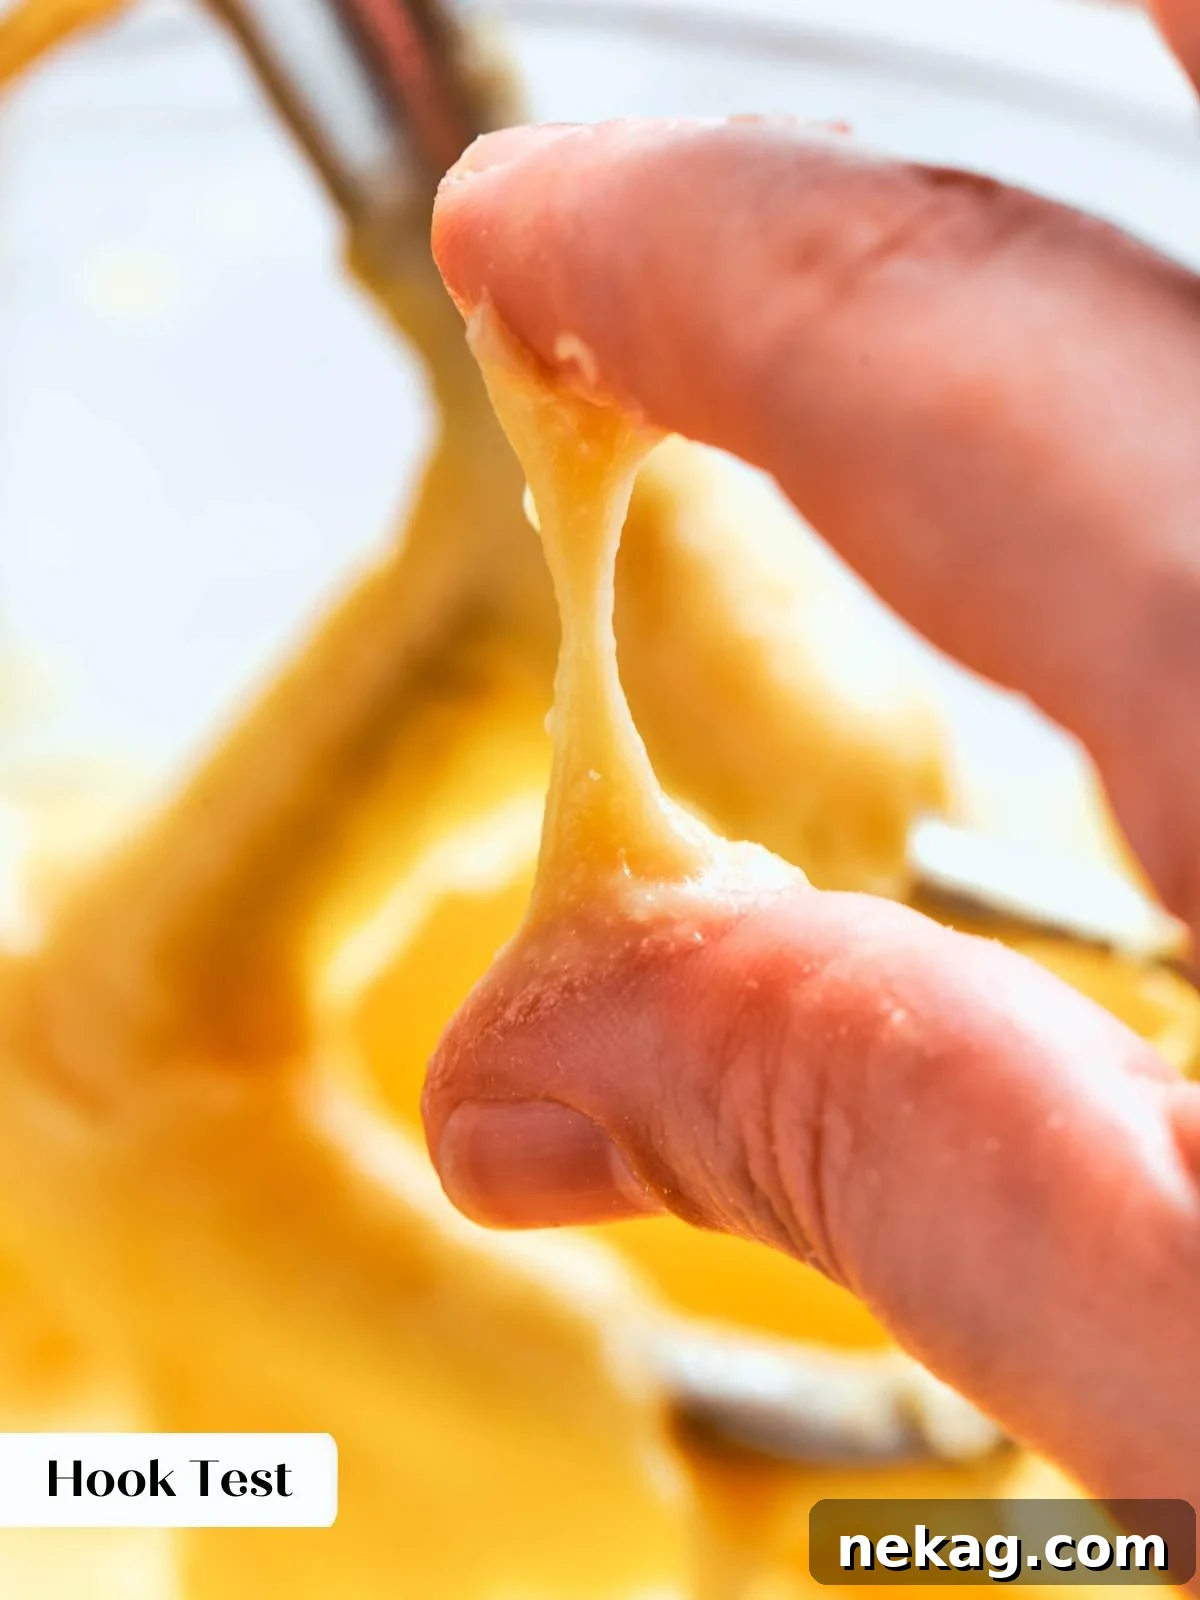
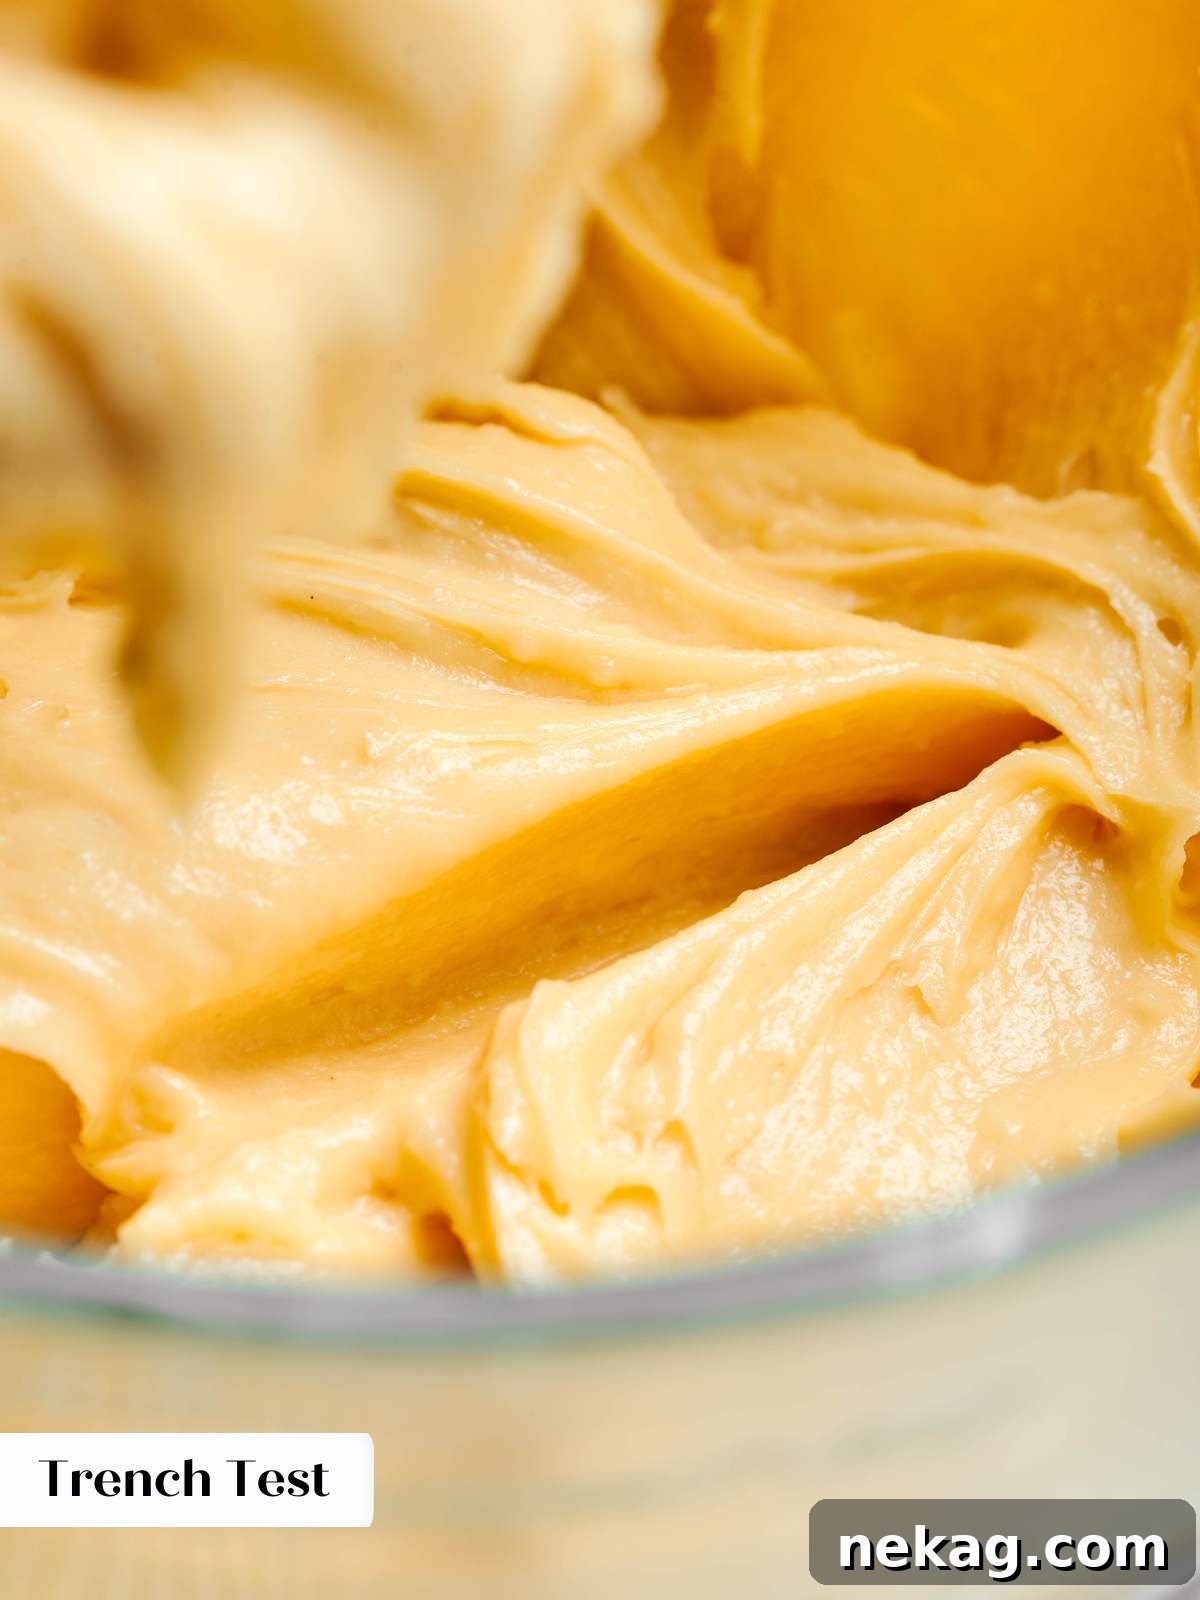
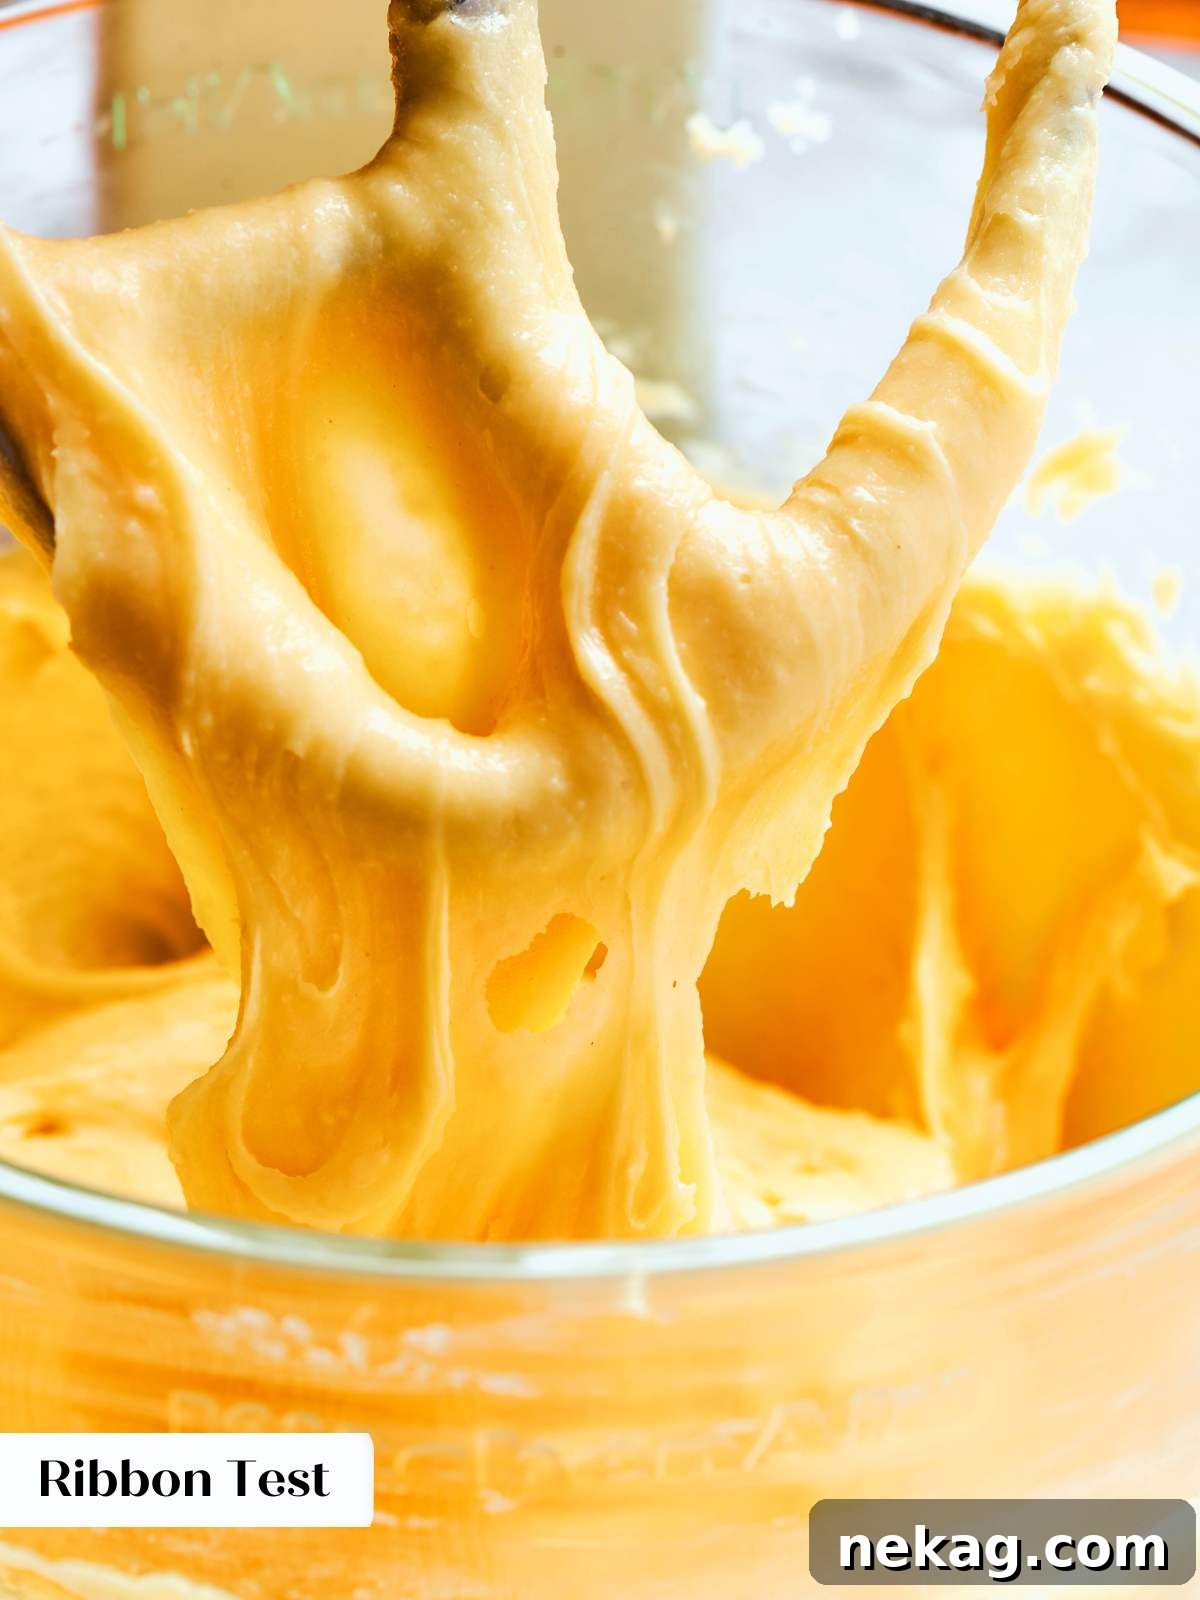
In the rare event that your dough still feels too stiff after incorporating the specified number of eggs, despite showing signs of requiring more based on the consistency tests, you may need to add more egg than the recipe specifies. To do this safely, beat an additional large egg in a separate bowl. Add this extra egg to the choux paste in very small additions (start with just a teaspoon or two), beating thoroughly after each addition. After each small addition, immediately retest the dough’s consistency. Continue this process cautiously until the desired consistency is achieved. At the very upper end, for a standard single batch, you should typically need no more than half an additional egg to reach perfection.
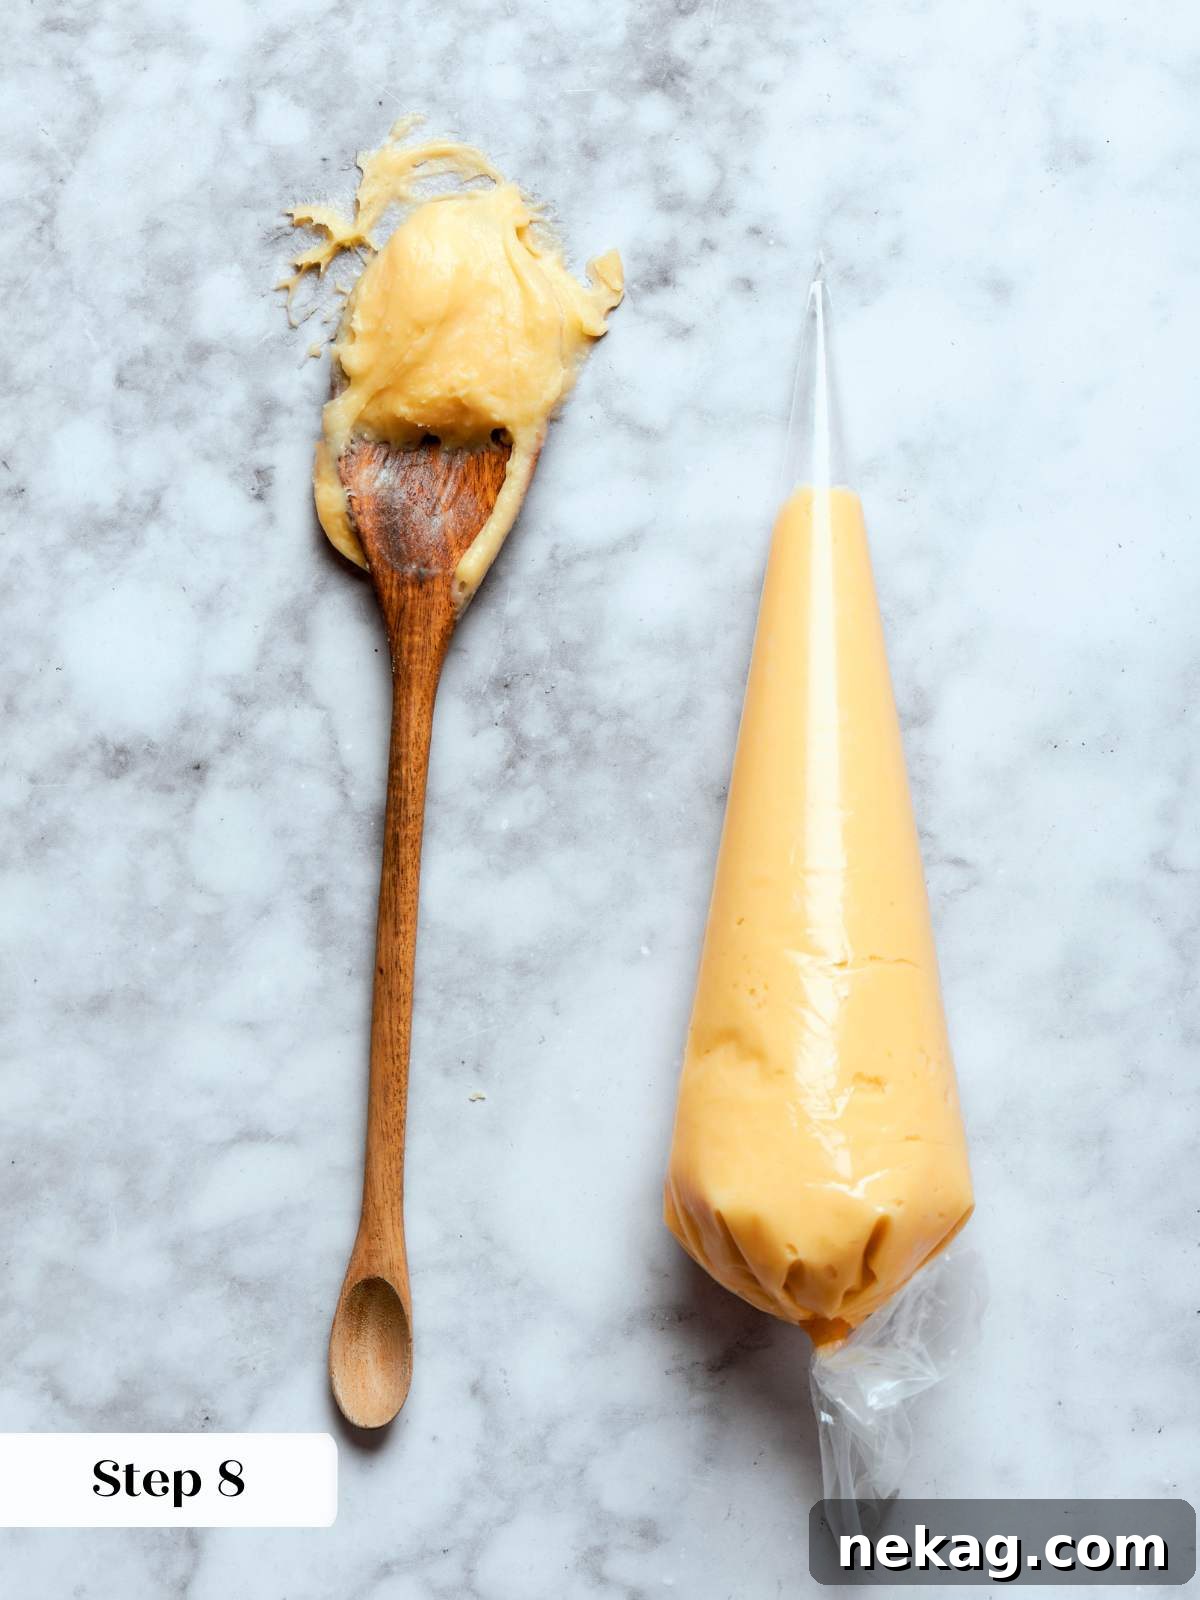
Step 8: Add Any Mix-ins and Transfer to Piping Bags. If your specific recipe calls for any mix-ins, such as finely grated cheese for savory gougères, now is the time to incorporate them. Add them to the finished choux paste in the mixer bowl and beat briefly on low speed, just until they are evenly combined. Overmixing at this stage can deflate the paste. Once mixed, transfer the dough to a durable piping bag fitted with your desired tip (or a plain bag with the end snipped off). You can proceed to pipe the choux immediately, or for convenience, the filled piping bags can be refrigerated for up to 3 days. It’s normal for the paste to develop small spots or slightly discolor over time in the refrigerator, but its quality will remain excellent (photo 7).
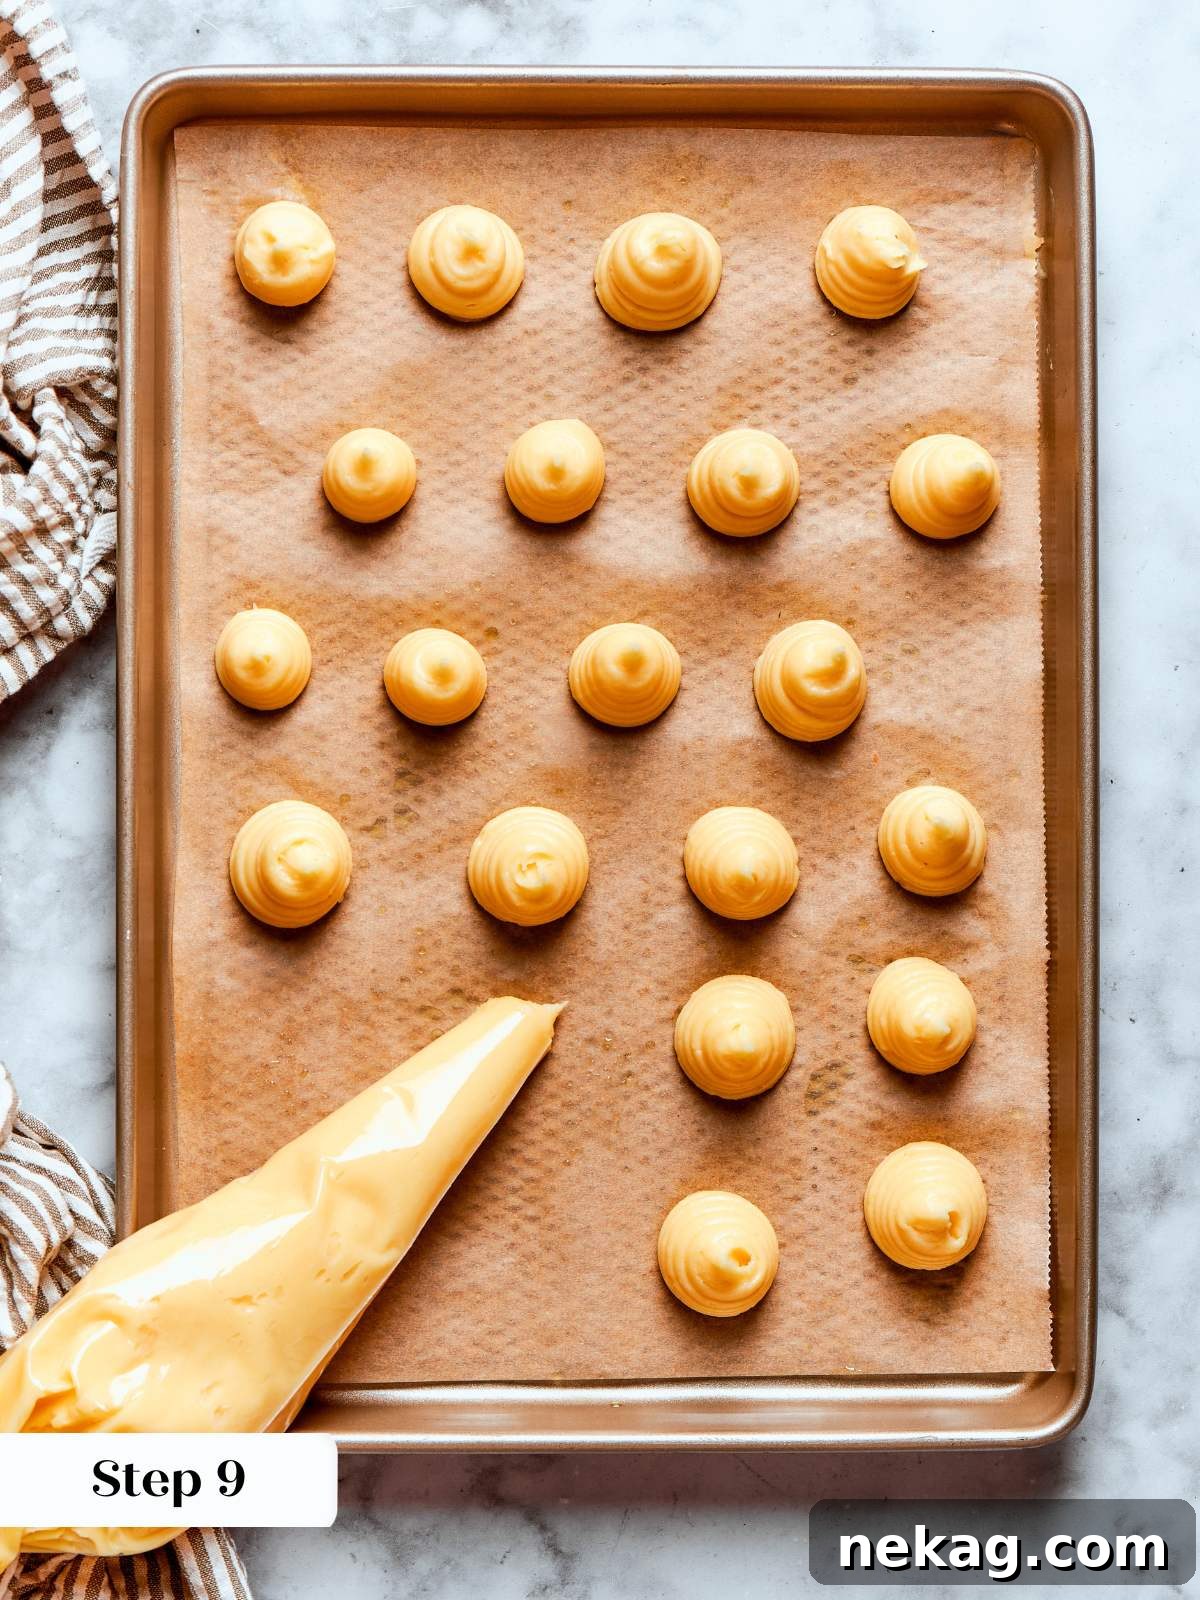
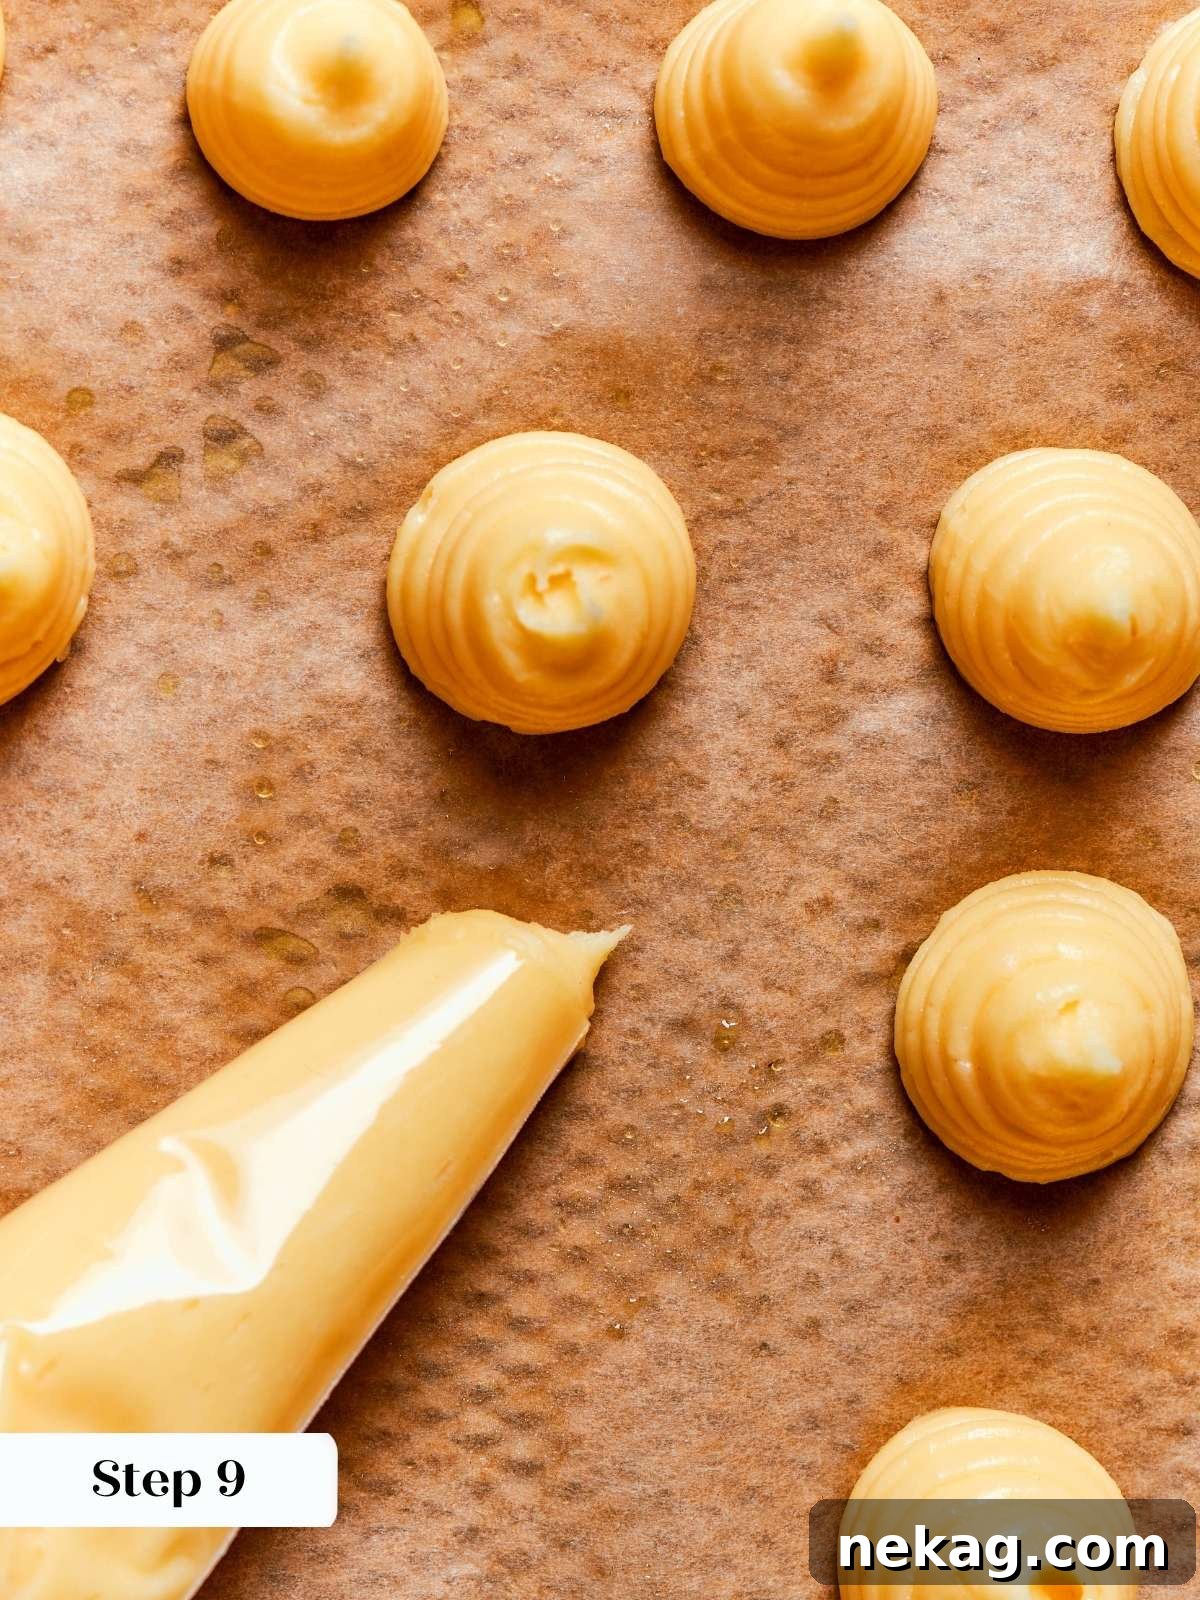
Step 9: Pipe the Choux Onto Prepared Baking Sheets. Prepare your baking sheets by lining them with parchment paper or a silicone baking mat. Hold the piping bag perpendicular to the baking sheet and apply even, consistent pressure to pipe your desired shapes. For standard cream puffs or éclairs, a simple straight-cut opening at the end of the piping bag (no special pastry tip needed) yields excellent, clean results and eliminates the variable of tip size affecting your flow. Ensure you space the pieces adequately, leaving enough room between each for them to expand significantly during baking without touching. Overcrowding can inhibit proper air circulation and lead to uneven baking (photos 8 & 9).
If you are working with choux dough that has been refrigerated, it’s beneficial to allow it to temper at room temperature for at least an hour before piping. This makes the dough more pliable and easier to pipe consistently.
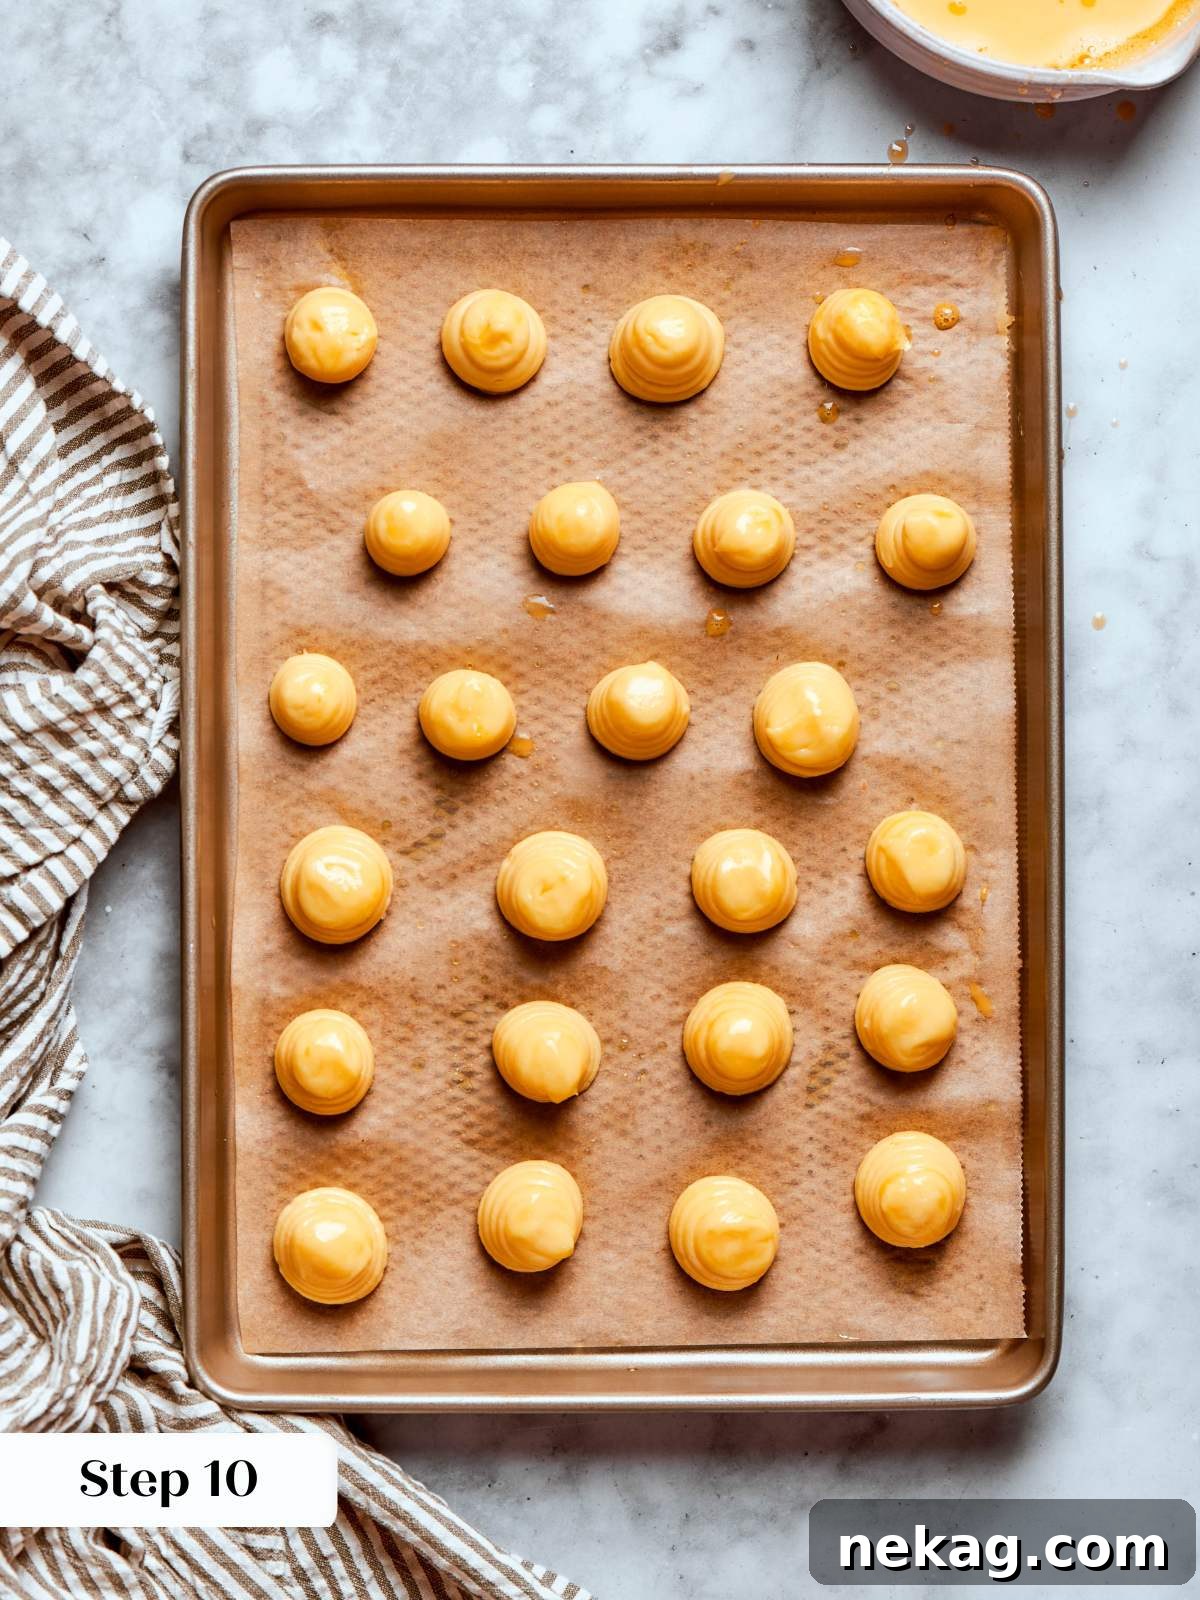
Step 10: Egg Wash Piped Choux for Golden Perfection. Once your choux shapes are piped onto the baking sheets, gently brush their tops with a beaten egg wash (photo 10). If you have any leftover beaten egg from making the dough, it’s perfect for this step! The egg wash serves two key purposes: it promotes a beautiful, glossy, deep golden-brown color during baking, and it can help to smooth out any small points or irregularities created during piping. A browned point on a gougère or profiterole is often a telltale sign of a novice baker, so taking a moment to gently smooth these with the egg wash will give your pastries a more refined, professional finish.
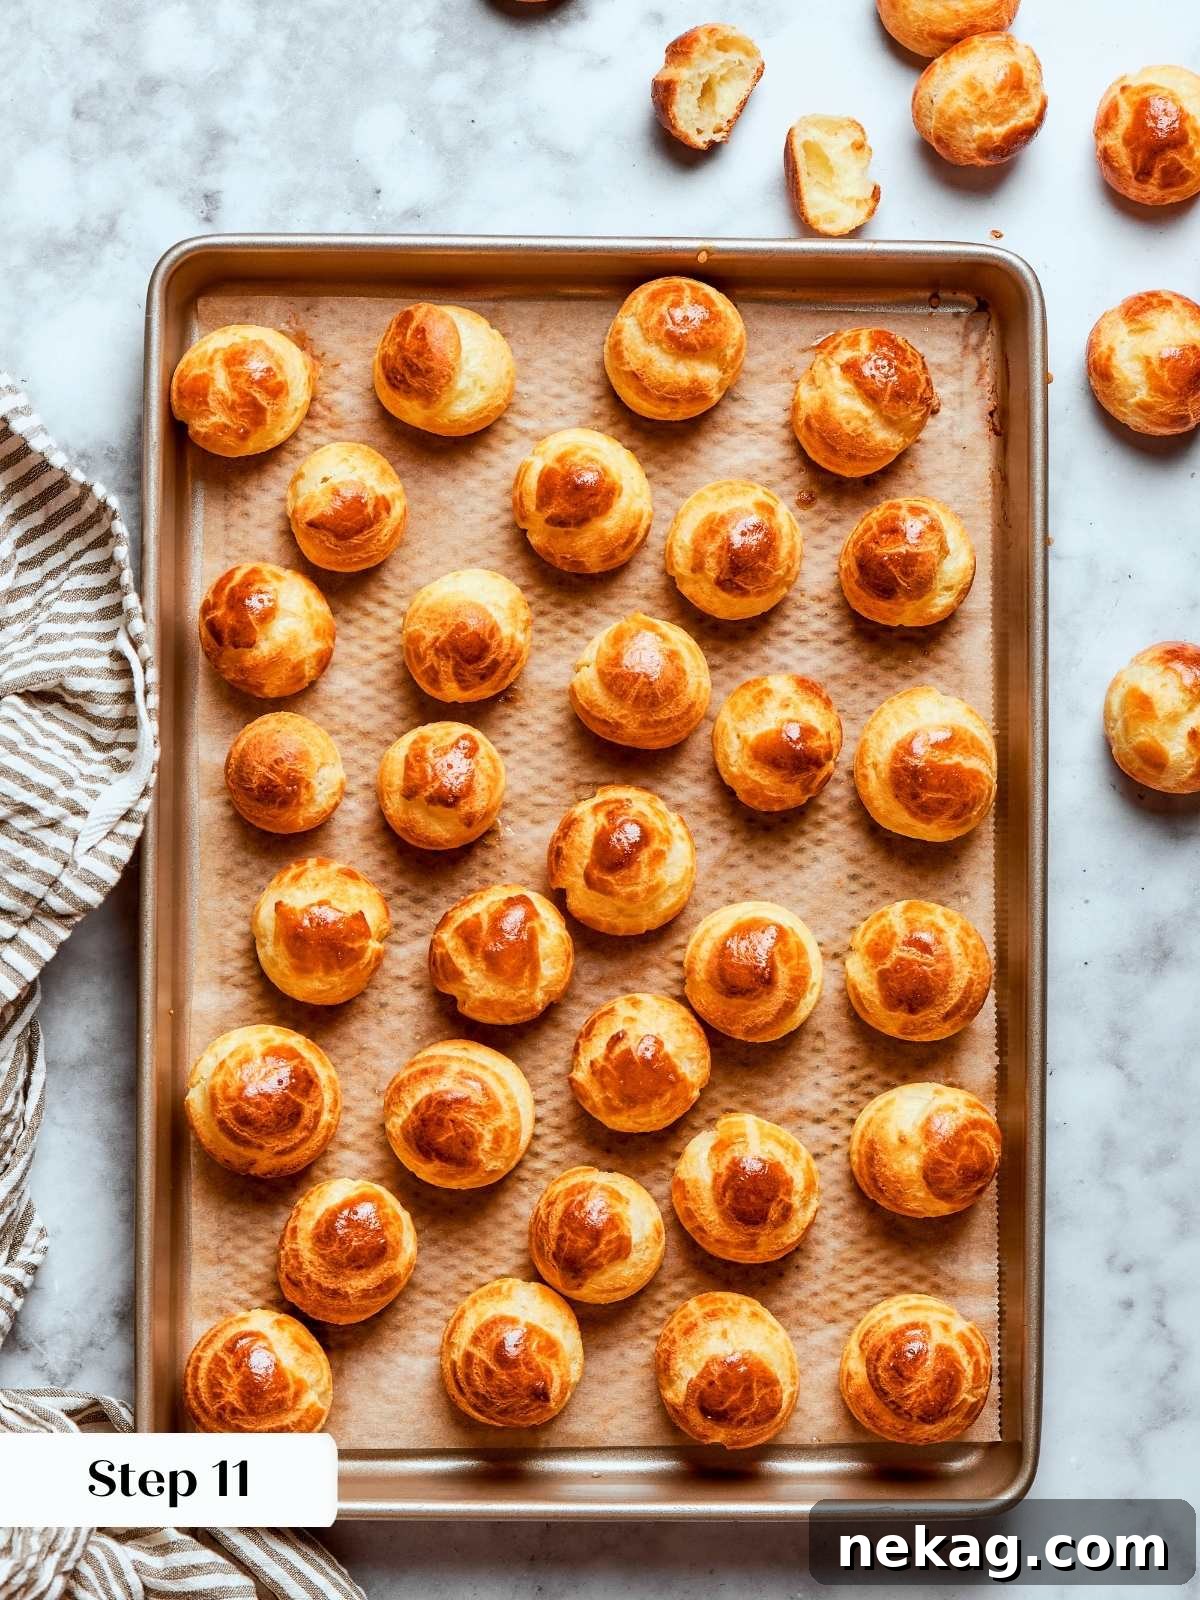
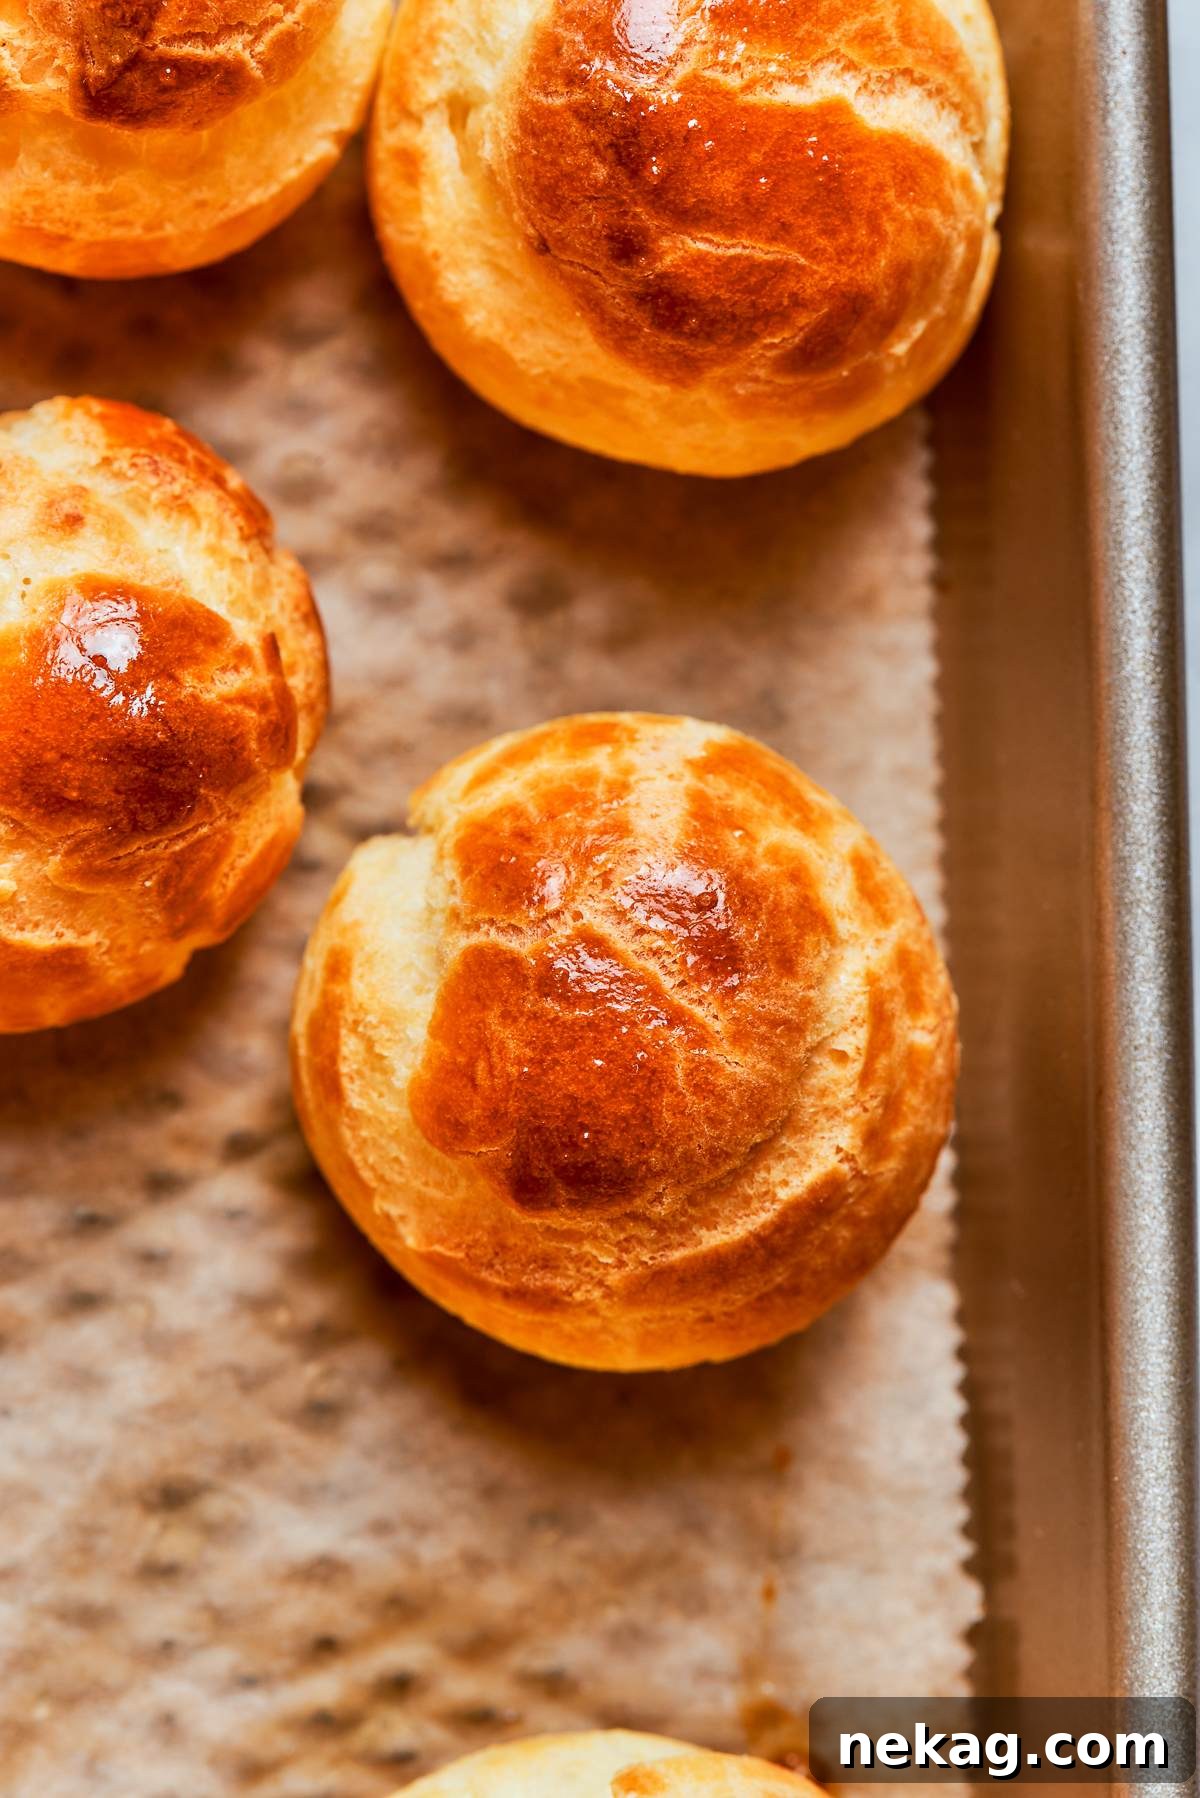
Step 11: Bake at Correct Temperature and Resist Opening the Oven Door. Preheat your oven to 350°F (175°C) for convection or 375°F (190°C) for conventional ovens. Place the baking sheets in the hot oven. The bake time will vary depending on the size and shape of your piped choux, so watch them closely. The most critical rule for choux pastry is to NEVER open the oven door during the first two-thirds of the baking time. The shells rely entirely on the sustained high heat and trapped steam within the oven to rise fully and develop their crucial structure. Opening the door prematurely will cause a sudden drop in temperature, leading to the choux collapsing and remaining flat or dense. Once the pastries are deeply golden brown, look visibly puffed, and feel hollow and rigid when you tap them gently, they are done. A shell that still gives slightly when pressed needs more time in the oven to fully dry out and crisp up (photo 10).
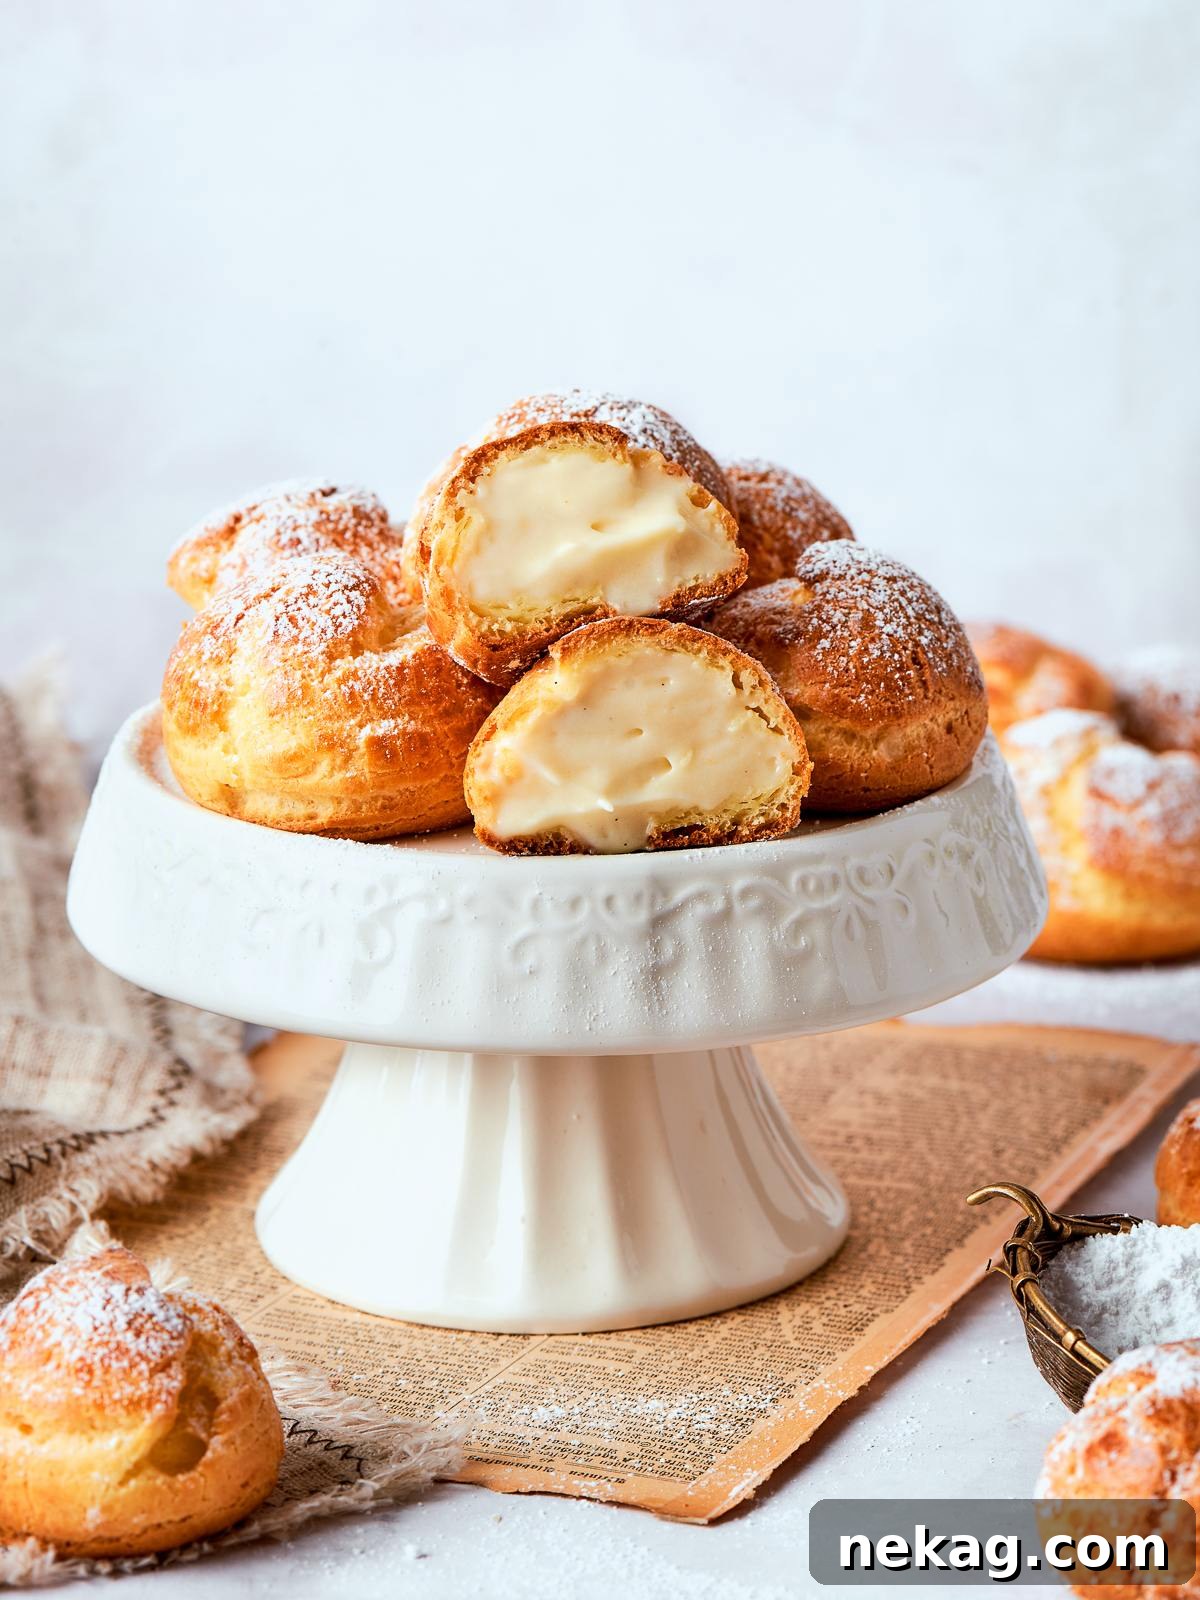
Step 12: Cool Completely Before Filling or Storing. As soon as the choux pastries are perfectly baked, transfer them from the hot baking sheets to a wire rack to cool completely. This allows air to circulate around them, preventing them from becoming soggy from residual heat. It is absolutely essential to cool choux pastry thoroughly before filling. Filling warm choux pastry will cause the filling (whether cream, custard, or cheese) to melt or loosen, and the steam trapped within the warm shells will soften their crisp exterior from the inside out. For long-term storage of unfilled shells, freeze them in a single layer on a baking sheet, then transfer to an airtight container. To restore their crispness, briefly refresh them in a 350°F (175°C) oven just before filling. This oven refresh is particularly important for savory items like gougères, as it brings back the delightful snap and texture that makes them so enjoyable to serve (photo 11).
Chef Lindsey’s Recipe Tip: The Art of Reading Your Dough
The single most common reason choux pastry fails is treating the egg count as a fixed, immutable number. In reality, the quantity of eggs in any recipe should always be considered a starting point, not a guarantee. This is because the amount of water that evaporates while cooking your panade directly determines how much additional moisture (from the eggs) the dough can absorb to reach the ideal consistency. Environmental factors like humidity and the intensity of your stovetop heat can also influence this. Therefore, the most reliable path to choux pastry success is to learn to “read the paste” – observing its visual cues, texture, and behavior during the egg incorporation stage. This sensory understanding is always more reliable than rigidly adhering to a specific egg count. Pâte à choux, much like mastering inverse puff pastry or any delicate baking technique, profoundly rewards repetition. Each batch you make will teach you subtle nuances that the previous one could not, building your intuition and confidence with this classic French dough.
Choux Pastry Recipe FAQs: Troubleshooting and Storage
The most reliable method is the trench test: drag your finger through the paste in the mixing bowl. The trench should close slowly and steadily, not immediately. Additionally, the paste should fall from a spatula in a thick, smooth V shape, often referred to as a “ribbon” or “hook” (though the trench test is more definitive). If the trench runs together instantly, the paste is too loose; if the sides don’t move at all, it’s too stiff and needs more egg. Remember that the cooler the choux, the slower the trench will close, so factor in temperature. If your paste seems slightly too runny even after rigorous testing, refrigerating the choux for 2-3 hours before piping can sometimes firm it up enough to be workable.
There are several common culprits for flat choux pastry, all stemming from issues that compromise the dough’s ability to trap steam and expand. The most frequent causes include adding the eggs too quickly, which can prevent proper emulsification; incorporating eggs while the dough is still too hot, leading to partial scrambling of proteins and a weakened structure; or not cooking the panade long enough to evaporate sufficient moisture, resulting in an overly wet dough. Any of these conditions fundamentally alters the paste’s delicate structure before it even enters the oven. Consistent, successful results come from carefully monitoring the panade’s temperature, adding eggs gradually and observing the consistency, and always performing a consistency test before piping.
Absolutely, choux pastry is excellent for make-ahead convenience, depending on where you are in the process. You can store the raw choux paste in piping bags in the refrigerator for up to 3 days. Alternatively, you can pipe the shapes onto a baking sheet, apply an egg wash, then wrap the entire sheet tightly in plastic wrap and refrigerate for up to 3 days, or freeze for up to 1 month. When baking frozen piped choux, I find it’s best to let it thaw in the refrigerator for a few hours or at room temperature for about an hour before baking, rather than putting it directly into a hot oven from frozen, to ensure a more even rise.
Unfilled, baked choux pastries have excellent freezer longevity; they will keep well for up to 1 month. To enjoy them at their best, especially for savory items like gougères, refresh them in a 350°F (175°C) oven for 5-10 minutes to restore their crisp shell before serving. For sweet choux pastries intended for fillings like pastry cream, it’s always best to fill and serve them on the same day. While they can be filled and stored for a day in the refrigerator, the filling will gradually soften the delicate shells, diminishing their optimal crisp texture.
Yes, this recipe is quite scalable. A half batch works reliably well, making it perfect for smaller quantities. I have also routinely made this recipe at four times the base formula in a professional setting without issues. When scaling beyond four times the base recipe, the volume of dough can become quite significant, making it challenging to stir effectively by hand. You’ll also need to carefully consider the capacity of your pot for the panade and your stand mixer bowl for incorporating the eggs. While scaling doesn’t fundamentally change the technique, it does increase the physical effort required during the panade cooking stage.
While not all are strictly essential, certain pieces of equipment greatly simplify the choux-making process and improve consistency. A heavy-bottomed, high-sided saucepot is crucial for even cooking of the panade. A sturdy wooden spoon is ideal for stirring the panade. A stand mixer with a paddle attachment is highly recommended for incorporating eggs, though a strong arm and vigorous hand mixing can also work. Other useful tools include a kitchen scale for accurate flour measurement, parchment paper or silicone mats for baking, and a piping bag with a round tip for uniform shapes.
More Classic French Recipes to Explore
Pies and Tart Recipes
Puff Pastry Fruit Tart
Pies and Tart Recipes
Apple Tarte Tatin
Dessert Recipes
French Crullers
Custard Recipes
Pastry Cream Recipe (Crème Pâtissière)
If you tried this recipe and loved it please leave a 🌟 star rating and let me know how it goes in the comments below. I love hearing from you; your comments make my day!
Pâte à Choux
Pin Recipe
Comment
Print Recipe
Ingredients
- 1 cup unsalted butter 226g, cubed
- 2 cups whole milk 520g
- 2 cups all-purpose flour 248g
- 1¼ teaspoons kosher salt
- 1 teaspoon granulated sugar
- 5 large eggs plus 1 additional egg if needed
Instructions
-
Measure and meticulously prepare all ingredients before commencing the recipe. In one bowl, combine the all-purpose flour, kosher salt, and granulated sugar, then set aside. Crack the large eggs into a separate bowl and have them ready for gradual incorporation.
-
In a high-sided, heavy-bottomed saucepot, combine the cubed unsalted butter and whole milk. Heat this mixture over high heat, watching carefully. The objective is for the butter to be fully melted at the precise moment the milk reaches a gentle boil. Do not allow the milk to continue boiling beyond this point to prevent excessive evaporation.
-
Immediately remove the pot from the heat. Add the entire flour mixture (flour, salt, sugar) into the hot liquid all at once. Stir vigorously with a wooden spoon to incorporate the dry ingredients, ensuring no lumps remain and the mixture forms a cohesive dough.
-
Return the pot to high heat and continue cooking, stirring constantly and vigorously, for approximately 2 minutes. The dough (known as panade) will pull away from the sides of the pot and leave a thin, dry coating on the bottom. This visual cue indicates that enough moisture has evaporated, resulting in a perfectly pipeable paste.
-
Transfer the hot panade immediately to the bowl of a stand mixer fitted with the paddle attachment. Beat the dough on medium-high speed for 3-5 minutes to release steam and allow it to cool down to around 140°F (60°C). This prevents the eggs from scrambling when added.
-
Once the dough has stopped steaming, reduce the mixer speed to medium. Begin adding the eggs one at a time, ensuring each egg is fully incorporated before adding the next. Continue this process until the paste is smooth, glossy, and passes a consistency test: when you drag a finger through the paste, the “trench” should close slowly and steadily. The paste should also fall from the spatula in a thick V shape. If all 5 eggs are incorporated and the paste remains too stiff, beat an additional egg separately and add it in very small stages (a teaspoon or two at a time), testing after each addition until the desired consistency is achieved.
-
If your specific recipe requires any mix-ins (such as cheese for gougères), gently fold them into the paste now. Transfer the prepared paste to piping bags. The dough can be used immediately or refrigerated for up to 3 days.
-
Brush the tops of the piped choux pastry with an egg wash (a single beaten egg) for a beautiful golden-brown finish and to smooth any uneven points.
-
Bake the piped choux in a preheated oven at 350°F (175°C) for convection or 375°F (190°C) for conventional, until they are deeply golden, fully puffed, and feel hollow inside. For 4-centimeter gougères, baking time typically ranges from 20-23 minutes. Rotate the baking trays after 10 minutes for even cooking. Adjust baking time based on the size and shape of your choux, and critically, avoid opening the oven door during the first two-thirds of baking.
Notes
Doneness Cue: The definitive test for the correct consistency of choux paste is the trench test. When you draw a finger through the paste, the sides of the trench should close slowly and steadily, indicating perfect hydration. It should not run together immediately.
Storage (raw paste): Unpiped choux paste can be stored effectively in piping bags in the refrigerator for up to 3 days. Alternatively, you can pipe the shapes onto a baking sheet, apply an egg wash, wrap tightly, and refrigerate for up to 3 days, or freeze for up to 1 month. For frozen piped choux, allow it to temper in the refrigerator or at room temperature for an hour before baking for best results.
Storage (baked): Unfilled, baked choux pastries can be stored in the freezer for up to 1 month. For savory items like gougères, a quick refresh in a 350°F (175°C) oven before serving is recommended to restore their crisp shell. For sweet choux, filling and serving on the same day will ensure the best possible texture.
Nutrition
Before You Go: Your Choux Pastry Journey Continues
Mastering choux pastry is a significant accomplishment in the world of baking. This foundational dough opens the door to one of the most rewarding and creative categories in classical French patisserie. From the delicate elegance of éclairs and the delightful simplicity of profiteroles to the grand presentation of a Paris-Brest, your new skill set will empower you to create a wide array of stunning desserts and savory treats.
Now that you’ve unlocked the secrets to perfect Pâte à Choux, your culinary adventure is just beginning. If you’re ready to continue exploring and expanding your baking repertoire, we invite you to browse more of our Dessert Recipes for what to create next. Enjoy the process, savor the results, and confidently share your beautifully crafted choux pastries with friends and family!