
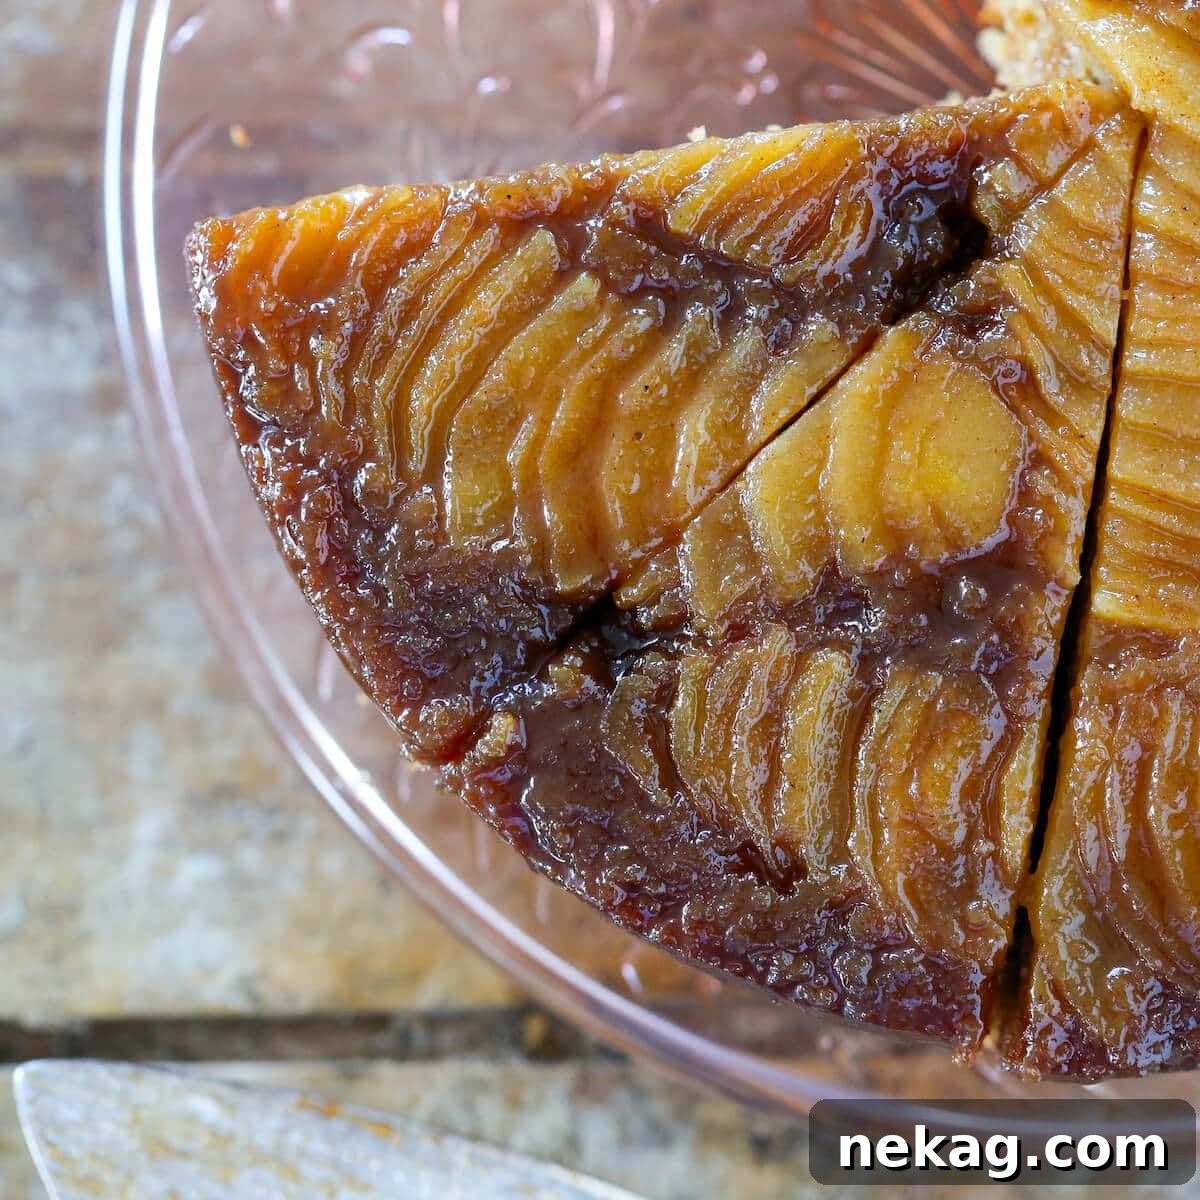
Indulge in the exquisite pleasure of a **Pear Upside Down Cake**, a delightful winter dessert that promises both stunning presentation and heartwarming flavors. This simple yet elegant cake features a rich, bubbling brown sugar caramel base, tender layers of perfectly arranged pears, and a sumptuously moist, cardamom-spiced cake. It’s a must-make for the colder months, transforming from pan to plate with a magnificent flip that unveils a beautifully caramelized fruit topping. Prepare to impress your guests and warm your soul with every slice of this easy-to-make, utterly unforgettable treat.
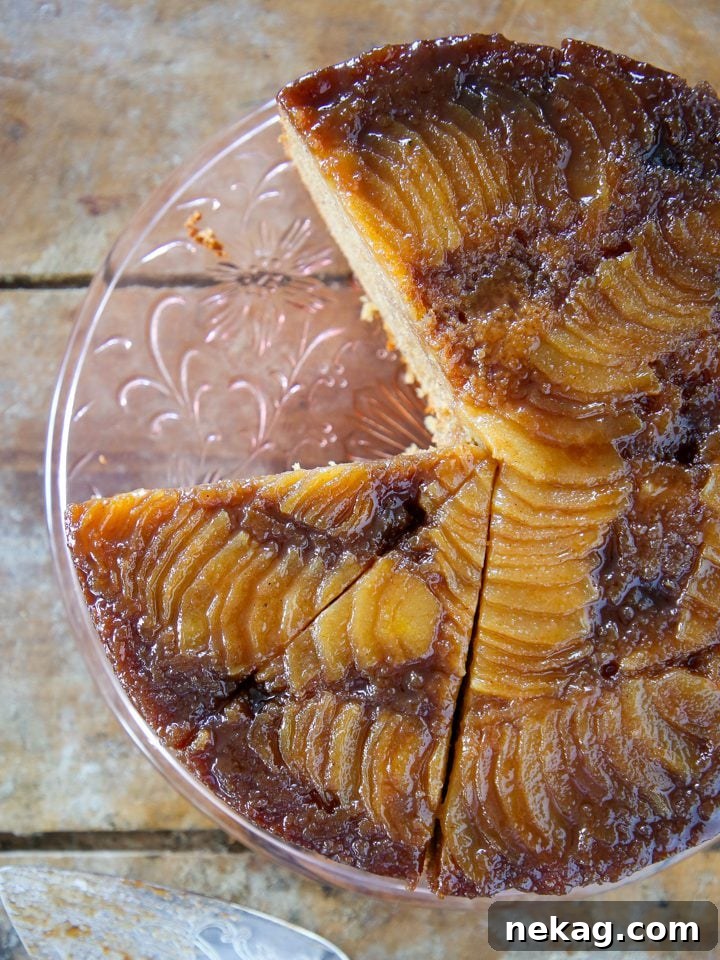
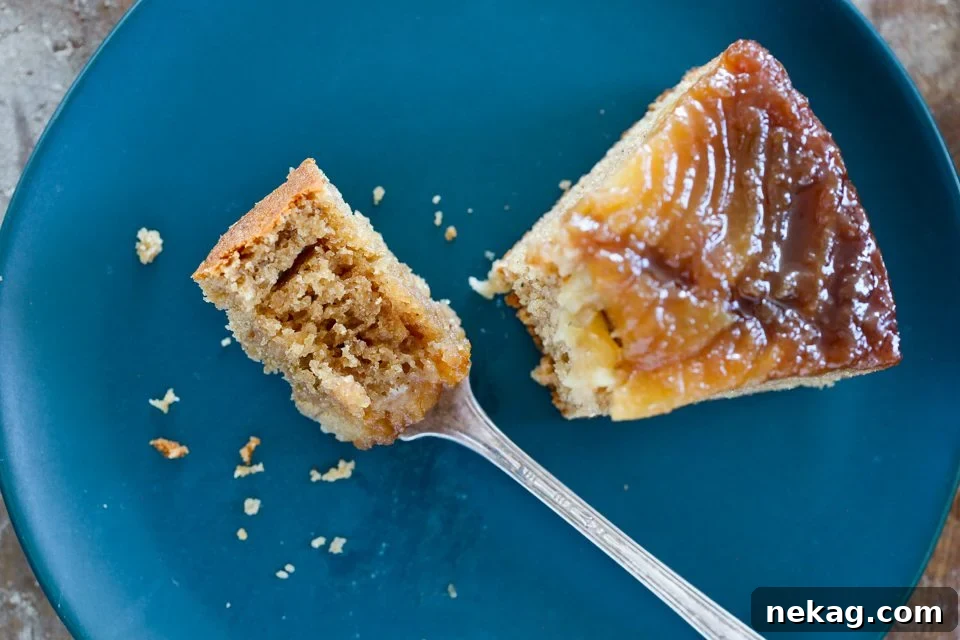
While the perfectly caramelized pears undeniably capture the eye, it’s the tender, spiced brown sugar cake beneath that truly leaves a lasting impression. Crafted with a harmonious blend of buttermilk and brown sugar, the cake boasts an exceptionally moist texture and a wonderfully fluffy, delicate crumb. The thoughtful infusion of warming spices – fragrant cardamom expertly balanced with cinnamon and clove – elevates the pears’ natural sweetness, creating a complex and comforting flavor profile that is simply irresistible.
This pear cake is surprisingly easy to execute, delivering a flawless, bakery-worthy presentation every time. Much like our popular orange upside down cake or the classic apple tarte tatin, it provides a spectacular outcome with minimal fuss. The magical combination of cardamom and pear in this recipe is truly exceptional, and once you fall in love with it, you’ll want to explore other pear-cardamom delights, starting with our irresistible Cardamom Pear Crisp. Serve this upside down cake warm, perhaps with a generous scoop of creamy French vanilla ice cream or a dollop of fluffy homemade whipped cream, for the perfect conclusion to any winter gathering or family meal.
Table of Contents
- Why You Will Love This Recipe
- Professional Baking Tips
- Key Ingredients Explained
- Delicious Variations
- How to Make the Perfect Pear Upside Down Cake
- Chef Lindsey’s Secret Tip
- Frequently Asked Questions
- Pear Upside Down Cake Recipe Card
- Before You Bake
Why You Will Absolutely Adore This Pear Upside Down Cake Recipe
This isn’t just another cake recipe; it’s a culinary experience designed to delight your senses and simplify your baking journey. Here’s why this Pear Upside Down Cake will become your new favorite:
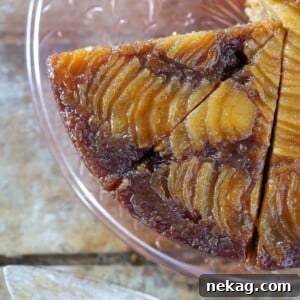
- A Masterpiece of Pears for a Stunning Topping: We transform simple pears into a visually arresting collage atop this cake. By using a mix of pear varieties and carefully layering them in an elegant fan shape, you create an eye-catching and luxuriously juicy topping. Whether you prefer a minimalist design or an elaborate pattern, the result is always magnificent and uniquely yours. Each slice reveals a beautiful arrangement, making every serving a special occasion.
- A Delicately Spiced, Irresistibly Moist Brown Sugar Cake: The foundation of any great upside down cake is its cake base, and ours is truly exceptional. This easy buttermilk cake is renowned for its light and fluffy texture, yet remains incredibly moist thanks to the brown sugar. Infused with a thoughtful blend of warming spices, it perfectly complements the sweet caramel and tender pears without overwhelming them. It’s a delicate balance that makes each bite utterly delicious.
- Foolproof, Professional Directions for Every Baker: Leave the guesswork behind! This recipe has been meticulously developed, tested, and re-tested by a professional pastry chef to ensure your success. Every step is clearly and concisely outlined, from preparing your pan to knowing exactly when to flip your cake. You won’t be left wondering about mixing times or doneness cues; our expert guidance ensures a smooth baking process and a perfect cake every single time. Enjoy confidence in your kitchen!
- The Perfect Winter Warmer: There’s something inherently comforting about a warm, spiced cake, especially during the colder months. The aromatic blend of cardamom, cinnamon, and clove permeates your kitchen, creating an inviting atmosphere that only intensifies the anticipation of tasting this exquisite dessert. It’s the quintessential treat for cozy evenings and festive gatherings.
Professional Baking Tips for the Best Pear Upside Down Cake
Achieving bakery-quality results at home is easier than you think with these expert tips:
- Embrace Cake Flour and Sift Diligently: While I don’t always insist on cake flour or sifting, for this particular recipe, these steps are truly transformative. Cake flour, with its lower protein content and finer texture, is key to developing an extraordinarily tender and delicate crumb that practically melts in your mouth. Sifting it isn’t just about breaking up clumps; it ensures an even distribution of dry ingredients throughout the batter, leading to a consistently light and airy cake. Don’t skip this for an unparalleled texture!
- Minimize Stirring During Caramel Preparation: This method for making a quick brown sugar caramel is simple and effective. However, excessive stirring can sometimes encourage sugar crystallization. If you notice a few crystals forming, don’t panic! Simply continue cooking. The slight crystallization will not significantly affect the final flavor or texture of the beautiful caramelized pear topping. The key is to trust the process and let the sugar melt and transform on its own.
- Invert the Cake While It’s Still Warm: The magic of an upside down cake lies in its topping, where pears are baked directly in a rich brown sugar caramel at the bottom of the pan. This caramel, while delicious, will become very sticky and firm as it cools, making it difficult to release the cake. To ensure a clean flip and a perfectly intact fruit layer, always run a thin knife or offset spatula around the edges of the cake immediately after removing it from the oven. Then, allow it to cool for precisely 15 minutes before inverting. This timing is crucial for the caramel to be fluid enough to release but set enough not to make a mess.
- Use a Serrated Knife for Clean Slices: Years of experience serving sophisticated desserts in Manhattan’s finest restaurants taught me this invaluable trick. A sharp, serrated knife is your best friend when cutting into an upside down cake. The serrations glide effortlessly through the soft, often irregularly shaped pear pieces and the tender cake, preventing squishing and ensuring neat, attractive slices. This small detail makes a big difference in presentation.
- Selecting the Right Pears: Choose pears that are firm but ripe. Pears that are too soft will become mushy during baking, while overly firm ones might remain too crunchy. Varieties like Anjou, Bosc, or Bartlett are excellent choices as they hold their shape beautifully when baked and offer a lovely texture contrast to the cake. Ensure your pears are uniform in size for consistent cooking.
Key Ingredients Explained for Your Pear Upside Down Cake
Every ingredient in this recipe plays a vital role in creating the perfect Pear Upside Down Cake. Understanding their function will help you appreciate the magic behind this dessert and ensure your baking success.
- Pears: The star of the show! You have the flexibility to use any pear variety you prefer. A blend of Anjou, Bosc, or Bartlett pears works beautifully, offering a delightful mix of flavors and textures. It’s important to note that I typically use small pears for this recipe. If you opt for larger pears, you may need to adjust the quantity or slice them thinner to ensure they fit properly within the 9-inch pan alongside the cake batter. Firm-ripe pears are ideal, holding their shape without becoming overly soft during baking.
- Lemon Juice: A crucial component in the caramel topping. A touch of lemon juice brightens the flavors, prevents the caramel from becoming overly sweet, and helps to stabilize the sugar, reducing the risk of crystallization during cooking. It adds a subtle tang that beautifully complements the pears.
- Cake Flour: This is a non-negotiable ingredient for achieving the signature tender crumb of this cake. Cake flour has a significantly lower gluten content (typically 8-10%) and a finer texture compared to all-purpose flour. These characteristics are essential for producing a light, airy, and truly delicate cake that almost melts in your mouth, similar to an angel food cake.
- Baking Powder & Baking Soda: These leavening agents work in tandem to give our cake its ideal height and fluffy texture. Baking powder provides a steady, even lift, contributing to a delicate and consistent crumb. Baking soda, on the other hand, reacts powerfully with the acidity of the buttermilk, creating a burst of carbon dioxide that results in a tall, light cake. Together, they ensure a perfectly risen and tender bake.
- Cinnamon: A classic warming spice that pairs exquisitely with pears and brown sugar. It adds a comforting, aromatic depth to both the caramel and the cake batter, enhancing the overall autumnal and wintery feel of the dessert.
- Cloves: Offering a pungent, sweet, and slightly peppery note, cloves are a cornerstone of many warming spice blends. While pre-ground cloves are convenient, freshly grinding whole cloves (using a spice grinder and then sifting to remove any larger pieces) will yield an even more sensational and vibrant flavor that truly elevates the cake.
- Cardamom: One of my absolute favorite spices! Cardamom brings a unique floral, citrusy, and slightly sweet aroma that is simply divine with pears. I highly recommend purchasing cardamom seeds and grinding them in small batches just before use; the difference in flavor is remarkable. Its vibrant essence can also be found in my cardamom walnut snowballs, browned butter cardamom snickerdoodles, and these easy ice box cookies.
- Kosher Salt: Often overlooked in baking, kosher salt is vital. It not only heightens and balances the rich flavors of the cake but also tempers the sweetness, preventing the dessert from becoming cloyingly rich. It’s the secret ingredient that makes all the other flavors shine.
- Unsalted Butter: Used in both the caramel topping and the cake batter. For the topping, unsalted butter adds a silky richness to the brown sugar caramel. In the cake, when creamed with sugar, it incorporates air for a lighter texture and provides essential fat, contributing to a wonderfully tender and moist crumb. Always use unsalted butter to control the salt content in your baking.
- Light Brown Sugar: Essential for both its sweetness and its moisture content. Using light brown sugar in the cake batter ensures a softer, more pliable texture, while also imparting a distinctive, rich molasses flavor that complements the spices and pears beautifully. It creates a deeper, more nuanced sweetness than granulated sugar.
- Whole Eggs: Eggs serve multiple purposes in cake baking: they act as a binder, provide structure, add richness, and contribute to leavening when whipped. Beating them into the creamed butter and sugar one at a time ensures proper emulsification and a smooth, consistent batter.
- Pure Vanilla Extract: A classic flavor enhancer, pure vanilla extract adds a layer of aromatic warmth and depth that complements all the other flavors without overpowering them. It’s a fundamental ingredient that rounds out the cake’s taste profile.
- Buttermilk: A key ingredient for a truly moist and tender cake. In recipes like this and my beloved devil’s food cake, I generally opt for low-fat buttermilk. It provides just the right amount of fat to keep the cake moist and enough liquid to hydrate the dry ingredients. More importantly, its acidity is crucial for activating the baking soda, resulting in that desirable tall and light texture.
Refer to the complete recipe card below for precise measurements and quantities of all ingredients.
Delicious Variations to Customize Your Pear Upside Down Cake
While the classic pear and cardamom combination is heavenly, feel free to get creative and personalize your upside down cake with these delightful variations:
- Buttermilk Substitutions: If you don’t have buttermilk on hand, resist the urge to simply add lemon juice to regular milk and call it a day; that won’t yield the same complex acidity and consistency. A more effective substitute is to combine ½ cup of sour cream with 2 tablespoons of water, whisking until smooth. This alternative will still provide adequate acidity and moisture, though your cake might be ever so slightly denser than with true buttermilk.
- Experiment with Cake Flavorings: The beauty of this base recipe is its versatility. You can easily alter the cake’s flavor profile.
- Citrus Zest: Add the finely grated zest of an orange, lemon, or even lime to the cake batter for a brighter, more aromatic lift. Citrus pairs wonderfully with pears and cardamom.
- Spice Adjustments: Feel free to adjust the amounts of cinnamon, cloves, and cardamom to your personal taste. You could even introduce a pinch of ginger or nutmeg for added warmth.
- Double the Vanilla: For a more pronounced vanilla aroma, increase the vanilla extract to 2-3 teaspoons.
- Seasonal Spice Blends: Incorporate other pre-made or homemade spice mixes like apple pie spice, my popular pumpkin spice recipe, or even a light hand of speculoos spice mix for a unique twist. Remember that speculoos is quite potent, so start with a small amount.
- Explore Different Fruit Toppings: The upside down cake technique is wonderfully adaptable to various fruits. The key is to choose fruits that maintain their shape and texture well when baked.
- Apples: Sliced apples (like Granny Smith or Honeycrisp) are an obvious and delicious substitute, offering a similar texture to pears.
- Stone Fruits: Sliced peaches, plums, or nectarines would be fantastic, especially when in season.
- Pineapple or Mango: Classic upside down cake fruits like pineapple rings work well. For mango, choose firm, slightly under-ripe fruit to prevent it from turning to mush.
- Berries: While not sliced, a layer of whole berries (like raspberries or blueberries) could be a vibrant addition, though they release more moisture.
- Poached Pears: For an extra layer of gourmet flavor, consider using red wine poached pears, similar to how I use them in my elegant Hazelnut Pear Tart. This would add a sophisticated depth of flavor and beautiful color.
- Add a Nutty Crunch: Sprinkle toasted pecans, walnuts, or almonds over the caramel before arranging the pears for an added layer of texture and flavor.
How to Make the Perfect Pear Upside Down Cake: Step-by-Step Guide
Creating this stunning pear upside down cake is a straightforward process when you follow these detailed instructions. Remember to read through all steps before you begin baking!
Further details and precise measurements can be found in the recipe card below.
Prepare Pears:
Step 1: Begin by preparing your pears. Carefully peel them using a vegetable peeler, then slice each pear lengthwise into quarters. Using a small paring knife or melon baller, carefully cut out and remove the tough core section from each quarter. Once cored, slice each pear quarter crosswise into thin, approximately ¼-inch thick pieces. The goal is to create slices that are uniform enough to fan out attractively. Set these prepared pear slices aside while you move on to the topping.
Make the Topping:
Step 2: Prepare your baking pan. Lightly spray a 9-inch round cake pan thoroughly with cooking spray. This acts as an initial non-stick layer. Next, line the bottom of the pan with a round of parchment paper. To do this, trace the bottom of your pan onto parchment paper and cut it out. This parchment layer is crucial for a clean release and is truly integral to the success of an upside down cake. Set the prepared pan aside. Preheat your oven to 325°F (160°C) if using a convection oven (with a fan), or 350°F (175°C) if using a conventional oven (no fan). This precise temperature ensures even baking and perfect caramelization.
Expert Tip: Lining your cake pan with parchment paper is absolutely essential. Skipping this simple step is the most common cause of tears and disappointment, often leading to the entire caramelized fruit topping sticking stubbornly to the bottom of the pan instead of adorning your beautiful cake.
Step 3: Now, let’s create the luscious caramel topping, which will form the first layer in your prepared pan. In a small, heavy-bottomed saucepan, melt the unsalted butter over medium heat. Once melted, add the lemon juice, cinnamon, and light brown sugar. Stir constantly until the sugar completely dissolves and the mixture begins to boil gently. Continue to cook, stirring occasionally, until the mixture thickens slightly and transforms into a beautiful medium amber color, reminiscent of rich autumn leaves. This caramelization process develops deep, complex flavors. Carefully pour this hot caramel mixture into your prepared 9-inch pan and use an offset spatula to gently spread it out evenly over the parchment-lined bottom.
Step 4: Arrange the reserved pear slices artfully over the warm caramel. You can create a stunning fan pattern, overlapping the slices slightly, or a concentric circle design. Take your time to make it visually appealing. However, if precision isn’t your forte or you’re short on time, simply scattering the pears willy-nilly will yield a cake that is every bit as delicious! The beauty of the flavor will shine through regardless of the pattern.
Chef’s Insight: Allowing the caramel to cool and set slightly (just a few minutes in the pan) before arranging your pears can make a big difference. This brief cooling period helps the pear slices adhere better to the caramel and stay perfectly in their intended spots throughout the baking process, preventing them from shifting as you add the cake batter.
Make the Cake Batter:
Step 5: In a medium-sized mixing bowl, combine all the dry ingredients for the cake batter: the sifted cake flour, baking powder, baking soda, kosher salt, and your chosen warming spices (cinnamon, cloves, and cardamom). Sift these ingredients together thoroughly to ensure they are well combined and free of any lumps. This step is crucial for an evenly textured cake. Set this bowl aside.
Step 6: In the bowl of a stand mixer fitted with the paddle attachment (or using a large bowl and a hand mixer), cream together the unsalted butter and light brown sugar on medium speed. Beat until the mixture is light, fluffy, and noticeably paler in color. This creaming process incorporates air, which is vital for the cake’s light texture. Next, add the whole eggs one at a time, beating well after each addition and scraping down the sides of the bowl with a spatula to ensure everything is fully incorporated. Add the pure vanilla extract along with the last egg, beating until just combined.
Step 7: Reduce the mixer speed to low. Gradually add the sifted dry flour mixture to the butter-egg mixture, alternating with the buttermilk. Begin and end with the flour mixture. For example, add about one-third of the flour, mix until just combined, then add half the buttermilk, mix, then another third of the flour, mix, the remaining buttermilk, mix, and finally the last third of the flour. Mix only until the ingredients are just combined and no streaks of flour remain. Be careful not to overmix the batter, as this can develop the gluten in the flour and result in a tough cake.
Pro Tip for a Tender Crumb: To guarantee an incredibly tender cake and prevent overmixing, I highly recommend performing the last few folds of the batter by hand using a flexible spatula. This allows for gentle incorporation of any remaining dry ingredients. As an added bonus, if you have any small pear pieces that weren’t perfectly arranged in the pan, you can gently fold them into the cake batter now for extra pear goodness throughout!
Step 8: Gently spoon the prepared cake batter over the arranged pears and caramel in the pan. Using an offset spatula, carefully spread the batter evenly to cover all the pears and reach the edges of the pan, being mindful not to disturb the pear arrangement too much.
Step 9: Transfer the pan to your preheated oven. Bake for approximately 35-40 minutes. The cake is ready when it is beautifully puffed up, golden brown on top, and a wooden cake tester or toothpick inserted into the center comes out with only a few moist crumbs clinging to it (not wet batter). This indicates it is cooked through but still moist.
Step 10: Once baked, immediately remove the cake from the oven. While it’s still warm (this is critical!), run a thin butter knife or an offset spatula carefully around the inner edge of the cake pan to loosen the cake from the sides. Let the cake rest in the pan for exactly 15 minutes. This cooling period allows the caramel to slightly set but remain fluid enough for a clean release. After 15 minutes, place a rimmed baking sheet or a wire rack directly over the cake pan. In one swift, confident motion, carefully flip the cake over onto the sheet or rack. Gently lift the pan away. The caramel will likely continue to drip and seep into the cake, creating a natural, delicious glaze. Ensure you have a rimmed surface to catch any excess caramel. If by chance the caramel is too runny and creates a pool, simply collect it in a jar and spoon it over individual slices when serving. Problem solved, and delicious!
Perfect Flip Timing is Everything: The timing of inversion is crucial for an upside down cake. If you wait too long, the luscious caramel will cool, harden, and set firmly against the pan, making it nearly impossible to release without tearing the cake or leaving the topping behind. Conversely, if you flip the cake too soon after baking, the caramel will be excessively hot and runny, potentially creating a sticky mess on your counter rather than clinging to your cake. The 15-minute cool-down is the sweet spot for a flawless flip!
Chef Lindsey’s Secret Tip: To Peel or Not To Peel?
For the absolute best overall flavor and especially the most desirable texture in your Pear Upside Down Cake, I strongly recommend taking the extra step to remove the pear skins before baking. While you *can* skip this step, the texture of cooked pear skin can be rubbery or slightly tough for some, which detracts from the otherwise tender fruit and delicate cake. Peeling ensures a uniformly smooth, melt-in-your-mouth experience that is truly worth the minimal additional effort.
Frequently Asked Questions About Pear Upside Down Cake
Due to the reactivity of baking soda in the recipe, I advise baking this cake as soon as the batter is mixed. Once baked, allow the cake to cool completely to room temperature. For optimal freshness and to prevent it from drying out, wrap the cooled cake tightly in plastic wrap or store it in an airtight container. It will remain delicious at room temperature for up to 3 days. If you need to store it longer, it can be refrigerated for up to a week. For extended storage, the cake freezes exceptionally well for several months. Thaw frozen cake at room temperature or gently warm it in a low oven.
The perfect timing for inverting an upside down cake is crucial. I recommend allowing the cake to cool in its pan for precisely 15 minutes after it comes out of the oven. This crucial window allows the hot caramel to slightly firm up and release from the pan, yet it remains warm and pliable enough to drip beautifully over the cake. For impeccable results, always bake this cake in a pan lined with parchment paper. Before flipping, run a knife or offset spatula gently around the edges of the pan to ensure full release. Then, confidently invert the cake onto a serving platter or wire rack. Any fruits that may have shifted during the flip can be gently rearranged. If there’s any excess caramel that didn’t adhere to the cake, simply spoon it over the top – it acts as a delectable natural cake soak, adding even more moisture and flavor!
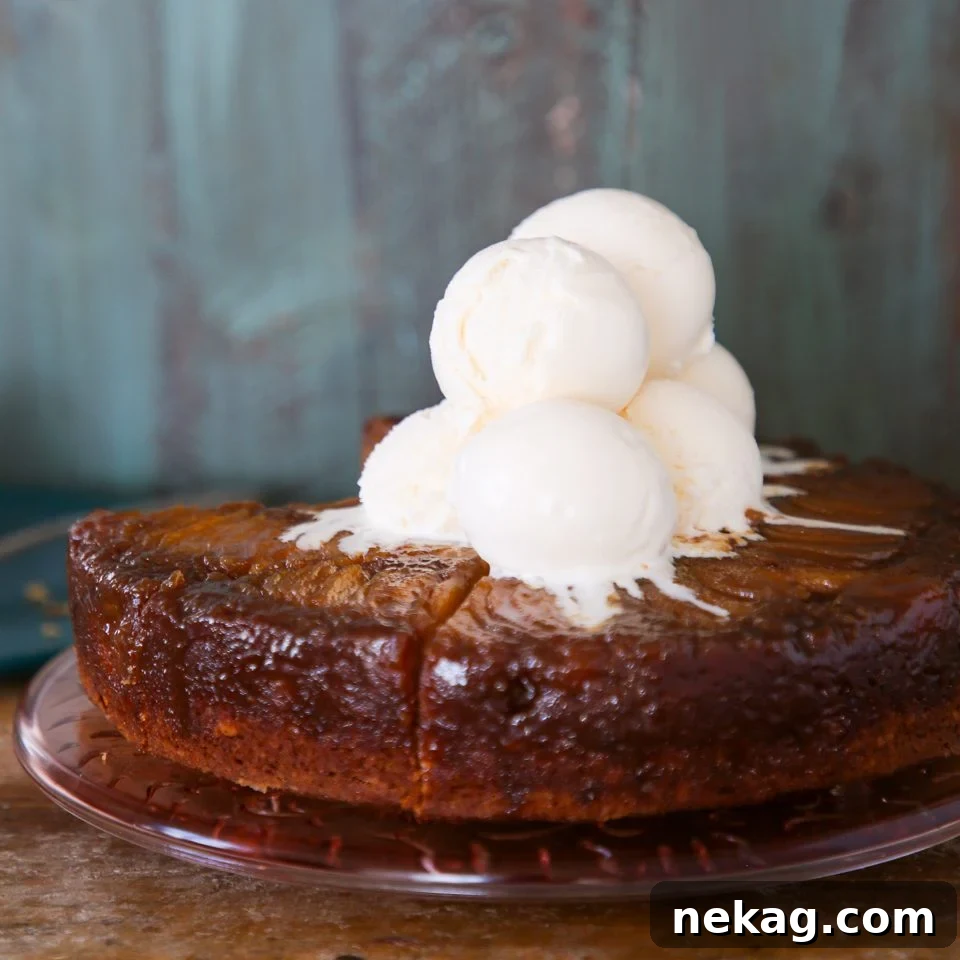
The warming spices and sweet pears in this cake are beautifully complemented by creamy and vanilla-infused accompaniments. For a classic pairing, serve it warm with a generous scoop of luxurious vanilla bean ice cream, just like in the photos. Alternatively, a rich spoonful of silky vanilla bean crème anglaise makes an elegant addition. To truly lean into the caramel aspect, drizzle it with homemade butterscotch sauce or our popular salted caramel sauce. For a fruity counterpoint, I also enjoy serving it with a dollop of flavorful apple butter. And for those who love a bit of texture, a sprinkle of toasted pecans, walnuts, or even a spoonful of our brown sugar streusel topping adds a delightful crunch.
This is a common issue and usually occurs if the cake was allowed to cool for too long in the pan before being inverted. The brown sugar caramel will naturally solidify as it cools, making it very difficult to release. Always invert the cake after exactly 15 minutes of cooling, as per the recipe instructions. Using parchment paper on the bottom of the pan and running a knife around the edges immediately after baking are crucial preventative steps. If it does happen, gently warm the bottom of the pan briefly on a stovetop (very low heat) to loosen the caramel before attempting to flip again.
Several factors can contribute to a dense cake. Overmixing the batter is a primary culprit, as it develops the gluten, leading to a tough texture. Ensure you mix only until the ingredients are just combined. Using old or inactive leavening agents (baking powder or baking soda) can also prevent the cake from rising properly. Always check their expiry dates. Lastly, not sifting the cake flour can result in uneven distribution and a less delicate crumb. Following the tips for using cake flour and sifting are key to achieving that desired light and fluffy consistency.
If you tried this incredible recipe and loved it, please leave a 🌟 star rating and share your thoughts in the comments below. I absolutely love hearing from you; your feedback and comments truly brighten my day!
Pear Upside Down Cake
Chef Lindsey
48 mins
27 mins
1 hr
15 mins
12 people
Comment
Print Recipe
Ingredients
- 3 pears divided
For Caramel:
- 1 cup light brown sugar not packed
- ½ teaspoon cinnamon
- 2 ½ tablespoons unsalted butter
- 1 tablespoon lemon juice
For the Batter:
- 2 cups cake flour
- 2 ¼ teaspoons baking powder
- ½ teaspoon baking soda
- 2 teaspoons cinnamon
- ¾ teaspoon cloves
- ¾ teaspoon cardamom
- 1 teaspoon kosher salt
- 9 ½ tablespoons unsalted butter
- 1 ¼ cups light brown sugar packed
- 2 eggs
- 1 ½ teaspoons vanilla
- 1 cup buttermilk
Instructions
Prepare pears:
-
Prepare the pears by peeling them and slicing them into quarters lengthwise. Slice out the core and then slice crosswise about ¼ inch thick, so you can fan them. Set aside.
Make the Topping:
-
Spray a 9-inch round pan with cooking spray and then line with parchment paper. Set aside, and preheat the oven to 325°F convection (with the fan) or 350°F conventional (no fan).
-
Make the caramel, which will be your first layer in the pan. To do this, melt butter in a small saucepot. Add lemon juice, cinnamon, and brown sugar. Cook until boiling and sugar has dissolved and caramelized. It will be a medium amber color, like leaves in Fall. Pour into the prepared pan and spread out evenly.
-
Arrange pear slices on top artfully. Or don’t! The cake will be just as delicious with the pears scattered haphazardly.
Make the cake:
-
In a medium bowl, sift together cake flour, baking powder, baking soda, salt, and spices. Set aside.
-
In the bowl of a stand mixer, cream butter and brown sugar until light and fluffy. Beat in the eggs one at a time, scraping down between each addition. Add the vanilla with the last egg.
-
Reduce the mixer speed to low and alternately add the flour mixture with the buttermilk, beginning and ending with flour.
-
Pour the batter into the prepared pan on top of the pears and then spread it out evenly with an offset spatula.
-
Bake in the preheated oven for 35-40 minutes or until puffed, golden brown, and a cake tester or toothpick inserted into the center comes out with a few clinging crumbs.
-
Release the cake from the sides of the pan while still warm by running a butter knife or offset spatula around the edges. After 15 minutes, flip the cake out onto a rimmed baking sheet or wire rack. The caramel will continue to drip, so make sure you have something to catch it!
Video
Notes
Presentation – A sharp serrated knife will slice right through the oddly shaped pear pieces and tender cake for clean, elegant slices.
Technique – I prefer to finish the last few folds of batter with a spatula to prevent overmixing. Any spare pear pieces can be folded into the batter.
Storage – Cool completely, then wrap tightly and store at room temperature for up to 3 days, refrigerated for up to a week, or frozen for several months.
Nutrition
Calories: 366kcal
|
Carbohydrates: 60g
|
Protein: 4g
|
Fat: 13g
|
Saturated Fat: 8g
|
Polyunsaturated Fat: 1g
|
Monounsaturated Fat: 3g
|
Trans Fat: 1g
|
Cholesterol: 62mg
|
Sodium: 461mg
|
Potassium: 171mg
|
Fiber: 2g
|
Sugar: 43g
|
Vitamin A: 421IU
|
Vitamin C: 3mg
|
Calcium: 118mg
|
Iron: 1mg
Dessert
American
366
Love this recipe? Leave a comment below!
Before You Go: Explore More Delicious Recipes
I genuinely hope you enjoyed baking and savoring this professional chef-tested recipe for Pear Upside Down Cake. It’s a true labor of love designed to bring joy to your kitchen and delight to your table.
If you’re eager to expand your baking repertoire, be sure to explore our collection of other delicious, chef-developed cake recipes. From the timeless appeal of my best carrot cake recipe to innovative seasonal delights, there’s a cake for every occasion and craving. And, of course, no slice of warm cake is complete without the perfect accompaniment! Discover our array of exquisite ice cream recipes, meticulously crafted to pair wonderfully with your freshly baked creations. Happy baking, and enjoy every delightful bite!