
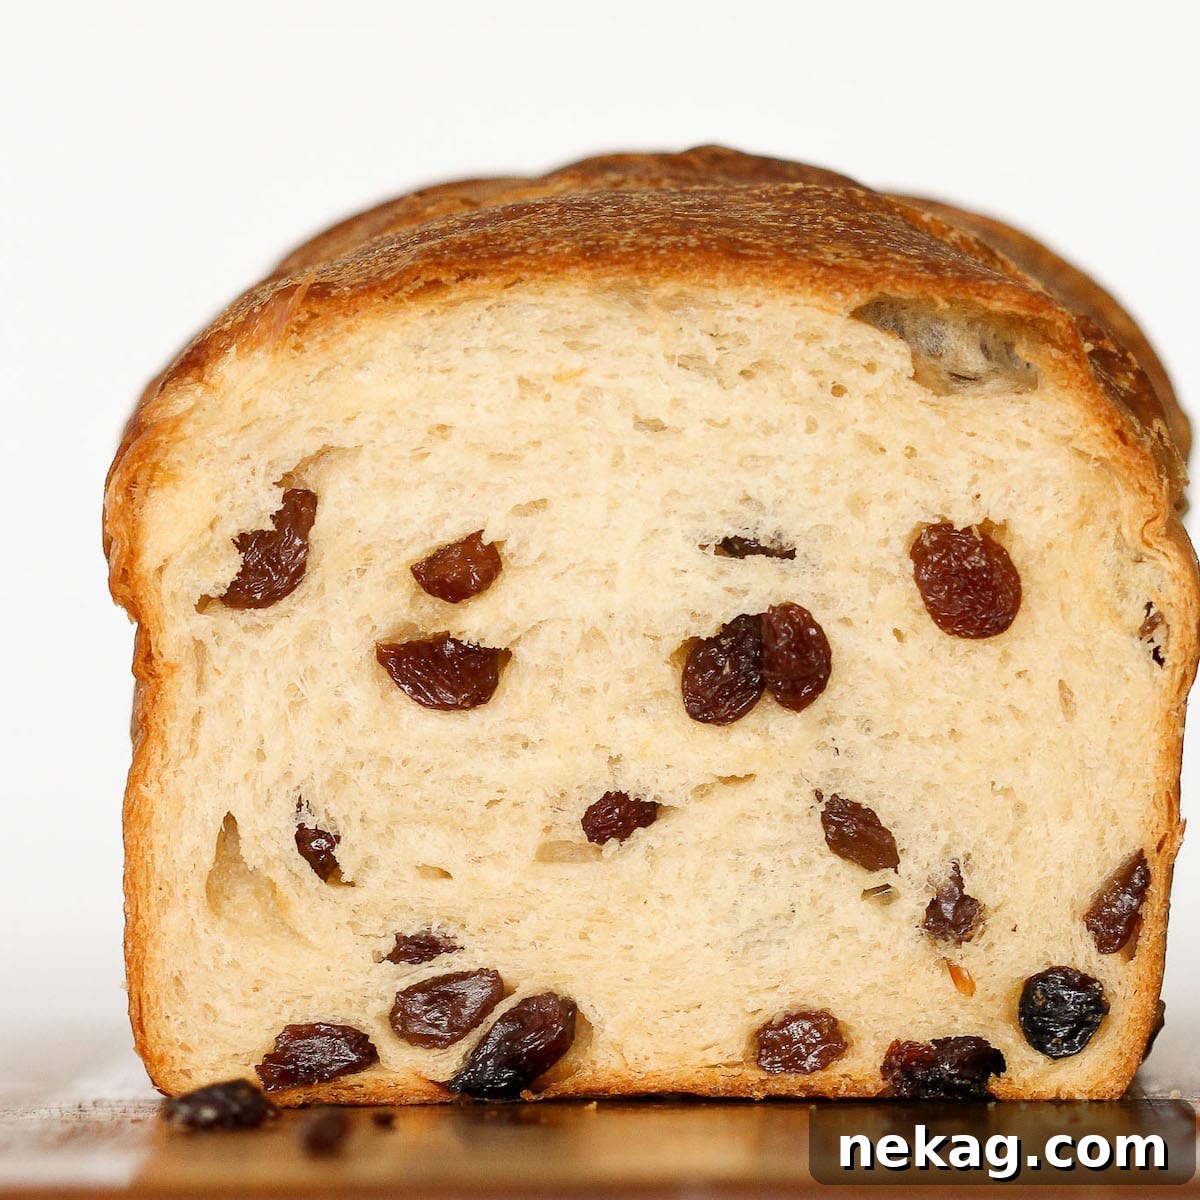
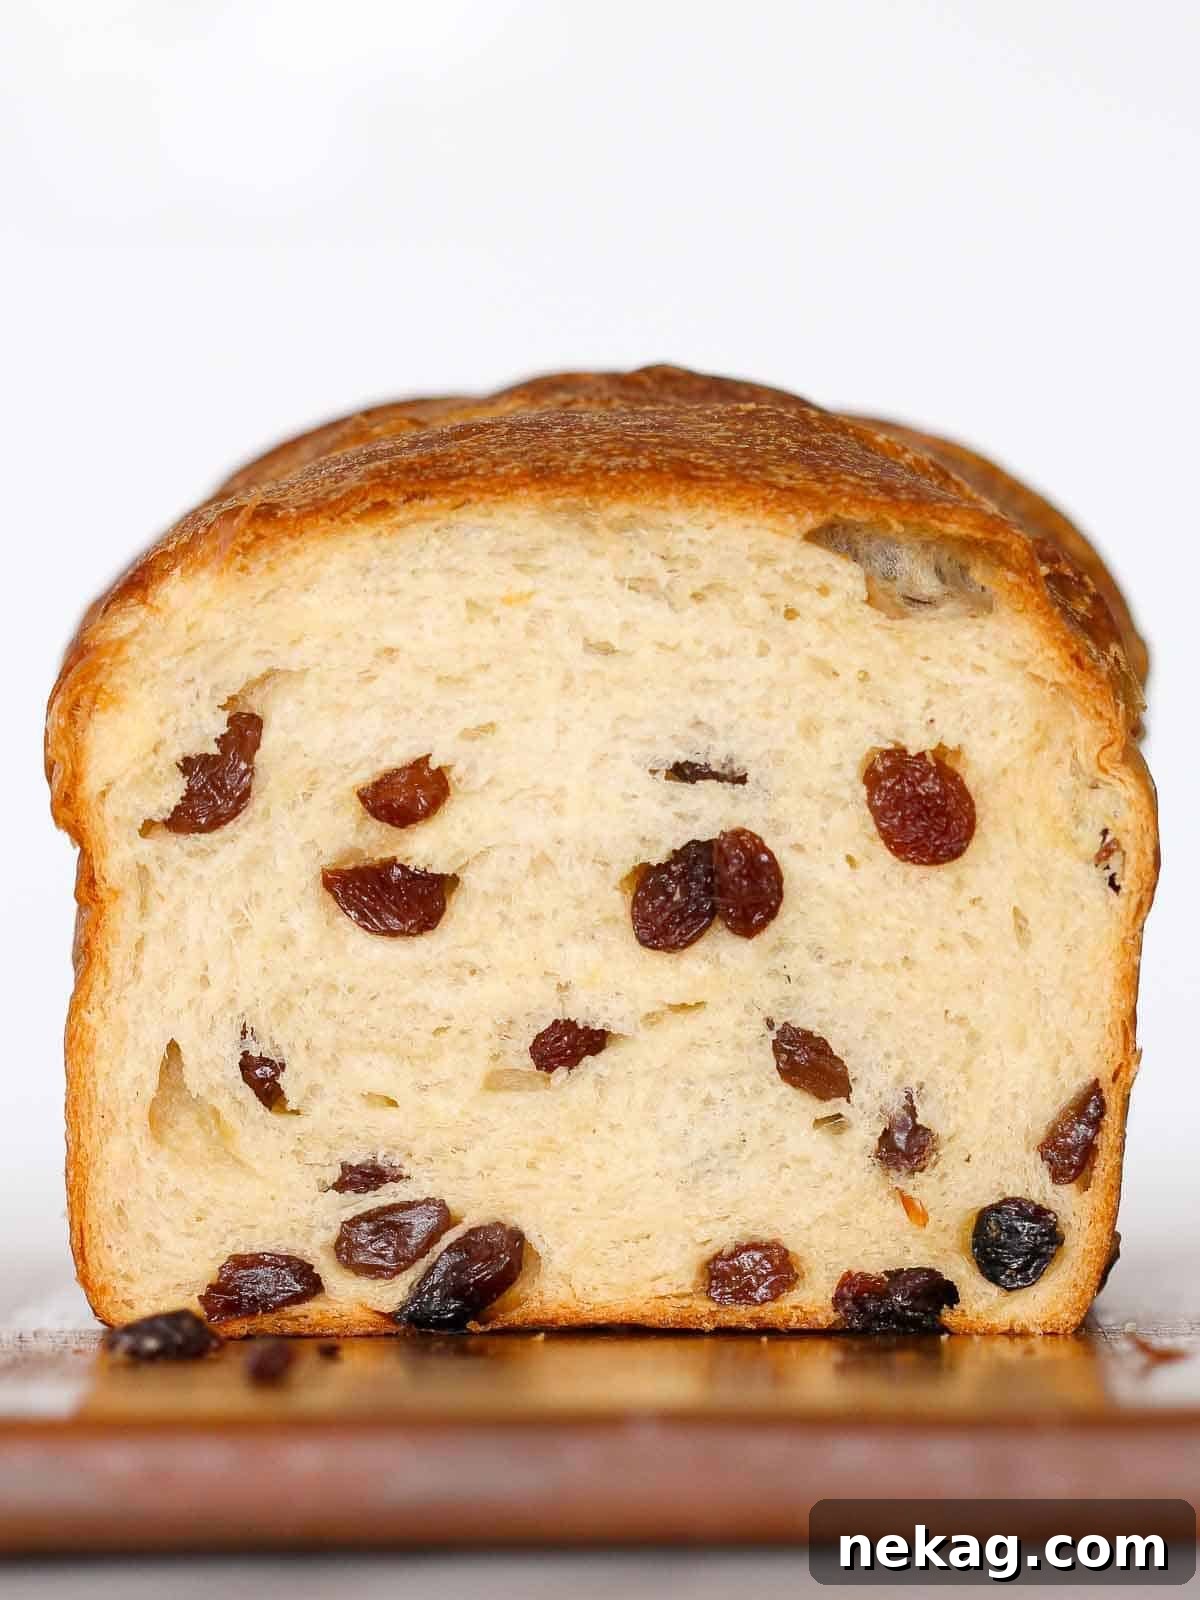
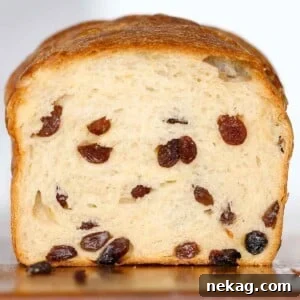
Indulge in the ultimate homemade treat with this incredible sourdough raisin bread. It’s an exceptionally soft, delightfully chewy, and richly buttery bread, generously packed with sweet, plump raisins! Enhanced with a touch of honey, its subtle sweetness makes it the quintessential bread for a hearty breakfast, a delightful brunch, or a satisfying afternoon snack. Forget store-bought versions – this recipe promises a truly rewarding baking experience and a loaf that will disappear fast!
A Quick Look At The Recipe
This is a brief summary of the recipe. Jump to the recipe for full details and precise measurements.
Jump to Recipe
Prep Time
5 hours
Cook Time
35 minutes
Total Time
5 hours 35 minutes
Servings
12 Slices
Difficulty
Moderate
Calories *
436 kcal per serving
Technique
Mix sponge, mix dough, add butter, divide, shape, proof and bake.
Flavor Profile
Soft, buttery, and subtly tangy sourdough bread, richly studded with sweet raisins.
* Based on nutrition panel, approximate values.
Summarize & Save this content on
ChatGPT
Google AI
Perplexity
Grok
“Exactly what I was looking for, thank you! This recipe turned out absolutely perfect and has quickly become a family favorite. Can’t wait to try your Irish soda bread next!”
Sarah ⭐⭐⭐⭐⭐
Why You’ll Fall in Love with This Sourdough Raisin Bread
This isn’t just any bread; it’s a testament to the joy of baking and the magic of sourdough. Here’s why this particular sourdough raisin bread recipe is destined to become a staple in your kitchen:
- A Luxurious Brioche-Style Treat: What makes this bread truly exceptional is its brioche base. We take the inherent depth of sourdough flavor and elevate it with a generous amount of butter, creating a dough that is unbelievably rich and tender. The butter doesn’t just add a soft richness to the interior; it also contributes to a beautifully delicate and soft crust that’s a pleasure to bite into.
- Incredibly Soft, Light, and Moist Texture: Achieving that coveted light and airy crumb is key, and this recipe delivers. By utilizing a “sponge” pre-ferment, we give the yeast an optimal environment to develop, contributing to the bread’s remarkable loft. Combined with the natural moisture from honey, the enriching touch of milk powder, and the softening effect of butter, the resulting crumb is exquisitely tender, almost bordering on decadent. Each slice melts in your mouth!
- Effortless Same-Day Sourdough Baking: Don’t let the idea of sourdough intimidate you with lengthy, multi-day processes. This recipe is designed for convenience, allowing you to enjoy freshly baked, irresistible sourdough raisin bread on the same day you start. You can begin your preparation in the morning and have warm, fragrant loaves ready to savor by late afternoon, making it perfect for weekend baking or even a special weeknight treat.
- Bursting with Sweet Raisins: We believe raisin bread should actually have raisins in every bite! This recipe uses a full pound of raisins across two loaves, ensuring that each slice is generously studded with sweet, juicy raisins. No more searching for that elusive raisin – they are abundant and evenly distributed, providing a delightful burst of sweetness with every mouthful.
Table of Contents
- Why You’ll Fall in Love with This Sourdough Raisin Bread
- Essential Ingredients & Smart Substitutions
- Delicious Variations for Your Sourdough Raisin Bread
- Professional Tips for Perfect Sourdough Baking
- Understanding Pre-ferments: Sourdough Starter & Sponge Explained
- Step-by-Step: How to Make Sourdough Raisin Bread
- Chef Lindsey’s Expert Recipe Tip
- Sample Baking Schedule for Your Convenience
- Sourdough Raisin Bread: Your FAQs Answered
- More Irresistible Bread Recipes to Try
- Full Sourdough Raisin Bread Recipe Card
- Before You Go: Explore More Baking Delights
For me, bread is more than just food; it’s a passion, a comfort, and a fundamental joy – second only to my family 🥰. Every single bite of this soft, tender, buttery sourdough raisin bread is a harmonious blend of flavors. The generous amount of sweet, plump raisins are perfectly balanced by the subtle tang and depth of the light sourdough flavor, creating an unforgettable experience.
Are you eager to expand your homemade bread repertoire beyond the basics? This sourdough raisin bread is a fantastic next step. If you’re looking for other delightful bread ideas, why not start with this easy dinner roll recipe or explore our savory sourdough rolls? They are both ideal for elevating weeknight dinners or adding a special touch to celebratory occasions! For your everyday bread needs, you might also love this incredibly tender potato bread or a wholesome whole wheat sandwich bread recipe. The world of homemade bread is vast and rewarding, and this raisin sourdough is a true gem.
Essential Ingredients & Smart Substitutions
Crafting the perfect sourdough raisin bread begins with high-quality ingredients. Here’s what you’ll need and some helpful substitution tips:
- Water: The foundation of any good bread. Use filtered water if your tap water has a strong chlorine taste, as chlorine can inhibit yeast activity.
- Active Sourdough Starter: This recipe hinges on an active and robust sourdough starter for its unique flavor. An active starter should be bubbly, fragrant, and at its peak activity, typically 4-8 hours after feeding. If you don’t have a sourdough starter or prefer not to make one, consider my delightful traditional raisin bread recipe, or simply add raisins to a classic brioche bread recipe or brioche bun recipe for a non-sourdough sweet bread option.
- All-Purpose Flour: A versatile choice that provides a tender crumb. You can certainly substitute bread flour for a slightly chewier texture and higher protein content, which can improve gluten development. However, I advise against substituting with whole wheat flour in this specific recipe as it absorbs liquid differently and will drastically alter the texture. For a wholesome alternative, explore this whole wheat sourdough bread recipe and then add your raisins!
- Honey: This natural sweetener (I recommend a good quality honey) serves a dual purpose. It provides vital food for the yeast, helping to kickstart and sustain the fermentation process, while also imparting a lovely, subtle sweetness and moisture to the finished bread.
- Active Dry Yeast: While sourdough provides incredible depth of flavor, the addition of active dry yeast ensures a reliable and quicker rise, making this a fantastic same-day sourdough option. If you have fresh yeast, use double the weight; for instant yeast, use half the weight.
- Dry Milk Powder: Milk powder is a secret ingredient for richness and a soft crumb without adding extra liquid to the dough. It contributes to a beautiful golden crust and improved shelf life. If you don’t have milk powder, you can omit it and replace the water in the recipe with an equal amount of whole milk.
- Kosher Salt: Essential for flavor balance and controlling fermentation. Always use kosher salt or another coarse sea salt for best results; fine table salt has a different density and saltiness, requiring adjustment.
- Unsalted Butter: The key to the brioche-like richness and incredible tenderness. Using unsalted butter allows you to control the overall salt content of the bread. Ensure it’s cold and cubed for proper incorporation.
- Raisins: Much like my cherished old-fashioned oatmeal raisin cookies, this bread is truly packed with raisins. We’re talking a full pound of juicy raisins for two loaves! I believe a raisin bread should deliver a burst of fruity sweetness in almost every bite, and hate when raisins fall out or are unevenly distributed. This recipe guarantees a generous and consistent raisin experience.
Refer to the comprehensive recipe card below for the complete ingredient list and precise quantities.
Delicious Variations for Your Sourdough Raisin Bread
While the classic sourdough raisin bread is sublime on its own, it also serves as a fantastic base for creative culinary explorations. Here are some delightful variations to customize your bake:
- Embrace the Cinnamon Swirl: For a truly decadent sourdough cinnamon raisin bread, introduce a fragrant cinnamon swirl. After the initial bench rest, gently roll your dough out into an approximate 8×12-inch rectangle. Lightly brush the surface with a small amount of milk or water to help the filling adhere. Then, generously sprinkle a mixture of cinnamon and sugar all over the dough, leaving a small border clear at one long edge. Alternatively, for an even richer experience, you can prepare the filling from my beloved sourdough cinnamon rolls. Tightly roll the dough lengthwise from the filled edge towards the clear edge, pinching the seam firmly closed. Place the log seam-side down in your prepared loaf pan and proceed with the final proof. For a visual guide, refer to this excellent cinnamon swirl bread recipe.
- Experiment with Diverse Mix-Ins: The beauty of this recipe is its adaptability to various dried fruits and nuts. You can easily substitute the raisins with dried currants, similar to those found in my festive sourdough hot cross buns. Consider dried cherries, as in my delightful cherry sourdough bread, or even freeze-dried strawberries or blueberries for a burst of vibrant flavor. For added texture and nutty notes, try incorporating some toasted pecans, walnuts, or even mini chocolate chips for a sweet indulgence. Of course, if you’re in the mood for a simpler loaf, you can always omit the raisins and create my versatile easy sourdough bread recipe!
- Transform into Individual Rolls: This versatile dough isn’t limited to loaves! You can easily shape it into individual rolls, much like my popular potato rolls. This is perfect for portion control or for serving alongside a meal. Imagine the delight of turning these into sourdough raisin cinnamon rolls using the swirl technique described above – a truly irresistible treat for breakfast or dessert!
Professional Tips for Perfect Sourdough Baking
Achieving bakery-quality sourdough raisin bread at home is within reach with these expert tips:
- Master Your Levain Type: It’s crucial to understand your sourdough starter. This recipe is specifically formulated for a *liquid levain* (a more hydrated starter, typically 1:1:1 ratio of starter, flour, water by weight). If you currently maintain a stiff levain (which has less water), you must adjust your feeding the night before to create a liquid levain at the specified hydration for this recipe. A stiff levain will significantly alter the dough’s consistency and the final bread’s texture due to its different hydration level. Ensure your starter is active and bubbly before incorporating it.
- Don’t Skip the Preshaping and Bench Rest: These steps are more than just pauses in the process; they are fundamental for excellent crumb structure and ease of shaping. The preshape allows the gluten network, which you’ve painstakingly developed during mixing, to begin to acclimate to its eventual final form. It helps to strengthen the gluten strands, building tension that contributes to a beautiful rise. Following this, the bench rest is a vital relaxation period, giving the gluten a chance to soften and become more extensible. Without this rest, trying to perform the final shape would be like fighting against a rubber band – the dough would tear, and you’d struggle to achieve a tight, smooth surface.
- Embrace the Precision of a Kitchen Scale: Baking, especially with sourdough, is a science as much as an art. Volume measurements (cups and spoons) are notoriously inconsistent; a cup of flour can vary significantly in weight depending on how it’s scooped or settled. This inconsistency can drastically impact the hydration and overall balance of your dough. Even an extra tablespoon of flour or water can alter the entire recipe. Investing in a reliable kitchen scale and measuring all ingredients by weight will yield far more consistent, professional results and eliminate common baking frustrations.
Understanding Pre-ferments: Sourdough Starter & Sponge Explained
Pre-fermentation is a fundamental technique in bread making that initiates the natural fermentation process of yeast (whether wild or commercial) in advance of mixing the final dough. This step deepens flavor, improves texture, and can even shorten overall proofing times. I elaborate on this crucial concept further in my panettone recipe, where it plays an equally important role. In this sourdough raisin bread recipe, we utilize two distinct types of pre-ferments:
- Sourdough Starter (Liquid Levain): This is perhaps the most well-known form of pre-ferment. Your active sourdough starter is a living culture of wild yeasts and beneficial bacteria that has been cultivated over weeks, months, or even decades. It’s responsible for the characteristic tangy flavor and unique texture of sourdough bread. By using a portion of this mature culture, we introduce a complex flavor profile and robust leavening power into our dough.
- The Sponge: The second pre-ferment in this recipe is a “sponge.” A sponge is created by combining a portion of the recipe’s flour, all of the commercial yeast, the specified water, and importantly, some honey and a portion of the sourdough starter itself. The primary role of this sponge is to give both the commercial yeast and the sourdough starter a vigorous head start. It allows them to become highly active and bubbly before the remaining ingredients are added, which significantly shortens the overall mixing and proofing process for a same-day bake. Additionally, as the flour and water in the sponge begin to hydrate, they naturally form a preliminary gluten network, much like an autolyse. This early gluten development contributes to a more extensible dough and a lighter, airier final crumb.
Working with these two pre-ferments creates a dynamic dough that’s full of flavor, has excellent structure, and is ready to bake more quickly than a traditional long-fermented sourdough.
Step-by-Step: How to Make Sourdough Raisin Bread
Follow these detailed instructions to create your own irresistible light and buttery sourdough raisin bread. For precise measurements and a full overview, please refer to the recipe card located further down the page.
Prepare Your Liquid Levain:
Step 1: The night before, or approximately 12-14 hours before you plan to mix your main dough, you’ll need to prepare your liquid levain. In a clean, medium-sized container, carefully combine the specified amount of all-purpose flour, water, and a small portion of your active sourdough culture (starter). Stir thoroughly with a spoon or spatula until no dry streaks of flour remain and the mixture is smooth. Cover the container loosely with a lid or plastic wrap to allow it to breathe, and let it sit at room temperature (ideally between 70-75°F / 21-24°C) until it has visibly doubled in size and is active and bubbly.
CHEF’S TIP: This recipe intentionally calls for a slightly larger amount of liquid levain than what’s strictly required for the dough. This accounts for any starter that might stick to the mixing bowl, spatulas, or your hands, ensuring you have the full amount needed for the recipe. Plus, it leaves you with a small amount (around 10g) to use as a “mother” to feed for your next batch, keeping your precious starter alive and thriving!
Prepare the Sponge:
Step 2: In a large mixing bowl (or the bowl of your stand mixer if using), carefully dissolve the active dry yeast in the warm water and honey. Whisk gently to ensure that the yeast is completely hydrated and there are no lingering lumps. Next, add the portion of all-purpose flour designated for the sponge, along with the prepared liquid sourdough starter. Stir thoroughly.
CHEF’S TIP: For the best results, take your time mixing the sponge. Ensure there are absolutely no dry pockets or lumps of flour. I often find it easiest to mix this initial stage by hand, using a sturdy spoon or a Danish dough whisk, as it allows for better control and ensures all ingredients are properly incorporated.
Step 3: Once mixed, cover the bowl tightly with plastic wrap or a clean kitchen towel. Place the covered bowl in a warm, humid environment (a proofing oven setting, a warm spot near a sunny window, or inside a turned-off oven with the light on are good options) until the sponge has become noticeably bubbly, expanded significantly, and roughly doubled in volume. This typically takes 30-60 minutes, depending on your room temperature and yeast activity.
Prepare the Dough:
Step 4: Once your sponge is active and bubbly, scrape all of its contents into the bowl of a stand mixer. If you mixed the sponge directly in your stand mixer bowl, simply continue. Fit the mixer with the paddle attachment. Add the remaining all-purpose flour, kosher salt, and dry milk powder to the bowl. Begin mixing on the lowest speed to gently incorporate these dry ingredients with the sponge. Continue mixing until a shaggy, cohesive mass forms and there are no longer any visible dry patches of flour clinging to the sides of the bowl. At this point, switch from the paddle attachment to the dough hook attachment.
Step 5: Increase the mixer speed to medium (typically speed 3 or 4 on a KitchenAid) and continue to mix the dough for approximately 10-15 minutes. During this time, the dough will transform from a shaggy mass into a smooth, elastic, and supple ball that pulls away from the sides of the bowl. To ensure proper gluten development, perform the “window pane test.”
THE WINDOW PANE TEST: This essential test determines if your dough has developed sufficient gluten. To perform it, pinch off a small piece of dough (about the size of a golf ball). Gently stretch the dough outwards with your fingers, rotating it slowly. If you can stretch it thin enough to see light pass through it without tearing – creating a translucent “window pane” – your dough is ready. If it tears easily before becoming translucent, it needs more mixing time. Remember, pulling too aggressively or using a piece of dough that is too small can also cause tearing; if in doubt, grab a slightly larger piece and try again with a gentler touch.
Step 6: With the dough now smooth and elastic, it’s time to incorporate the butter. Add the cold, cubed unsalted butter to the dough, one cube at a time, while the mixer is running on medium speed. Continue mixing until all the butter is fully incorporated into the dough and the dough once again looks smooth and cohesive. Finally, reduce the mixer speed to low and add the raisins. Mix just until they are evenly distributed throughout the dough and mostly tucked inside, avoiding excessive mixing that could break them apart.
Proofing and Shaping:
Step 7: Bulk Proof: Lightly flour your work surface and gently turn the dough out onto it. Knead the dough briefly into a smooth, round ball. Lightly grease a large bowl with a neutral oil (like vegetable or grapeseed oil) and place the dough ball inside, turning it once to coat. Cover the bowl tightly with plastic wrap or a damp kitchen towel. Place the dough in a warm environment (75-80°F / 24-27°C is ideal) and allow it to bulk proof until it has visibly doubled in size. If your oven has a “proof” setting, this is an excellent time to utilize it.
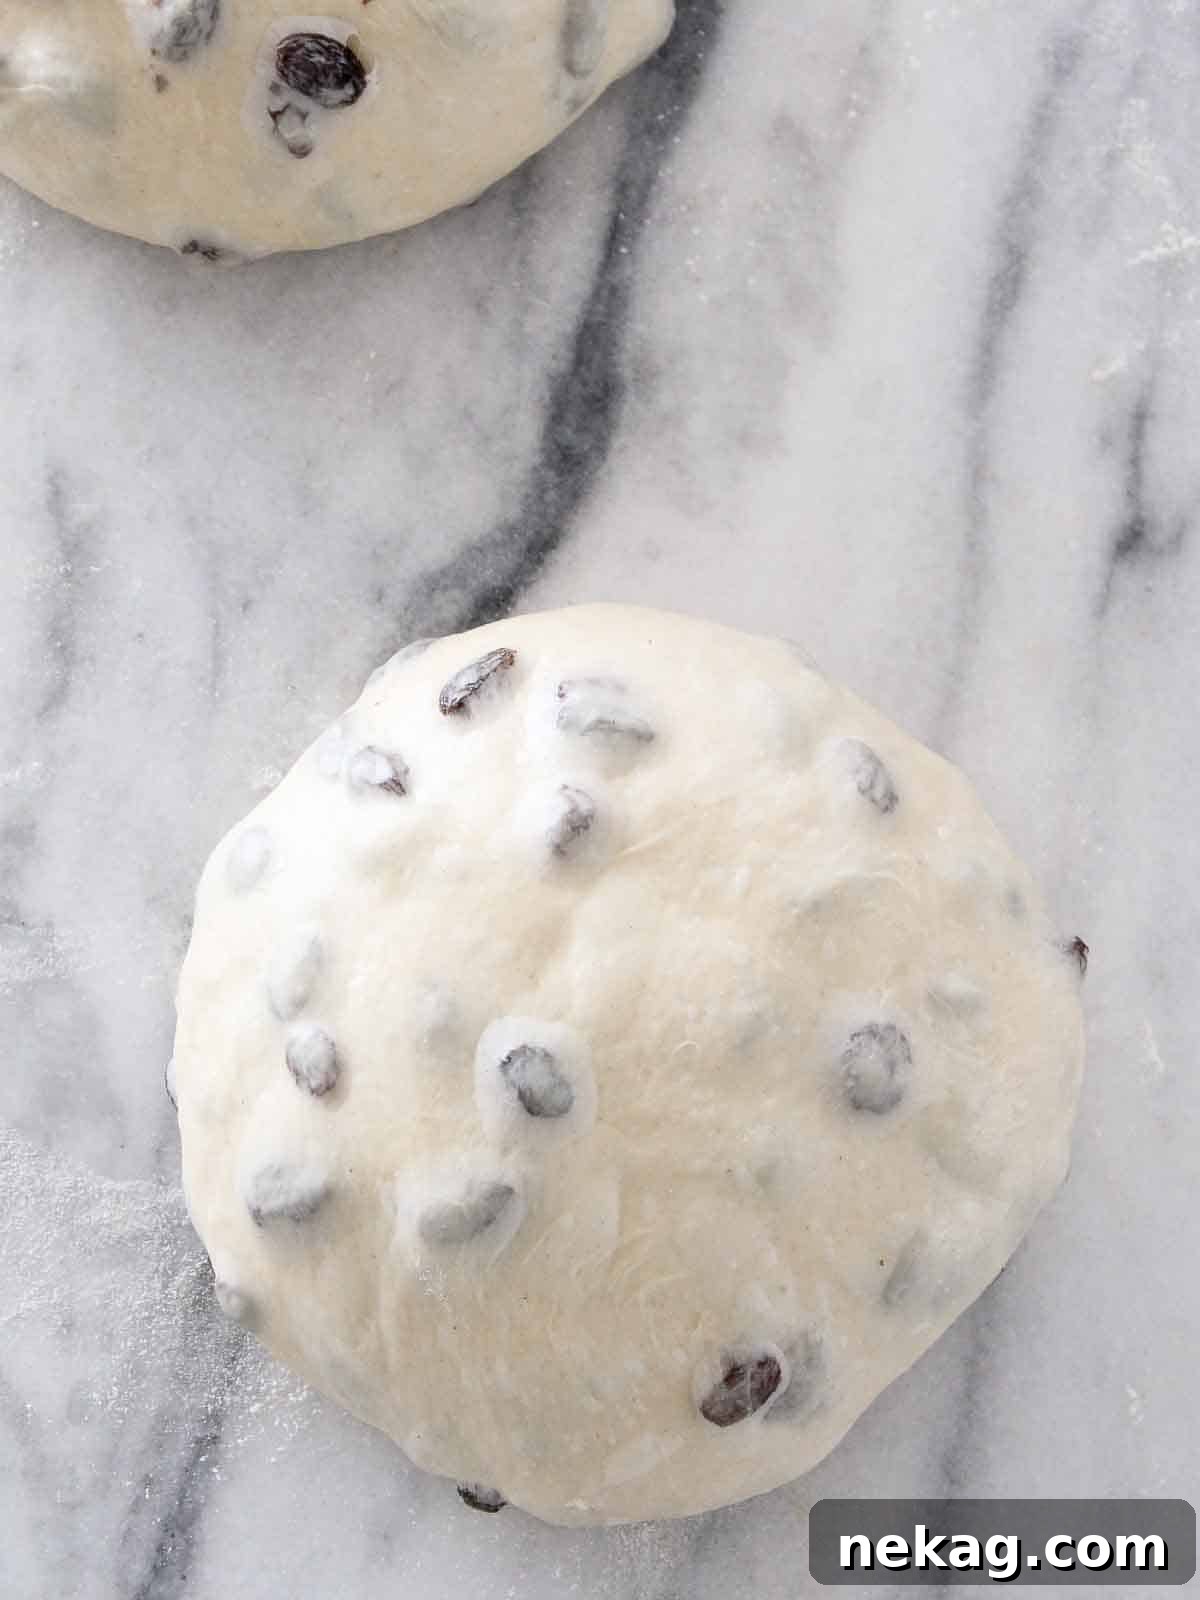
Step 8: Preshape: Once the dough has doubled, gently turn it out onto a lightly floured surface. Divide the dough into two equal portions, aiming for approximately 790g each for standard loaf pans. Now, preshape each portion into a boule (a round shape). To do this, fold each of the four sides of the dough towards the center, creating tension on the top surface. Flip the dough over so the seam is underneath. Using both hands, gently pull the dough towards yourself, tucking the edges underneath, and rotating a quarter turn as you go. Continue this motion until you have a smooth, tight, round dough ball. Cover the preshaped boules with plastic wrap or a clean towel and let them rest on the counter for 10 minutes. This “bench rest” allows the gluten to relax, making the final shaping much easier. (Photo 1)
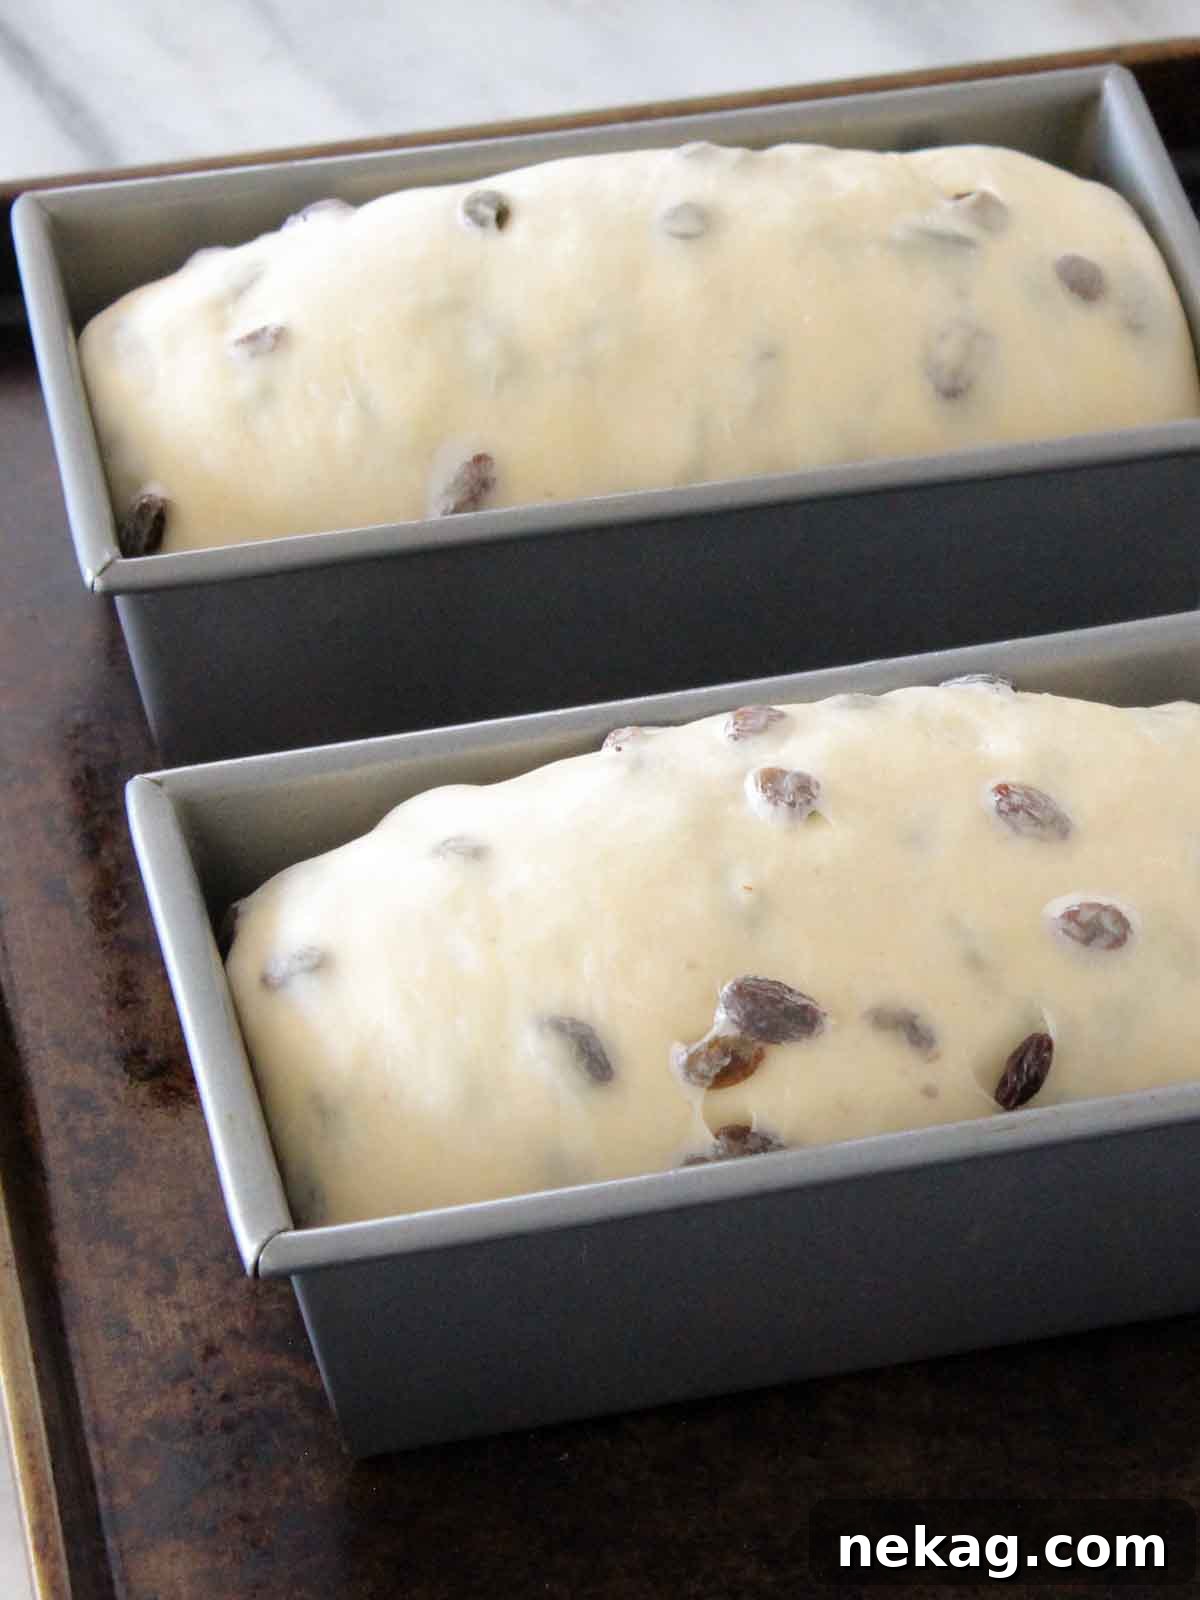
Step 9: Final Shape: After the bench rest, flip one preshaped dough ball over so the seam is facing upwards. Gently grab two corners of the dough and carefully lift it, allowing gravity to stretch the dough downwards into a rough rectangle. Place it back on your lightly floured counter. Fold the top third of the dough down towards the center, pressing firmly to seal. Rotate the dough 180 degrees and repeat the fold with the other side. Now, starting from one end, use the heel of your dominant hand and the thumb of your other hand to grab the top edge of the dough. Fold it over your thumb towards the center, creating a tight seam, and press down firmly with the heel of your hand to seal it. Repeat this “thumb-folding” process all the way down the length of the loaf, ensuring each fold is tight and sealed, creating a taut surface. Once shaped, carefully transfer the dough log, seam-side down, into your prepared greased loaf pan. Repeat with the second dough portion. (Photo 2)
Final Proof and Bake:
Step 10: Preheat your oven to 350°F (175°C) approximately 20-30 minutes before you anticipate baking. This ensures the oven is thoroughly heated and maintains a consistent temperature when the bread goes in.
Step 11: Final Proof: Cover the loaf pans loosely with plastic wrap or a clean cloth and place them in a warm, humid location for their final proof. The dough should continue to rise until it has significantly doubled in size and feels light and airy to the touch. A good indicator is when the dough gently crests over the rim of the loaf pans. This final proof typically takes 1.5-2.5 hours, depending on your room temperature and starter activity. Be patient – a proper final proof is crucial for a great crumb!
Step 12: For an extra special touch, creating a beautifully shiny and soft crust, you can optionally brush the top of each dough loaf with a little melted unsalted butter just before baking. This step also enhances the golden-brown color.
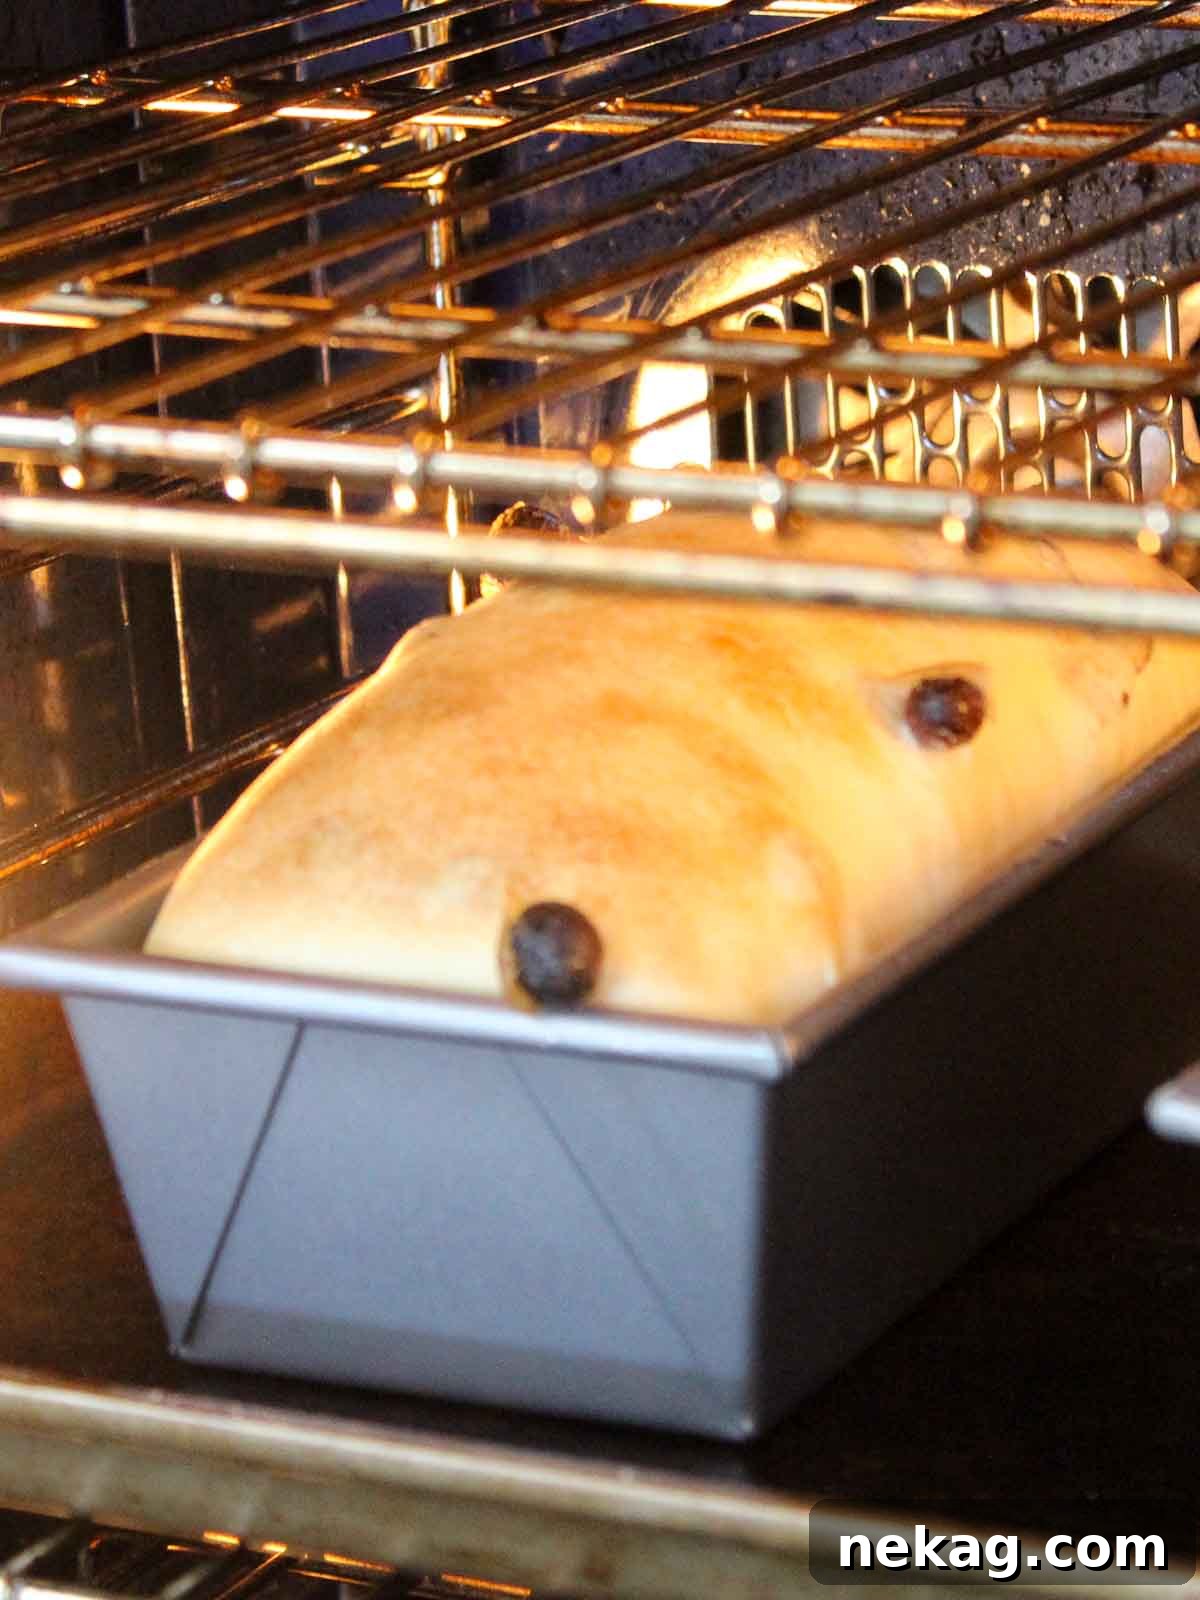
Step 13: Carefully place the loaf pans into the preheated oven. Bake for approximately 30-35 minutes, or until the internal temperature of the bread, measured with an instant-read thermometer inserted into the center of the loaf, reaches 186°F (86°C). The crust should be golden brown and sound hollow when tapped on the bottom.
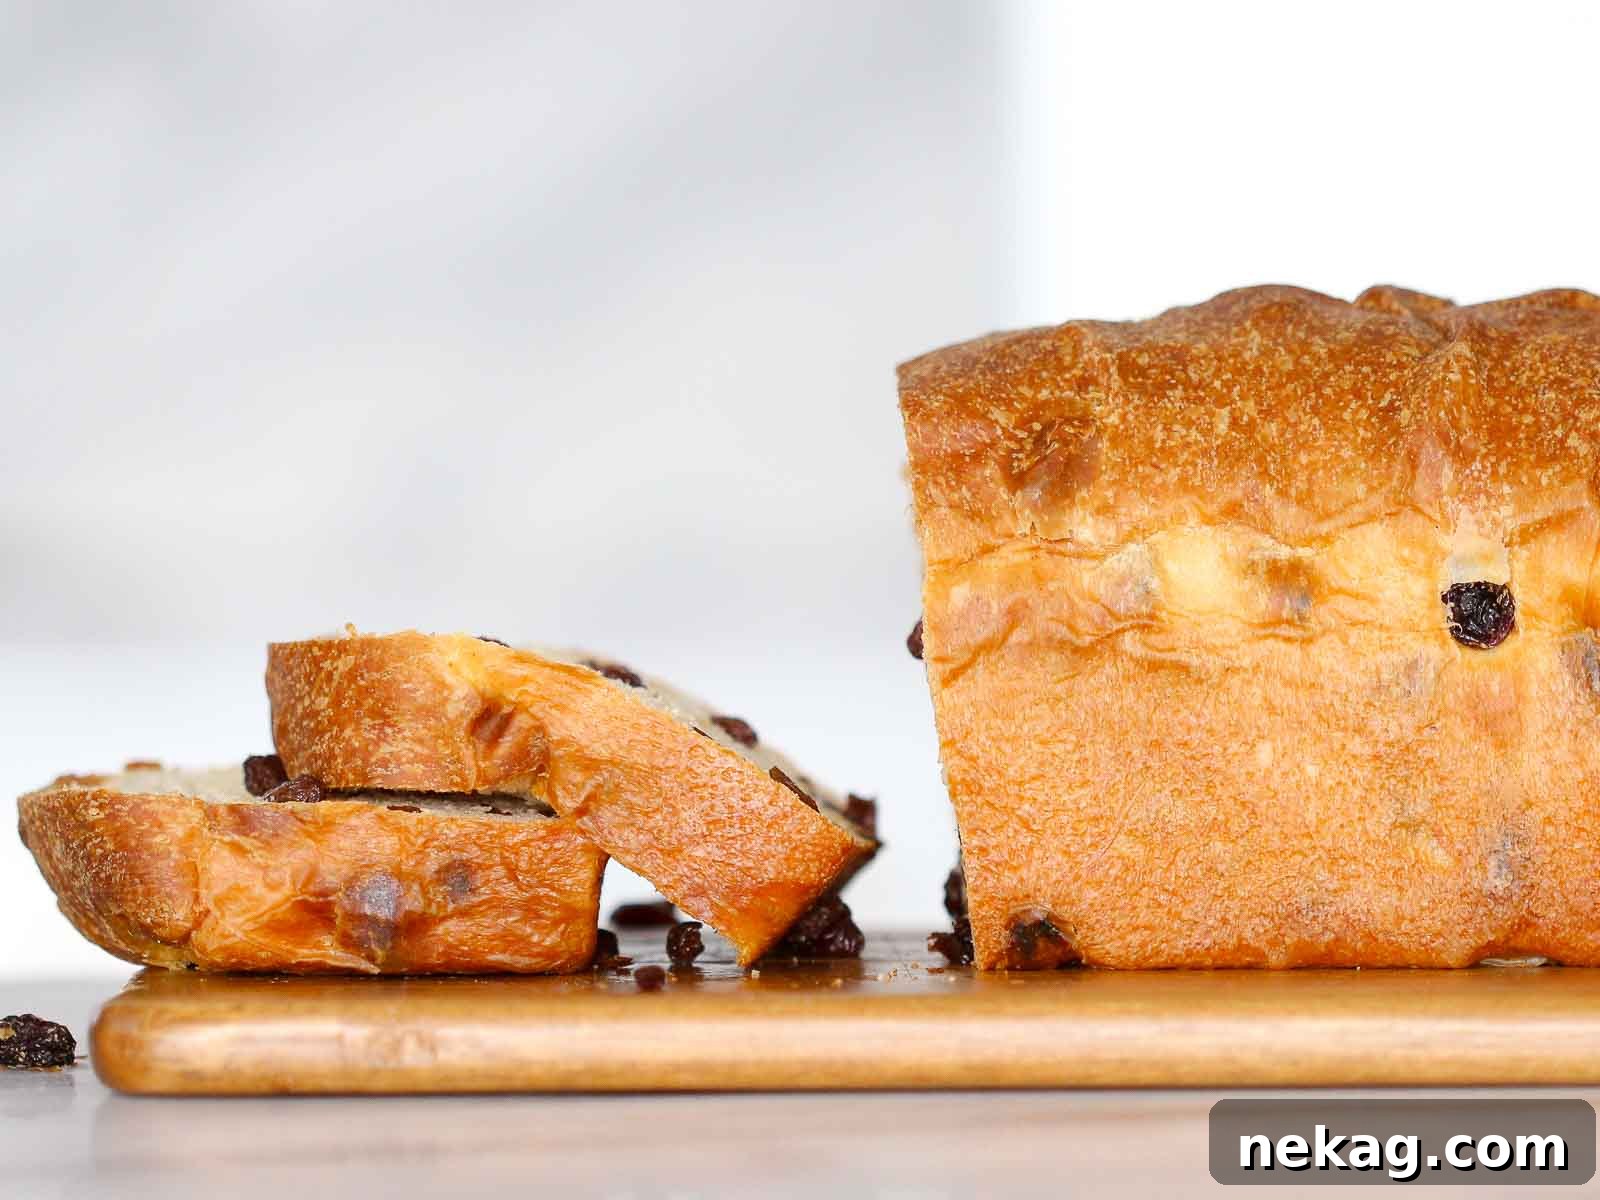
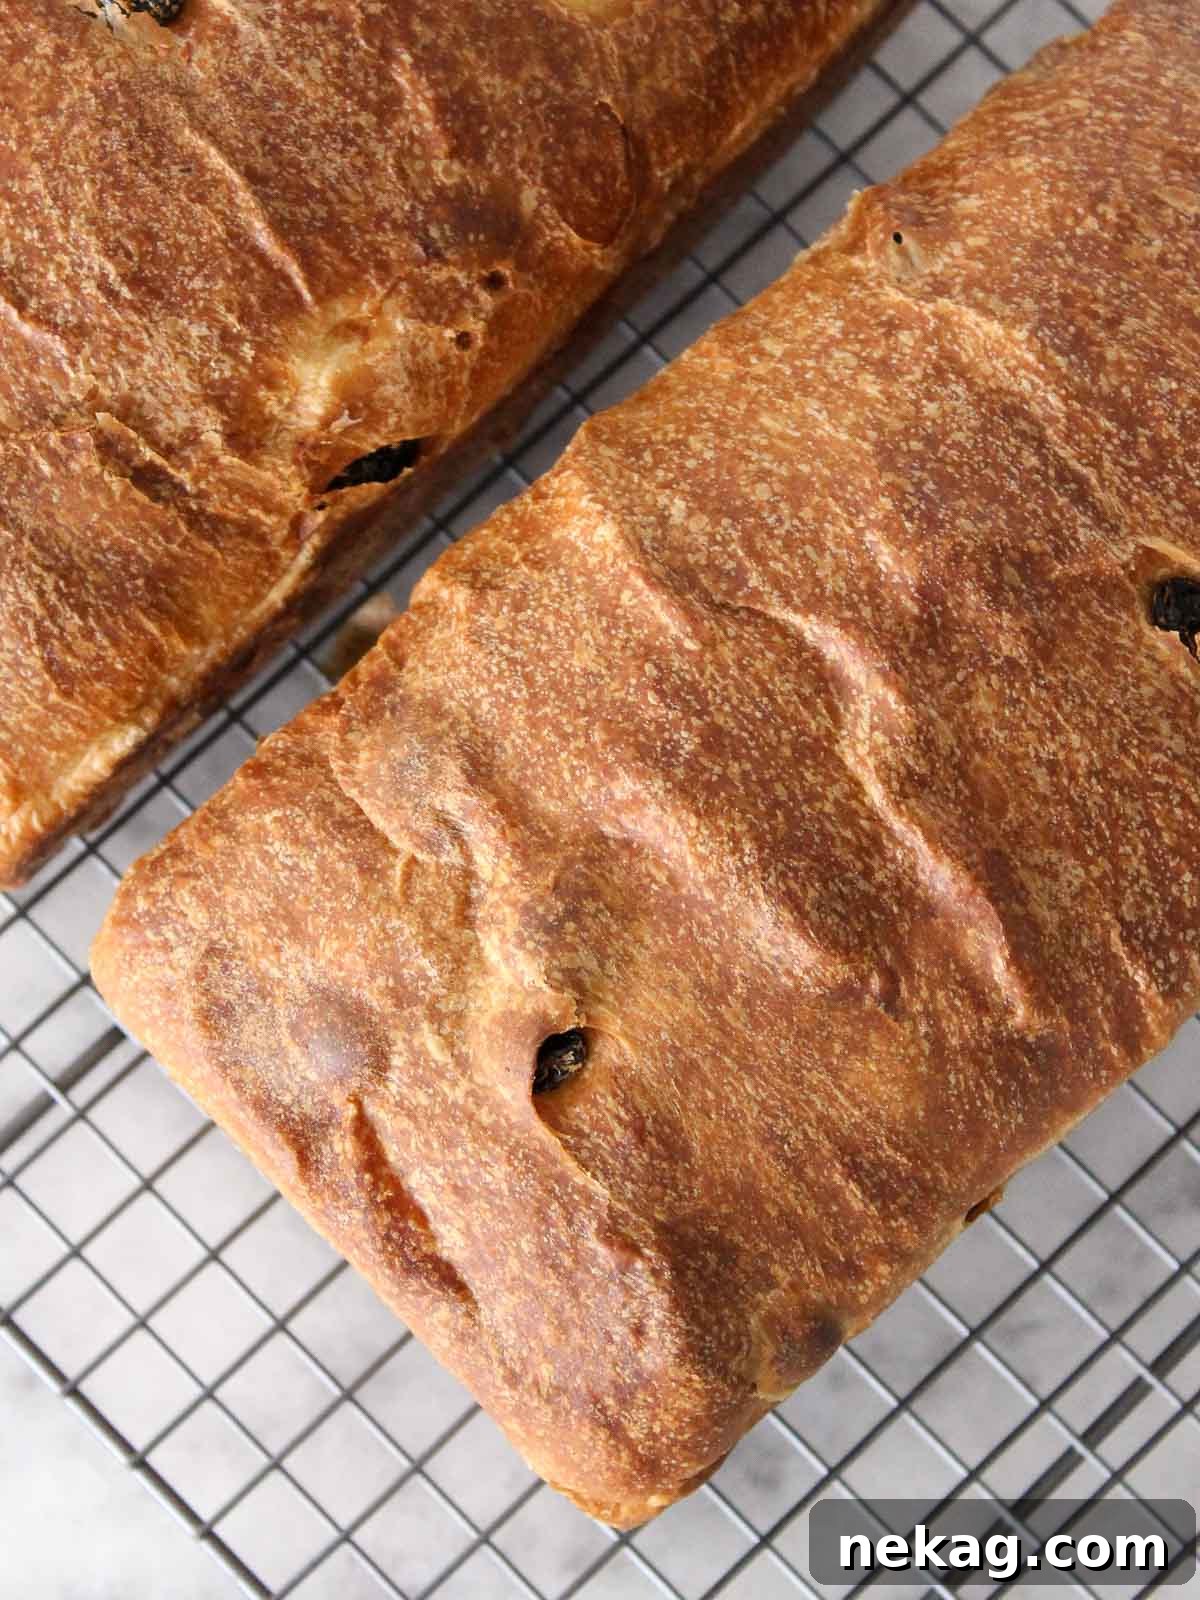
Step 14: Once baked, immediately remove the bread from the loaf pans and transfer them onto a wire cooling rack. It’s absolutely crucial to allow the bread to cool completely before slicing. Slicing warm bread can compress the crumb, making it gummy, and it won’t allow the internal structure to fully set. Patience is key for that perfect slice!
Chef Lindsey’s Expert Recipe Tip
When you’re performing the final shaping of your loaves, always keep the dimensions of your loaf pan in mind. You want the shaped dough log to be neither too long nor too short for the pan, fitting snugly but not overtly compressed. A perfectly sized dough will rise evenly and result in a beautifully proportioned loaf. For easy reference, it’s a great habit to place your empty loaf pan directly on your work bench in front of you as you shape. If your dough log isn’t quite tight enough or doesn’t meet the desired length, simply repeat the thumb-folding process a few more times until you achieve the perfect tension and length. This attention to detail ensures a professional-looking and perfectly baked loaf every time!
Sample Baking Schedule for Your Convenience
This streamlined schedule is designed for bakers using an active sourdough starter alongside active dry yeast, allowing for a delicious same-day bake:
- 9:00 PM (The Night Before): Begin by feeding your sourdough starter. Ensure you prepare enough levain for both this sourdough raisin bread recipe and a small portion to continue feeding for future baking endeavors. A well-fed, active starter is the cornerstone of great sourdough.
- 9:00 AM (Morning): Time to mix the sponge! Combine the specified ingredients and let it begin its active fermentation.
- 9:20 AM (Morning): Once the sponge is bubbly, mix the main dough. After mixing, transfer it to an oiled bowl for its bulk fermentation (first rise).
- 11:30 AM (Late Morning): Perform the preshaping step. This brief rest helps the gluten relax and prepares the dough for its final form.
- 11:45 AM (Late Morning): Execute the final shaping of your loaves and carefully place them into their loaf pans for the final proof (second rise).
- 1:15 PM (Early Afternoon): Your beautifully proofed loaves are ready! Preheat your oven and bake them to golden perfection. Enjoy warm, freshly baked sourdough raisin bread by late afternoon!
Sourdough Raisin Bread: Your FAQs Answered
To maintain its freshness and delightful texture, store your sourdough raisin bread well-wrapped in plastic wrap, aluminum foil, or in an airtight bread box/container at room temperature for up to 5 days. For longer storage, I highly recommend freezing it immediately after it has cooled completely. This preserves its quality for up to 2 months. As a helpful tip, I find it much more convenient to pre-slice the loaf before wrapping and freezing; this way, you can easily defrost individual slices as needed for a quick breakfast or snack.
For this specific sourdough raisin bread recipe, it is generally not necessary to pre-soak the raisins. The dough is sufficiently hydrated, and the baking process will plump them up beautifully. However, if your raisins appear particularly dry or hard, or if you desire an extra layer of flavor, you can certainly soak them. I often do this with my rum raisin banana bread, using fruit juice, brandy, or rum. If you choose to soak them, be sure to drain them thoroughly and pat them very dry with a paper towel before incorporating them into the dough to avoid adding excess moisture.
While the idea of adding cinnamon directly to the dough for a cinnamon raisin sourdough bread is tempting, it’s important to note that cinnamon possesses antimicrobial properties. This means it can actually slow down the fermentation process of your yeast and sourdough starter. If you are comfortable with a significantly longer proofing time, by all means, you can experiment with adding a small amount to the dough. Otherwise, for a more predictable rise and delicious flavor, I recommend incorporating cinnamon as a swirl (as described in the “Variations” section) or simply dusting it on top of your baked slices with a pat of butter – a classic and equally satisfying combination!
Yes, you absolutely can cold proof this dough overnight to deepen its flavor profile and fit your schedule! To do so, I would suggest omitting the active dry yeast from the recipe entirely. After mixing the dough and incorporating the butter and raisins, proceed with the bulk rise in the refrigerator for 8-12 hours (or even up to 24 hours). The following day, remove the dough from the fridge, allow it to come to room temperature for about 30-60 minutes, then shape it as directed. Allow the shaped dough a second rise at room temperature until it reaches the rim of the pan. Alternatively, you could take the dough to its final shape, place it into greased loaf pans or banneton baskets dusted with rice flour, and then proof it overnight in the refrigerator. You can then bake the loaves directly from the fridge the next morning, or let them warm up slightly first for a better rise.
Should you miraculously have any leftovers (it’s that good!), sourdough raisin bread transforms into several other delightful treats. It makes for truly fabulous cinnamon raisin French toast, perfect for a special breakfast or brunch. It’s also an excellent base for an easy bread pudding, especially with a rich hard sauce. Or, for a simple yet nostalgic afternoon snack, you can make this cinnamon toast recipe, just like my Mom used to prepare – simple, comforting, and always a hit!
More Irresistible Bread Recipes to Try
Homemade Bread Recipes
Panettone: The Classic Italian Sweet Bread
Yeasted Bread Recipes
Classic Old-Fashioned Raisin Bread Recipe
Sourdough Bread Recipes
Delightful Cherry Pecan Sourdough Bread
Homemade Bread Recipes
Tender & Fluffy Homemade Potato Bread
If you’ve tried this wonderful sourdough raisin bread recipe and loved it as much as we do, please take a moment to leave a 🌟 star rating and share your experience in the comments below. Your feedback truly brightens my day and helps other bakers discover this delicious recipe!
Sourdough Raisin Bread
Pin Recipe
Comment
Print Recipe
Ingredients
Liquid Levain:
- 147 g water
- 12 g sourdough starter
- 117 g all-purpose flour
Sponge:
- 226 g all-purpose flour
- 296 g water 90°F (32°C)
- 65 g honey
- 3 g dry active yeast
- 230 g sourdough starter
Dough:
- 311 g all-purpose flour
- 40 g milk powder
- 15 g kosher salt
- 130 g unsalted butter cold, cubed
- 454 g raisins
Instructions
-
Prepare your liquid levain: Approximately 12-14 hours before you intend to mix your main dough, begin by preparing your liquid levain. In a clean, appropriately sized container, combine the specified amounts of all-purpose flour, water, and a small portion of your active sourdough culture (starter). Stir thoroughly until all ingredients are well-integrated and the mixture is smooth. Cover the container loosely to allow for air exchange and fermentation, then let it rest at room temperature until it has visibly doubled in size and appears bubbly and active.
-
Prepare the sponge: In a large mixing bowl, gently dissolve the active dry yeast into the warm water, followed by the honey. Whisk the mixture until you are certain there are no lumps of yeast remaining. Next, add the designated portion of all-purpose flour for the sponge, along with the entire amount of your prepared sourdough starter. Mix well, ensuring all the flour is fully hydrated and there are no dry pockets.
-
Cover the bowl tightly with plastic wrap or a clean damp towel. Place it in a warm, humid location (such as a proofing oven or a warm kitchen spot) and allow it to ferment until the sponge develops numerous large bubbles on its surface and has approximately doubled in volume, typically taking 30-60 minutes.
-
Scrape the entire contents of the active sponge into the bowl of a stand mixer. If not already, fit the mixer with the paddle attachment. Add the remaining all-purpose flour, kosher salt, and dry milk powder. Begin mixing on the lowest speed to gently combine all the ingredients. Continue mixing until a shaggy, cohesive mass forms and there are no longer any visible dry pieces of flour. At this point, switch to the dough hook attachment.
-
Increase the mixer speed to medium and knead the dough for 10-15 minutes until it becomes smooth, elastic, and passes the window pane test. This means you should be able to stretch a small piece of the dough thin enough for light to pass through without it tearing, indicating excellent gluten development.
-
Once the dough is smooth, gradually add the cold, cubed unsalted butter, mixing on medium speed until it is fully incorporated and the dough returns to a smooth consistency. Finally, reduce the mixer speed to low and add the raisins. Mix gently and briefly, just until the raisins are evenly distributed throughout the dough and mostly embedded within, avoiding overmixing which could damage them.
-
Bulk Proof: Turn the dough out onto a lightly floured surface and gently knead it into a smooth, round ball. Place the dough into a lightly greased bowl, turning it once to coat, then cover it tightly with plastic wrap. Allow the dough to bulk proof in a warm place (75-80°F / 24-27°C) until it has visibly doubled in size.
-
Preshape: Gently turn the proofed dough out onto a lightly floured surface. Divide the dough into two equal portions, each weighing approximately 790g. Preshape each portion into a boule (a round shape). This is achieved by folding the edges towards the center and then gently pulling the dough towards yourself on the work surface, creating surface tension. Rotate a quarter turn and repeat until you have a smooth, tight, round dough ball. Cover the preshaped dough with plastic wrap and let it rest for 10 minutes on the counter to allow the gluten to relax.
-
Final Shape: After the bench rest, flip one of the dough portions over so the seam is facing upwards. Gently lift two corners and allow gravity to help stretch the dough into a rough rectangular shape. Place it back on your counter. Fold the top third of the dough down towards the center and press firmly to seal. Rotate the dough 180 degrees and repeat the fold with the other side. Now, starting from the right side, use the heel of your right hand and the thumb on your left to grab the top edge of the dough. Fold it over your thumb and press down firmly with the heel of your hand to create a tight seam. Continue this “thumb-folding” technique along the entire length of the loaf, ensuring a taut surface. Once shaped, carefully transfer the dough log, seam-side down, into a greased baking dish (loaf pan). Repeat with the second dough portion.
-
Preheat your oven to 350°F (175°C). Ensure it’s fully preheated to temperature before baking.
-
Final Proof: Cover the loaf pans loosely with plastic wrap or a clean towel and allow them to undergo their final proof in a warm, humid place. The dough should continue to rise until it has notably doubled in size and feels very light and airy when gently poked. A key indicator is when the dough visibly crests over the edges of the loaf pans.
-
For a beautiful golden sheen and a softer crust, you can optionally brush the tops of the proofed loaves with a thin layer of melted unsalted butter just before placing them in the oven.
-
Bake the bread in the preheated oven for approximately 30-35 minutes. To ensure it’s fully baked, use an instant-read thermometer to check the internal temperature; it should read 186°F (86°C) when inserted into the center of the loaf.
-
Immediately upon removal from the oven, turn the baked bread out of their pans and onto a wire cooling rack. It is paramount to allow the bread to cool completely to room temperature before slicing. This allows the internal structure to set properly and prevents a gummy texture.
Video Tutorial
Recipe Notes & Expert Tips
Presentation Perfection: For an extra glossy, deep golden-brown crust, consider brushing your proofed loaves with an egg wash (one egg whisked with a tablespoon of water) just before they go into the oven. This creates a stunning bakery-quality finish.
Accelerated Fermentation: The inclusion of commercial active dry yeast in this recipe is a deliberate choice to speed up the fermentation process, making this a fantastic same-day sourdough option. While you can certainly make this bread with only your sourdough starter for a longer, more traditional fermentation, the added yeast ensures a reliable and quicker rise without compromising flavor.
Sweetener Swaps: The honey in this recipe provides a lovely subtle sweetness. Feel free to experiment with other liquid sweeteners like pure maple syrup, agave nectar, or even rich molasses for different flavor nuances. You could also opt for dark brown sugar, which would add a caramel-like depth. Even though it’s a small amount, each swap will impart a unique, light flavor profile to your bread.
Optimal Storage & Freezing: To keep your delicious sourdough raisin bread fresh, store it securely wrapped in plastic wrap, aluminum foil, or within an airtight bread container at room temperature for up to 5 days. Avoid refrigeration, as it tends to dry out bread more quickly. For extended enjoyment, freeze the loaves immediately after they have cooled completely for up to 2 months. To make future servings effortless, I highly recommend pre-slicing the bread before wrapping and freezing; this allows for convenient individual portion defrosting whenever a craving strikes!
Nutrition Facts
Carbohydrates: 81g |
Protein: 9g |
Fat: 10g |
Saturated Fat: 6g |
Polyunsaturated Fat: 1g |
Monounsaturated Fat: 2g |
Trans Fat: 0.4g |
Cholesterol: 24mg |
Sodium: 586mg |
Potassium: 438mg |
Fiber: 4g |
Sugar: 6g |
Vitamin A: 343IU |
Vitamin C: 2mg |
Calcium: 65mg |
Iron: 4mg
Like this? Leave a comment below!
Before You Go: Explore More Baking Delights
I genuinely hope you thoroughly enjoyed baking and tasting this exceptional soft brioche sourdough raisin bread recipe. It’s a true delight, perfect for elevating any meal or simply enjoying on its own. If your love for homemade bread has been ignited, I warmly invite you to explore our other delicious sourdough bread recipes, each offering unique flavors and rewarding baking experiences. Alternatively, for those who prefer classic methods, our diverse collection of yeasted bread recipes has something for everyone. And for a taste of timeless comfort, don’t miss out on my grandma’s cherished Jewish apple cake – a recipe steeped in tradition and flavor. Happy baking!